Virtualbox && Vagrant migration and recovery
Virtualbox && Vagrant migration and recovery
Article directory
- Preface
- recovery process
-
- 1. Backup files:
- 2. After reinstalling Virtualbox, copy the
[VirtualBox](/search?q=VirtualBox).xmlfile over the original file - 3. In the Virtualbox interface, select "Management - Virtual Media Manager" and manually add registered virtual media.
- 4. In the Virtualbox interface, select "Control-Registration" to register the [[virtual machine](/search?q=virtual machine)](/search?q=virtual machine)
- 5. In the Virtualbox interface, select "Settings - Storage & System Startup Sequence" [If this step is missing, an error will be reported when starting the virtual machine [FATAL: NO bootable medium found! System halted.](https://www.cnblogs.com/yabingshi/ p/3912532.html)】
- 6. Start the virtual machine successfully
- 7. Restore the
[vagrant](/search?q=vagrant) upmethod to start the virtual machine
Preface
Reinstall C drive on Windows 10 computer. The VirtualBox virtual machine that was in normal use before reinstallation failed to start. First, various file not found errors were reported during startup . Although {uuid.vmdk}the original virtual machine configuration file could be used to start normally, after the virtual machine was shut down, the snapshot sequence of xxx.vboxthe configuration file was changed again. It is cleared automatically and cannot be used normally. I have been struggling for a long time, so I will record it here.
recovery process
1. Backup files:
- Back up the VirtualBox.xml global configuration file on drive C, such as my directory:
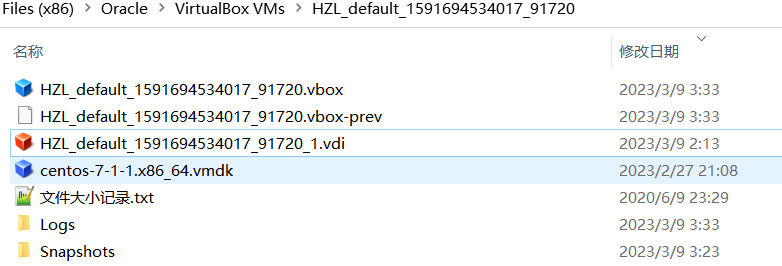
C:\Users\HZL\.VirtualBox\VirtualBox.xml - Back up virtual machine files, such as mine:
E:\Program Files (x86)\Oracle\VirtualBox VMs\HZL_default_1591694534017_91720\ - If you use
vagrant upthe method to start VirtualBox, you also need to backup the andC:\Users\HZL\.vagrantvagrant configuration files
C:\Users\HZL\.vagrant.d
C:\Users\HZL\.Vagrantfile

2. After reinstalling Virtualbox, copy VirtualBox.xmlthe file over the original file.
C:\Users\HZL\.VirtualBox
C:\Users\HZL\.vagrant
C:\Users\HZL\.vagrant.d
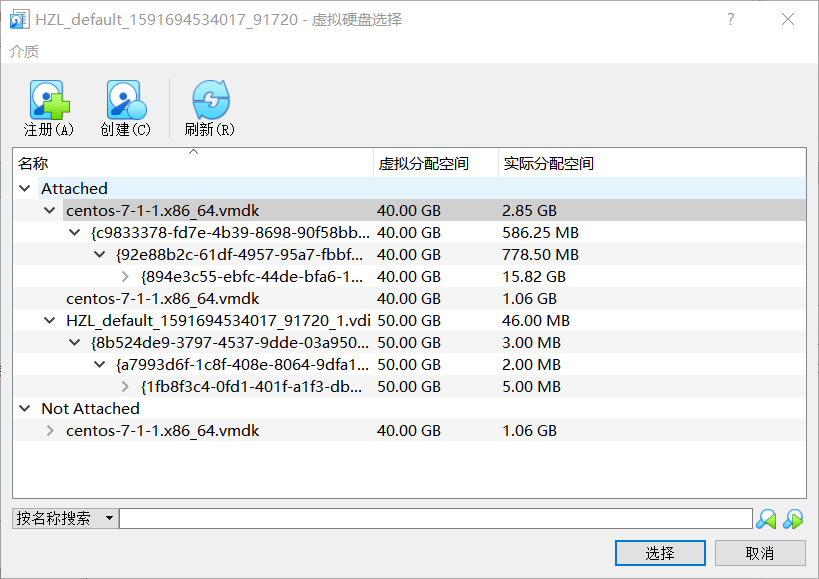
3. In the Virtualbox interface, select "Management - Virtual Media Manager" and manually add registered virtual media.
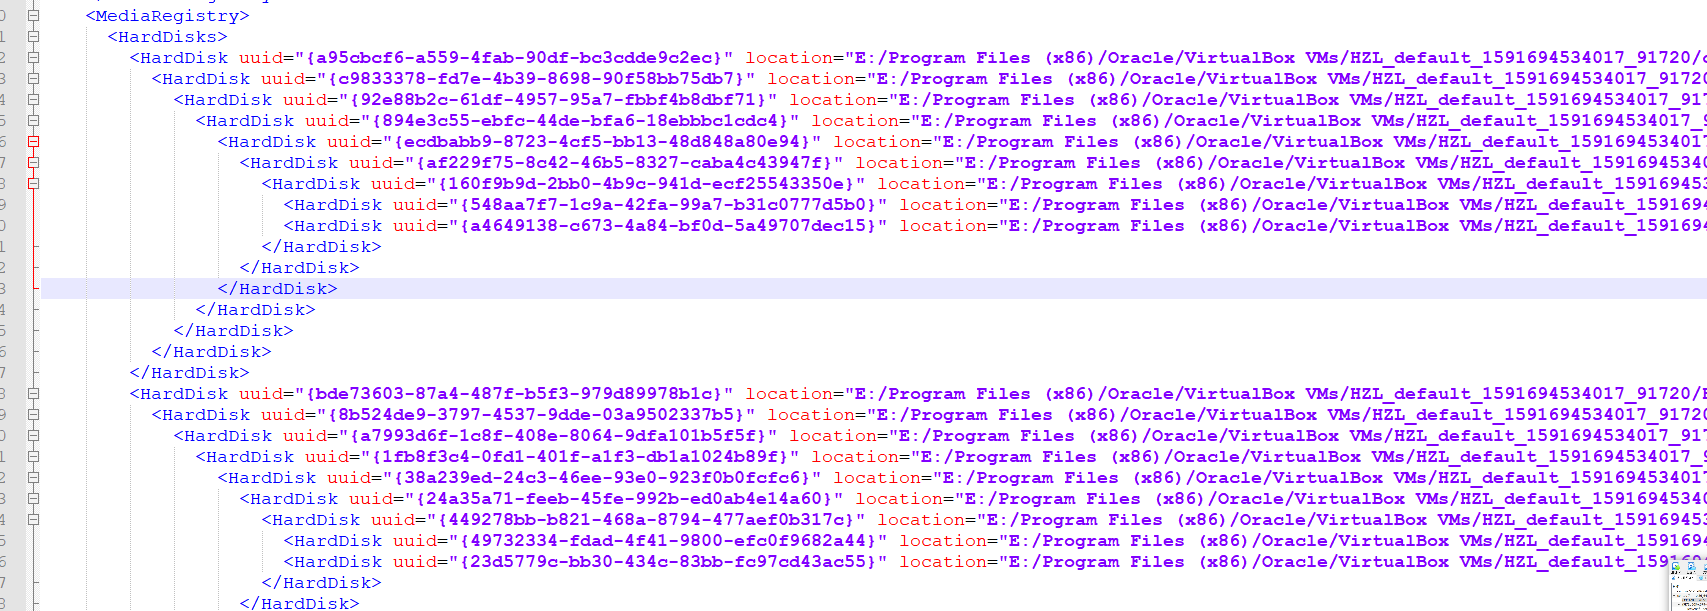
Note: If there are snapshots, they need to be registered in hierarchical order. If you don't remember the order, you can refer to the " HZL_default_1591694534017_91720.vbox" configuration file or
The global configuration file of C drive VirtualBox.xmlcontains the original media order.
Something like this:
After registering and adding in order, click Close directly (do not click "Refresh", otherwise it will be filled in blank), the effect is as follows:
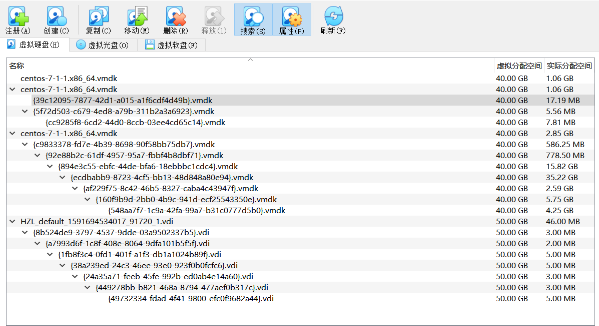
The registration is completed. The schematic diagram is as follows. The status shows "Close". The registered snapshot information on the right is displayed normally, indicating success. 
(I missed the registration step before, so my virtual machine could only start normally once. After shutting down the virtual machine, the HZL_default_1591694534017_91720.vboxsnapshot sequence of my " " configuration file would be overwritten, and the snapshot binding sequence would be lost. Various errors are reported and {uuid.vmdk}cannot be found, resulting in the inability to start. The "xxx.vbox" configuration file comment also explains that it is xxx.vboxmore reliable not to modify the file manually, but to automatically modify the configuration file through graphical interface management, so this step cannot Lack.)
4. In the Virtualbox interface, select "Control-Registration" to register the virtual machine
If you open VirtualBox.xmlthe file in advance, after the registration is completed, you will find that C:\Users\HZL\.VirtualBox\VirtualBox.xmlthe VirtualBox.xml global configuration file will also be modified and updated at this time.
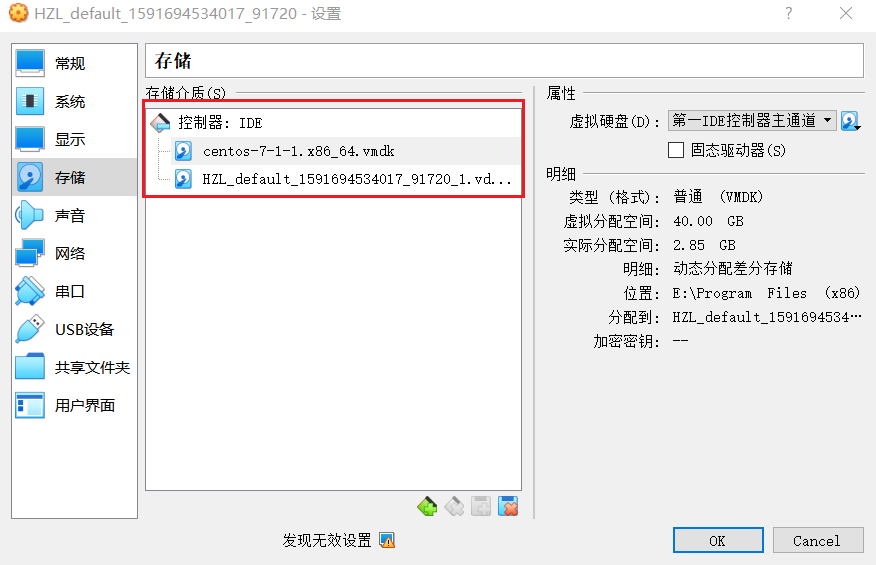
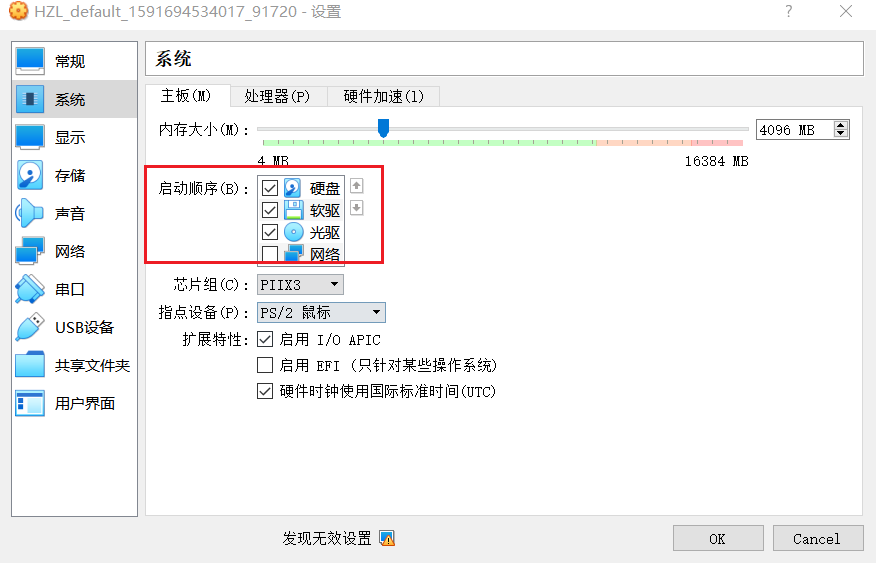
5. In the Virtualbox interface, select "Settings - Storage & System Startup Sequence" [If this step is missing, the error will be reported when starting the virtual machine : FATAL: NO bootable medium found! System halted. ]
Select a virtual machine on the left, click "Settings" to enter the virtual machine settings graphical interface, storage - controller - add.
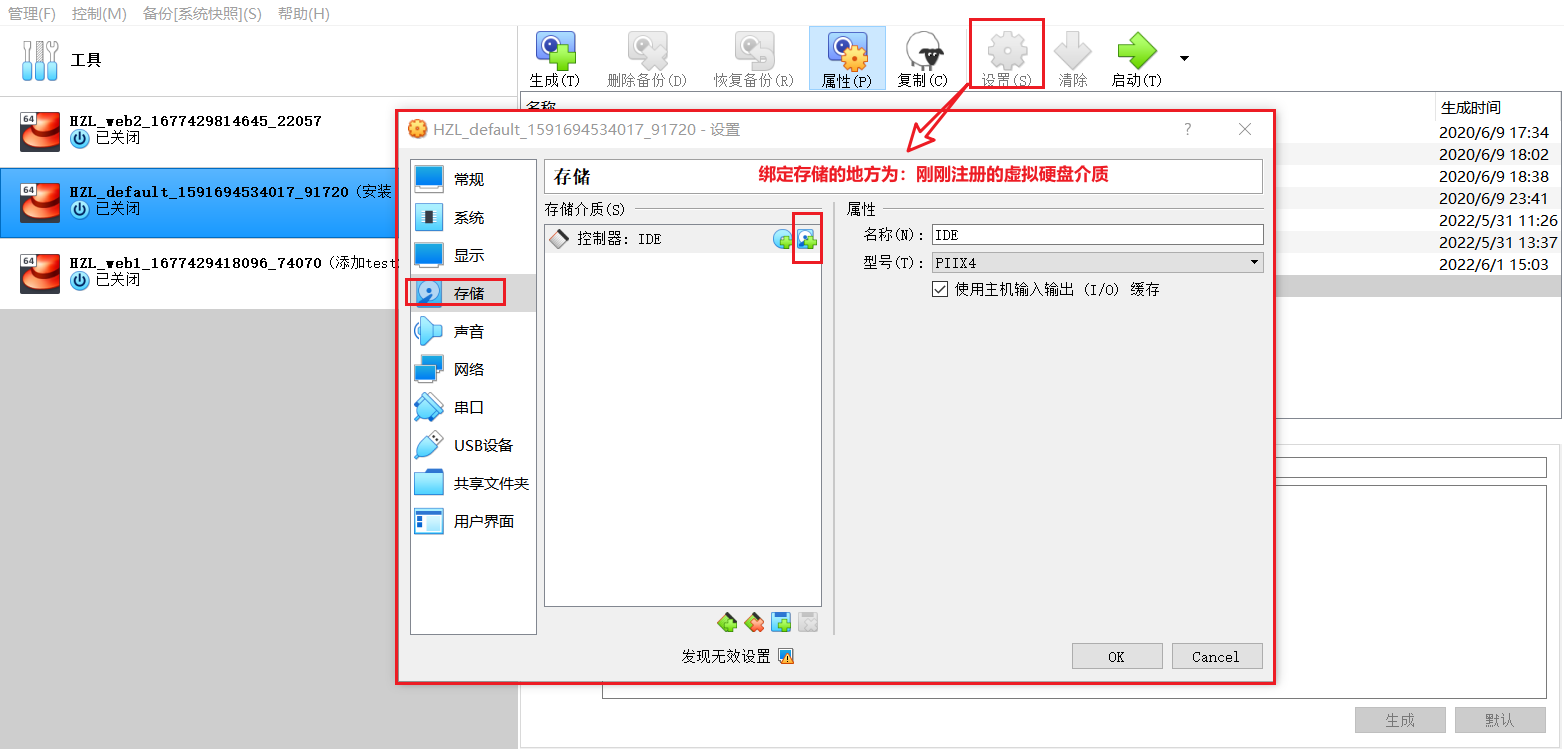
Select the virtual media hard disk you just registered and added.
I have added and bound 2 virtual hard disks here.
Settings - System, set the system startup loading sequence. VirtualBox defaults to CD and floppy disk startup priority. It is recommended to set it to hard disk startup priority.
6. Start the virtual machine successfully
After configuring the above steps, even if it is completed, even if the virtual machine is restarted repeatedly, it can still start normally. The key is that the graphical interface fixes the snapshot and media-related information into
" HZL_default_1591694534017_91720.vbox" and C:\Users\HZL\.VirtualBox\VirtualBox.xmlfiles.
7. vagrant up Start the virtual machine in recovery mode
- Install vagrant
- Copy and overwrite
C:\Users\HZL\.vagrant
C:\Users\HZL\.vagrant.d
C:\Users\HZL\.Vagrantfilethe vagrant configuration file
If these files are not overwritten, if you directly use vagrant up the command to start a new machine, you will find that a new virtual machine example is started and is not bound to your original virtual machine. This is because each virtual machine instance ID is unique, and configuration files, password-free login keys and other configurations are in these three files.
    # 启动默认的虚拟机
    $ vagrant up

    # 启动指定虚拟机
    $ vagrant up web1

    # 关闭指定虚拟机
    $ vagrant halt web1