Use vagrant to quickly build virtual machines and docker to install software
Use vagrant to quickly build virtual machines and docker to install software
Table of contents
1 vagrant quickly builds a virtual machine
1.1 Install VirtualBox
1.2 Install Vagrant
1.3 Download box
1.4 Add box to vagrant
1.5 vagrant builds virtual machine
1.6 Test whether the host and virtual machine can ping successfully
2 Linux installation docker, jdk8, nacos
2.1 Linux installation docker
2.2 Linux installation jdk8
2.3 Install nacos under Linux
3 docker installation software
3.1 Install docker under Linux
3.2 Configure Alibaba Cloud container image acceleration for docker
3.3 Use docker to install mysql
3.4 Use docker to install tomcat
4 Reference Blog
1 Vagrant quickly builds a virtual machine
1.1Install VirtualBox
1. Turn on computer CPU virtualization (this step is not done in win11 system)
2. VirtualBox download address
Downloads – Oracle VM VirtualBox

3. Fool-proof installation. . . . .
1.2 Install Vagrant
1. Vagrant download address
Install | Vagrant | HashiCorp Developer
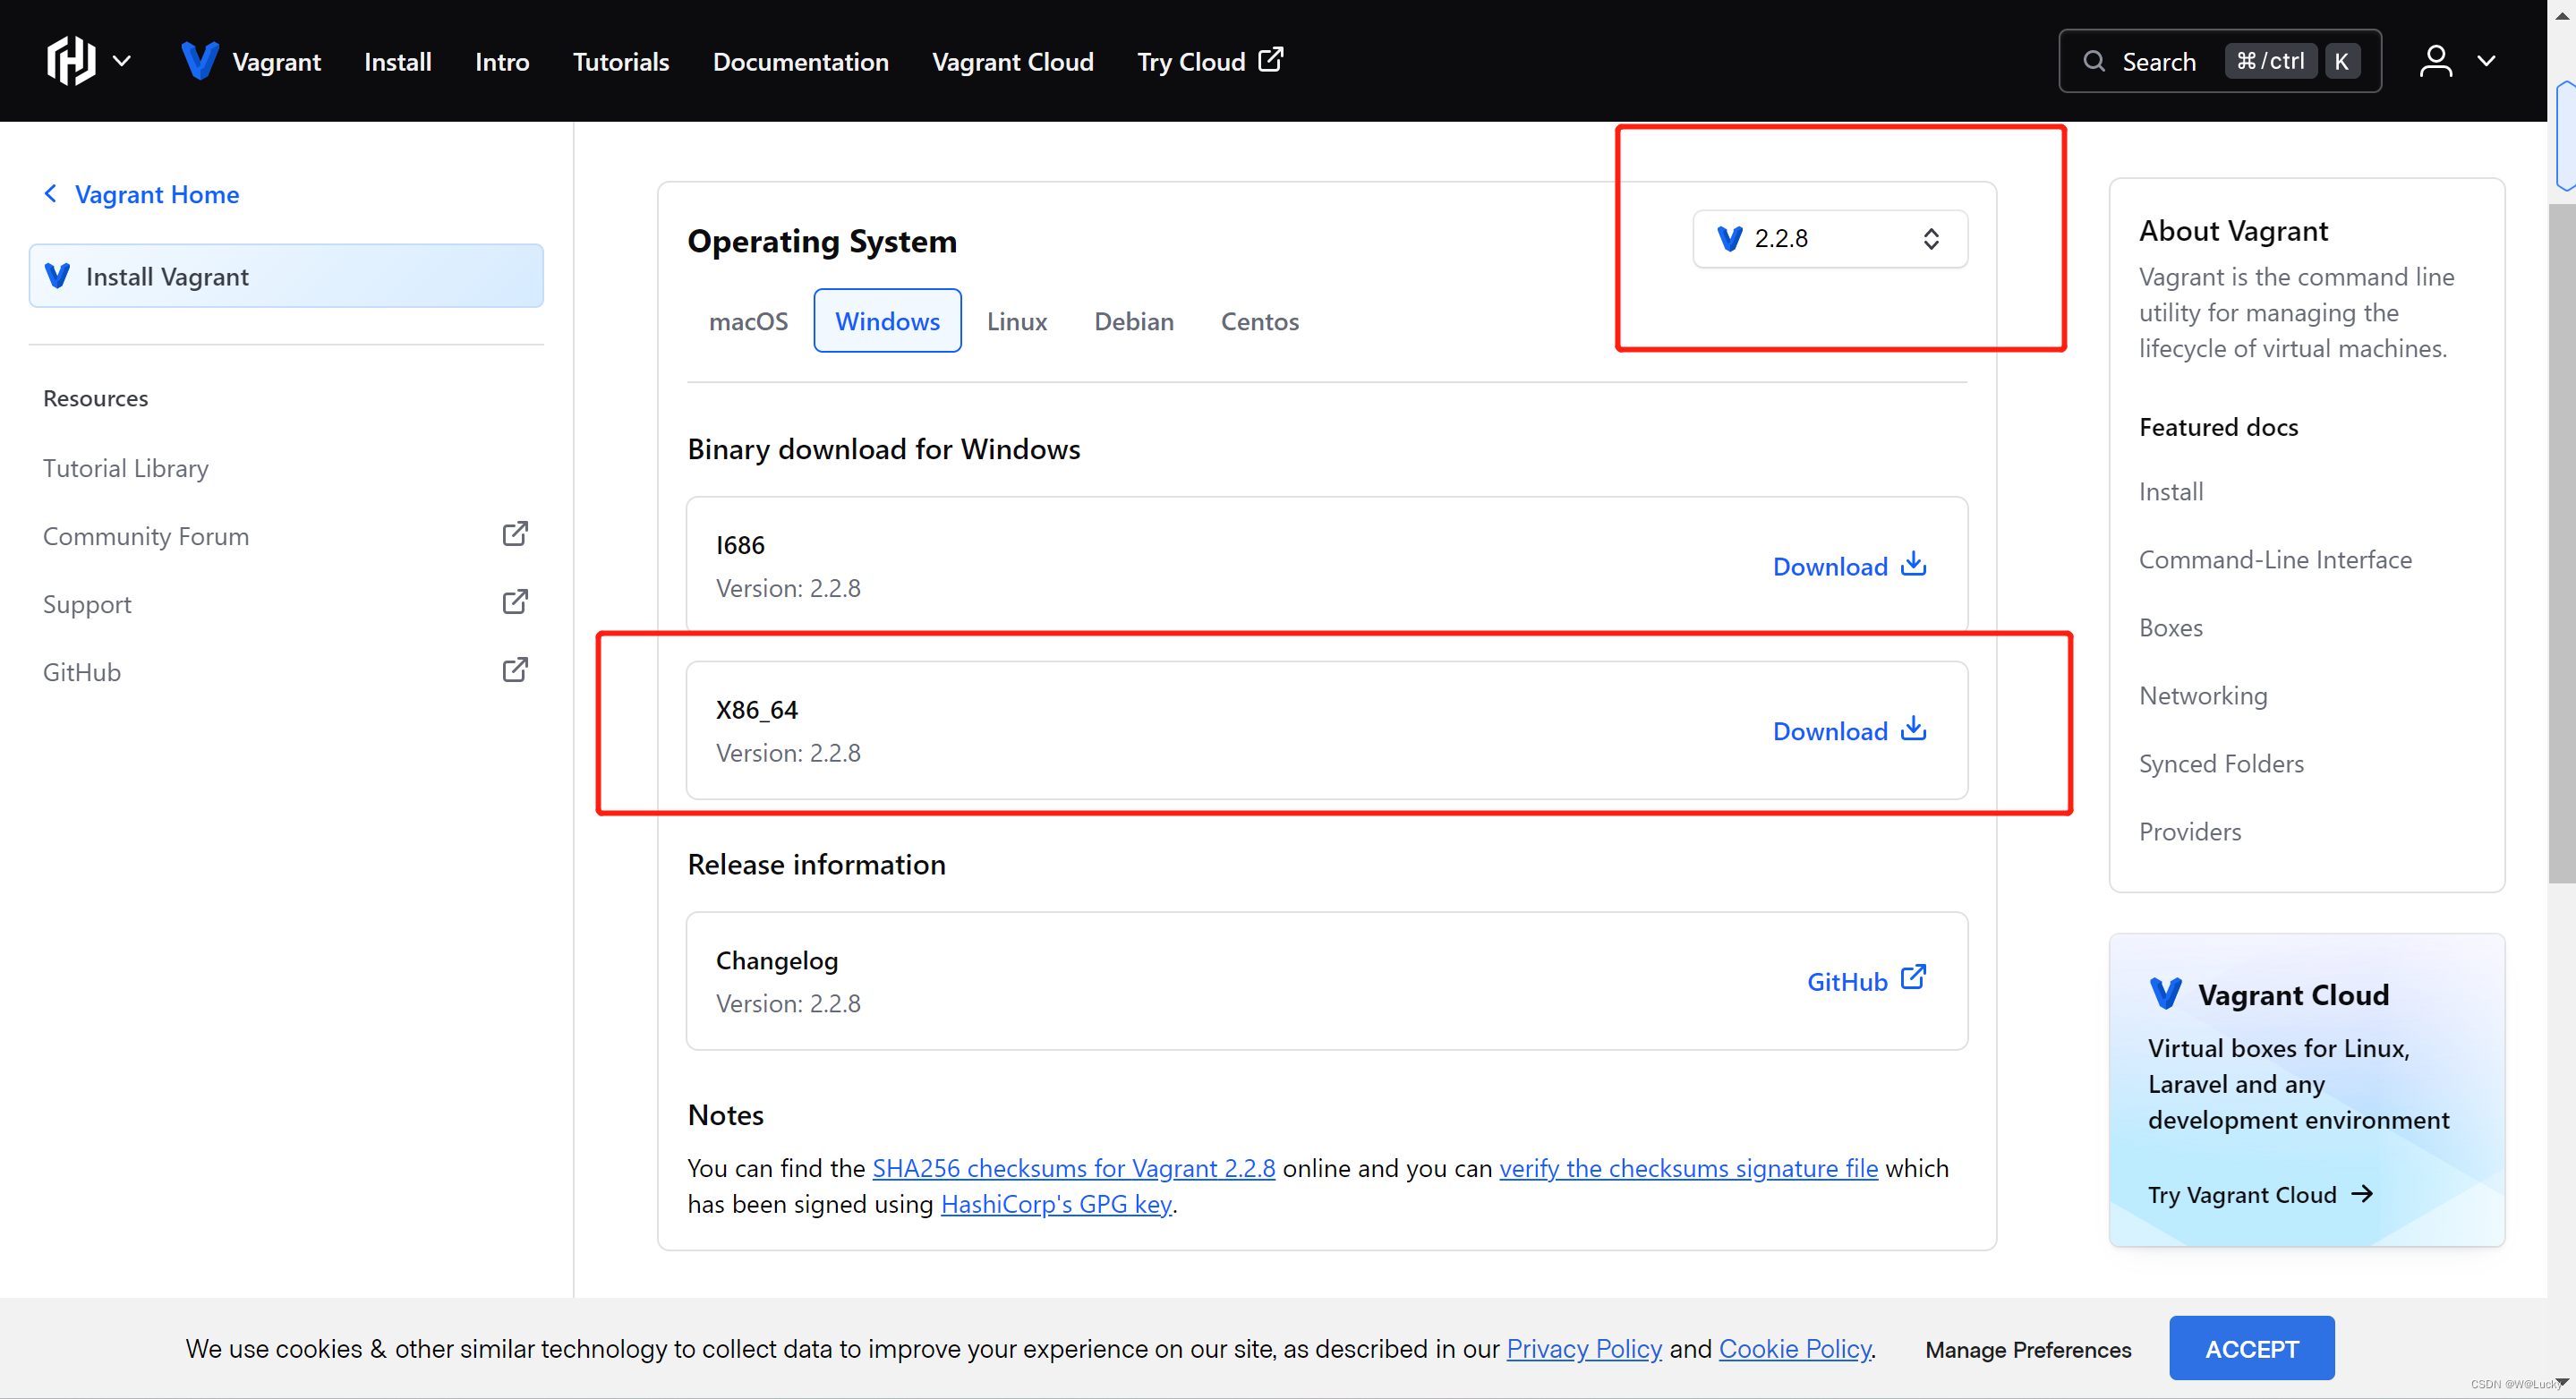
2. Fool-proof installation. . . . .
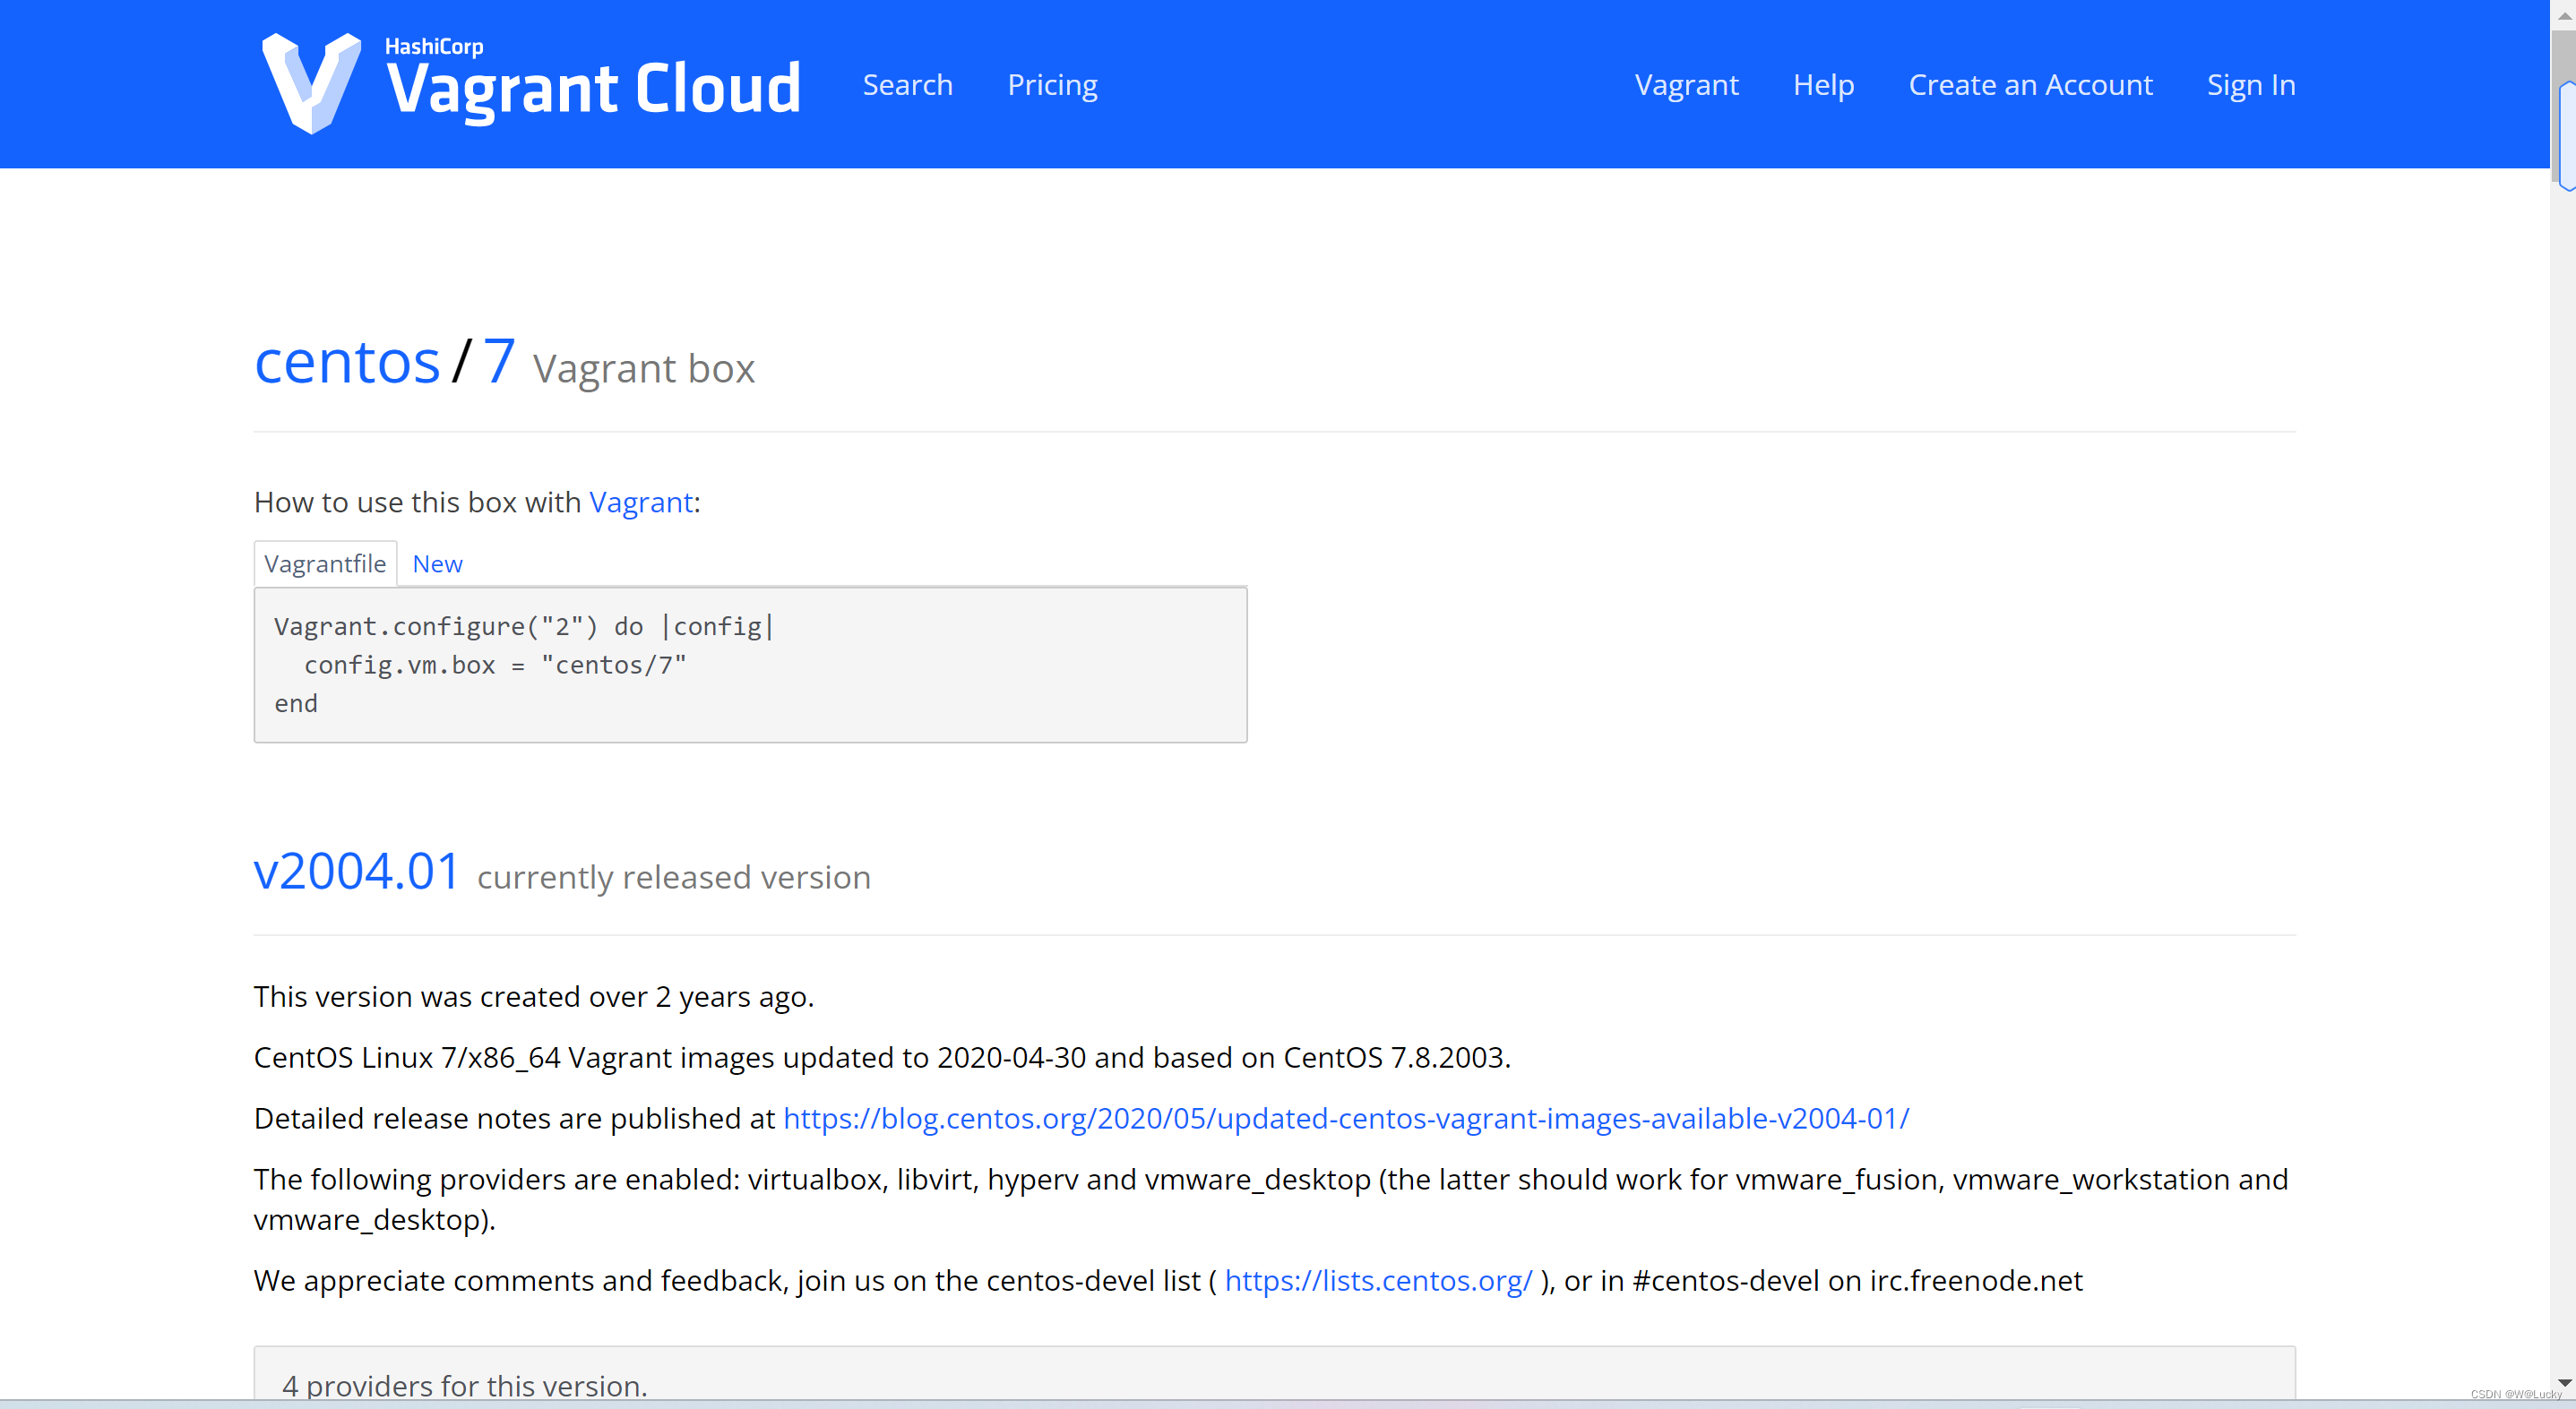
1.3 Download box
1. centos/7 download address
https://app.vagrantup.com/centos/boxes/7
1.4 Add box to vagrant
1. List all boxes in the local environment
vagrant box list
2. Add box to local vagrant environment
      2. # 挂载自己的box,centos/7是box名称:自定义

      3. vagrant box add centos7 D:\vagrant\CentOS-7-x86_64-Vagrant-1905_01.VirtualBox.box
1.5 vagrant builds virtual machine
1. Create a new folder and create the initialization file Vagrantfile in the folder
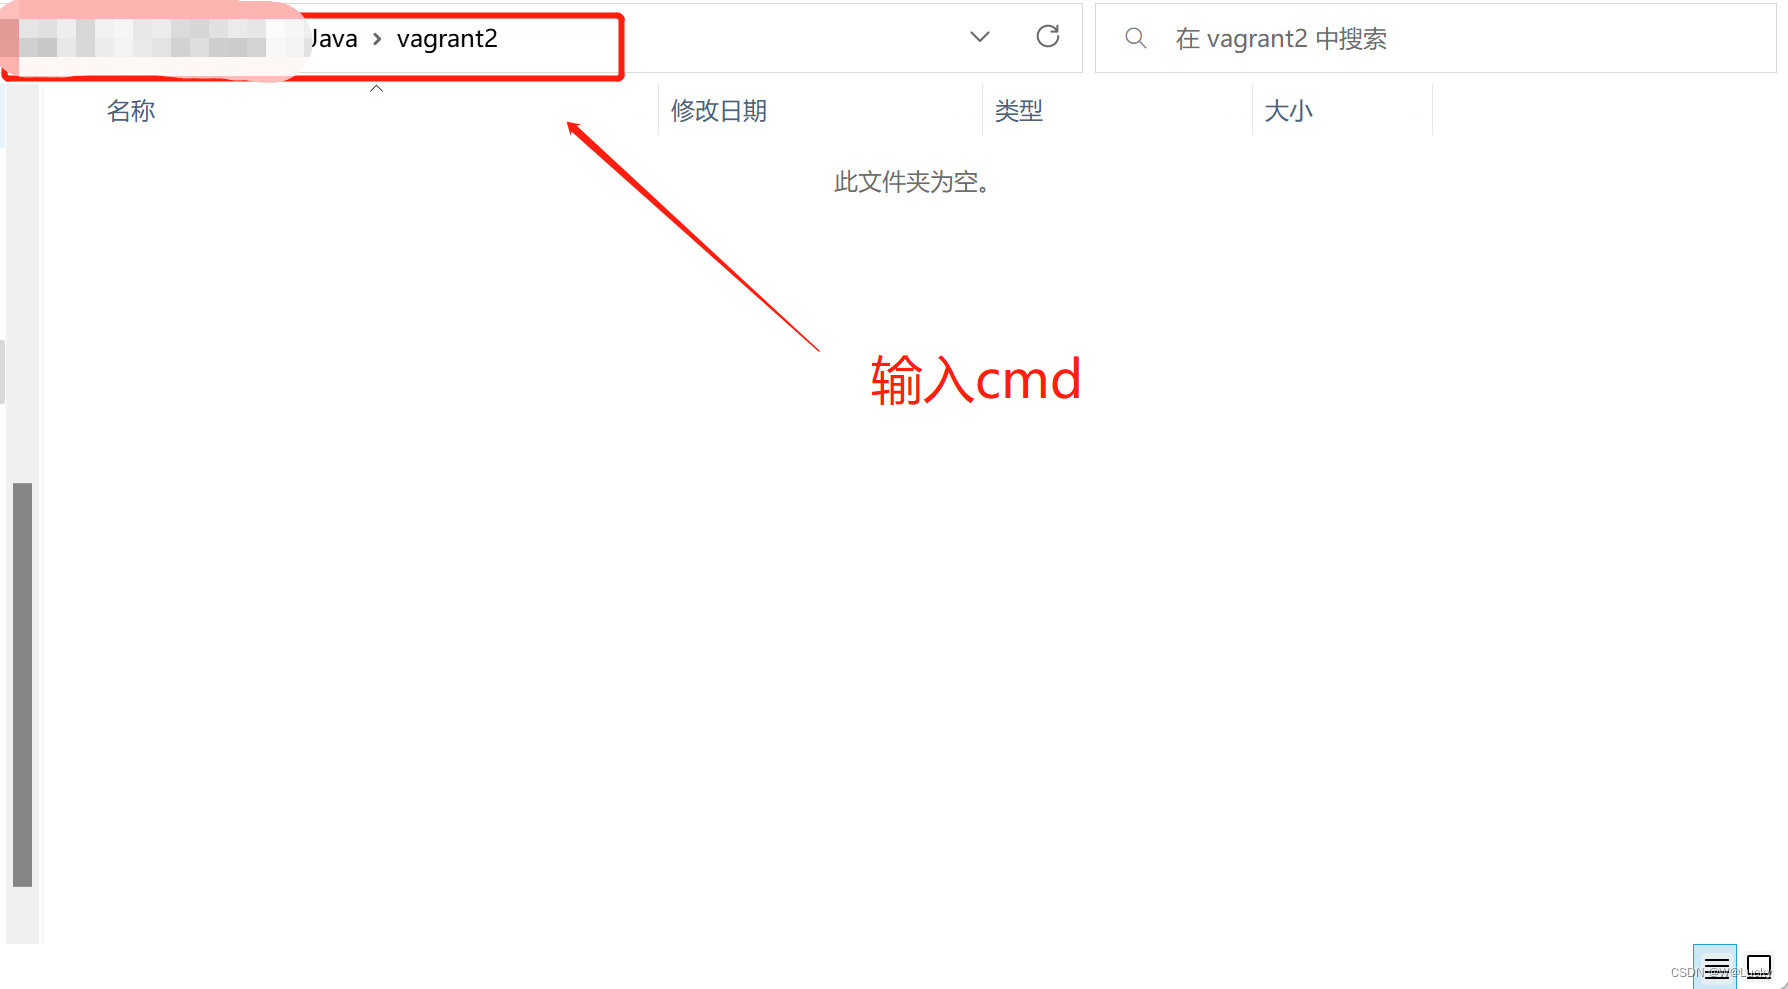
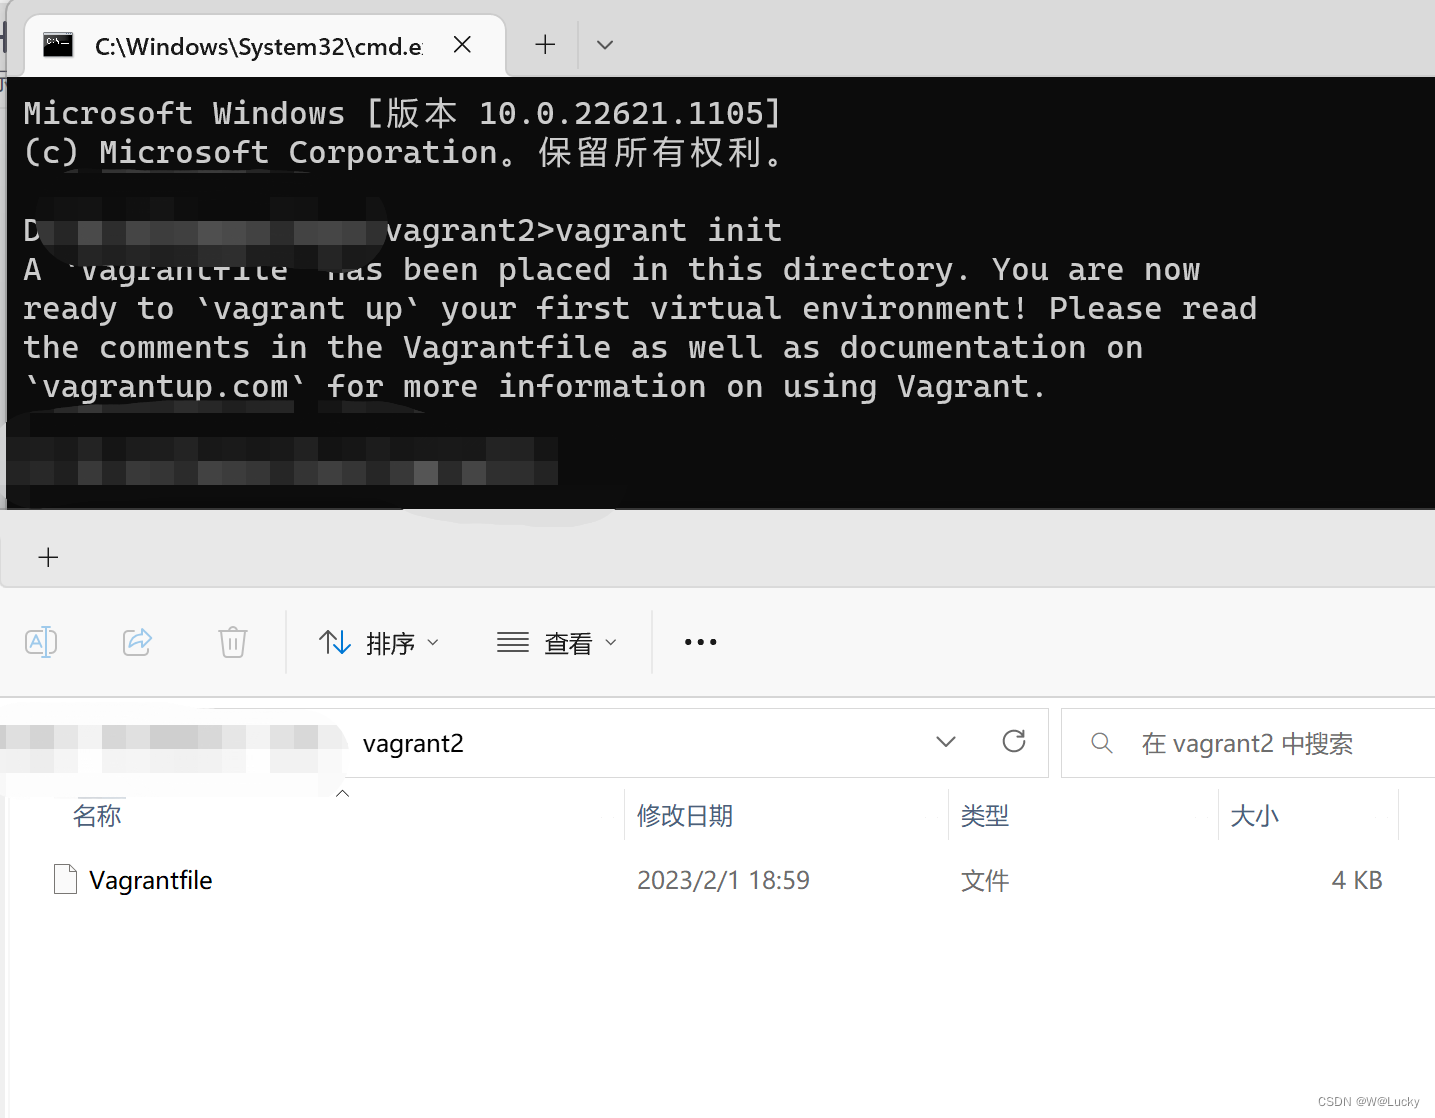
2. In the cmd command window, enter the following command and press Enter
vagrant init
Generate Vagrantfile file under vagrant2 folder
3. Edit the Vagrantfile file with the following content (the public network is used here)
2. config.vm.define :www do |www|
3. # 使用基于virtualbox虚拟化
4. www.vm.provider "virtualbox" do |v|
5. v.customize ["modifyvm", :id, "--name", "www", "--memory", "1024","--cpus","2"]
6. end
7. # 使用box,必须先挂载好
8. www.vm.box = "centos7"
9. # 主机名称
10. www.vm.hostname = "www"
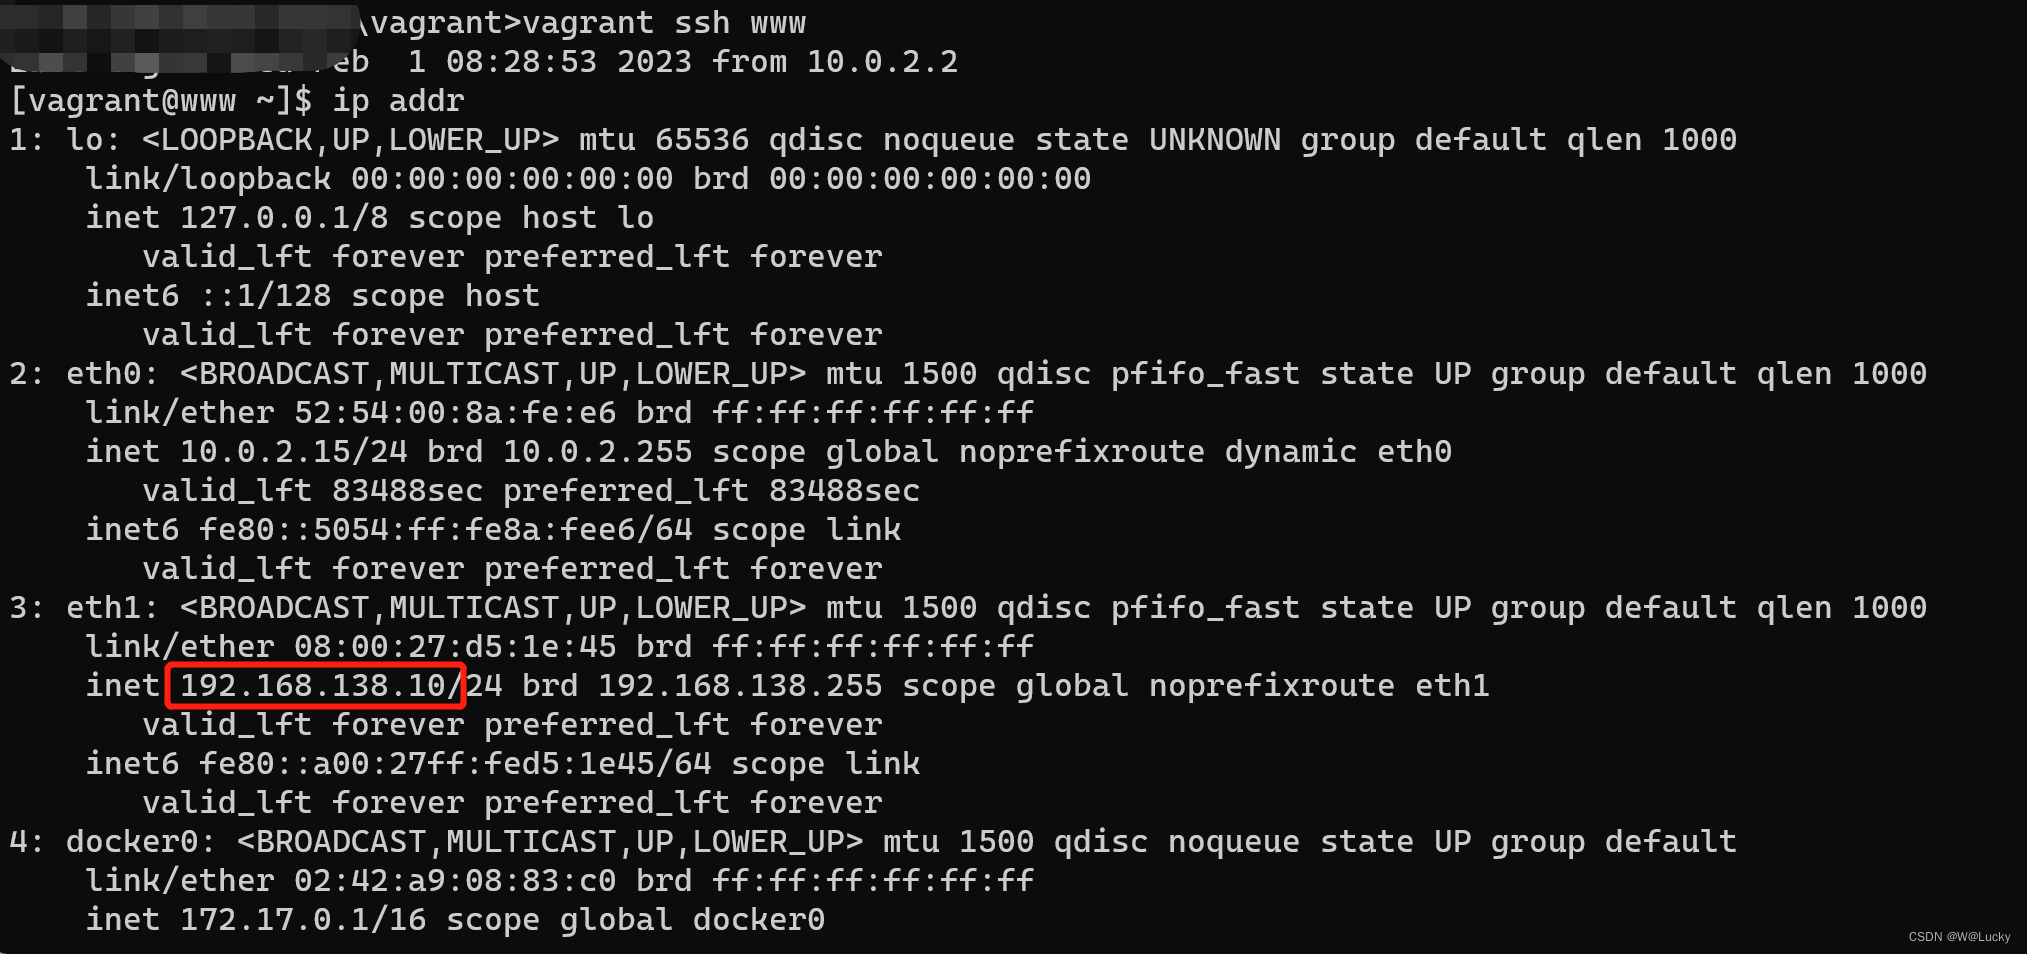
11. # 公有网络 ip设置与本地主机ip在同一网段
12. www.vm.network :public_network, ip: "192.168.138.10"
13. # 私有网络 和 virtualbox network在同一网段
14. # www.vm.network :private_network, ip: "192.168.56.10"
15. end
16. end

After editing the Vagrantfile, you can reload the virtual machine through the command: vagrant reload
Notice:
The way to fill in the IP of the private network is as follows:
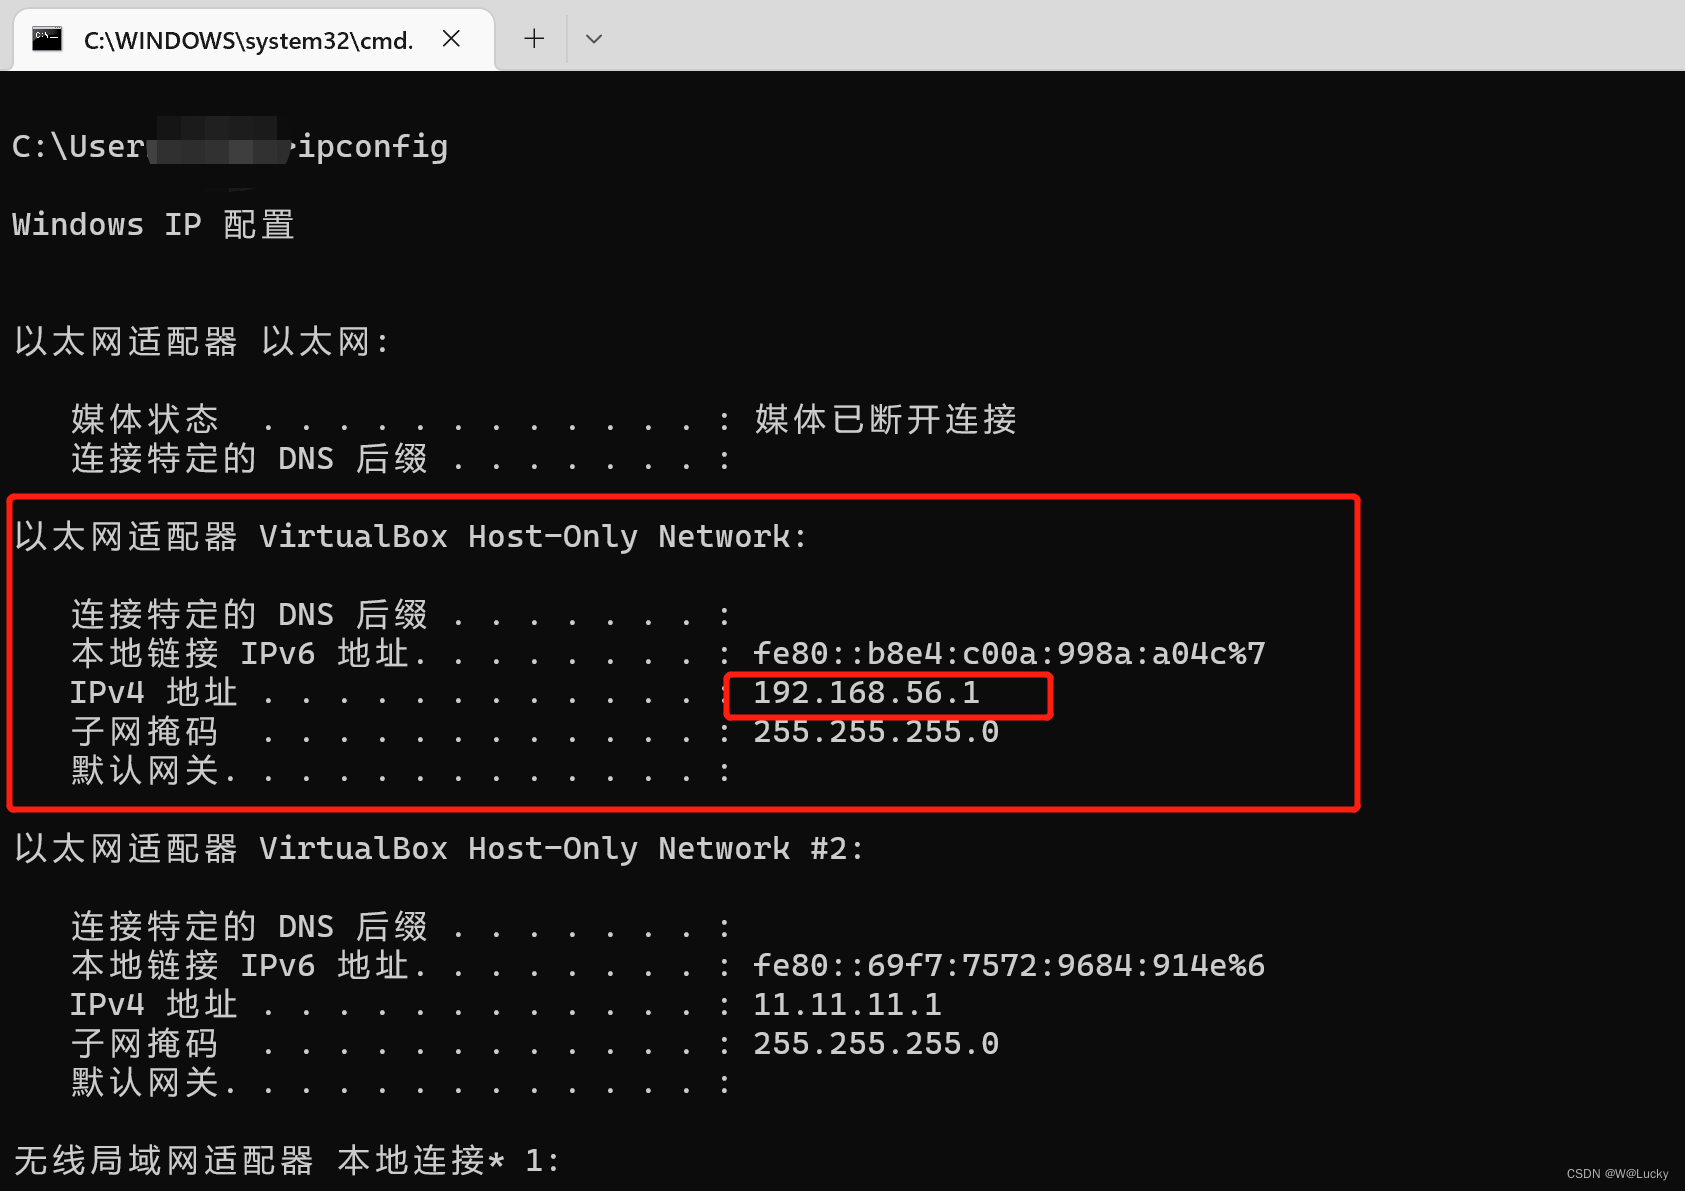
The IP of the private network and the IPv4 address of the VirtualBox Host-Only Network only need to be on the same network segment. You can use 192.168.56.10.
4. Start the virtual machine -> Log in to the started virtual machine
      2. vagrant up

      3. # 登录启动的虚拟机

      4. vagrant ssh www
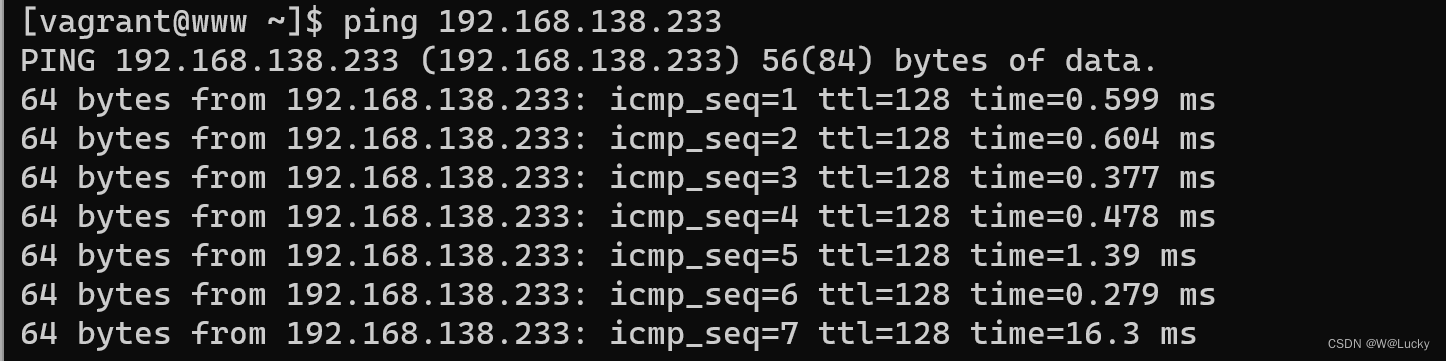
1.6 Test whether the host and virtual machine can ping successfully
1. Windows system pings virtual machine

2. Virtual machine ping windows system
2 Linux installation docker, jdk8, nacos
2.1 Linux installation docker
      2. yum install docker

      3.

      4. # 2、启动docker

      5. systemctl start docker

      6.

      7. # 3、测试

      8. docker -v

      9.

      10. # 4、开机启动docker

      11. systemctl enable docker
2.2 Linux installation jdk8
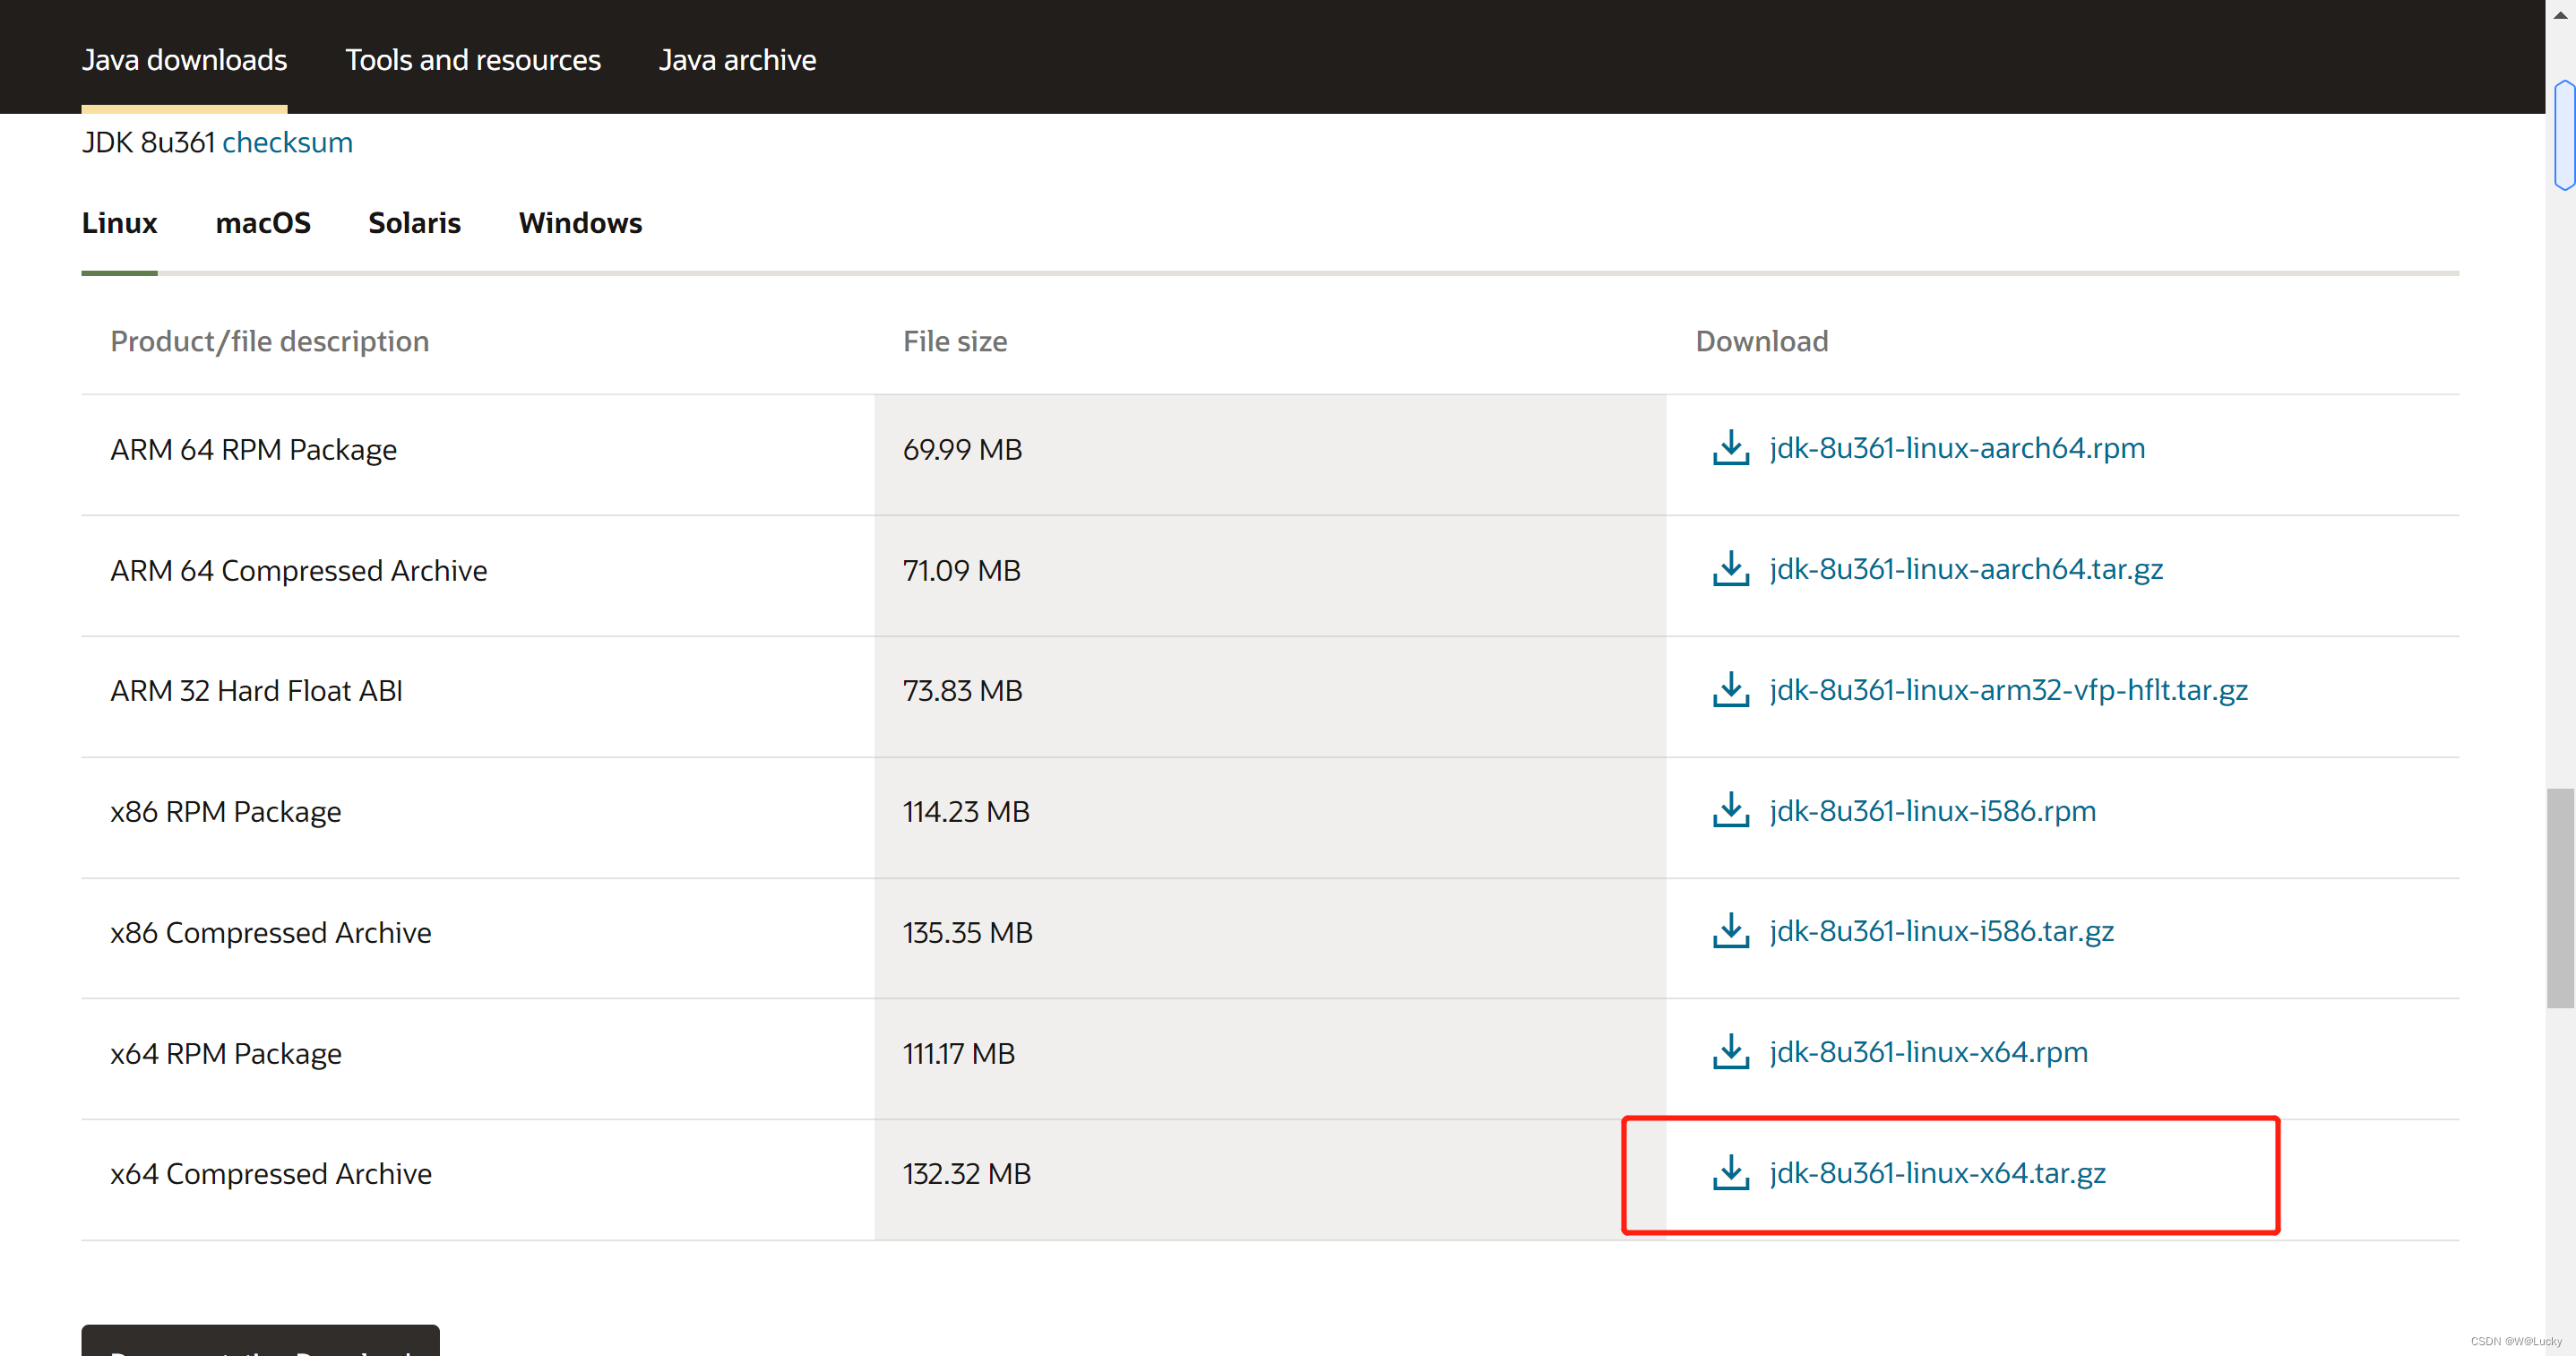
1. Download jdk8, the download address is as follows:
2. Place the jdk8 compressed package in the opt/myjdk folder of the centos server
3. Enter opt/myjdk and decompress the jdk8 compressed package
tar -zxvf jdk-8u361-[linux](/search?q=linux)-x64.tar.gz
4. Configure environment variables
      2. # 在文件的最后加上下面的配置

      3. JAVA_HOME=/opt/jdk1.8.0_361

      4. PATH=$JAVA_HOME/bin:$PATH

      5. CLASSPATH=.:$JAVA_HOME/jre/lib/rt.jar

      6. export JAVA_HOME PATH CLASSPATH

      7. # 不会立即生效,需要加上

      8. source /etc/profile
Enter java -version to verify whether jdk8 is installed successfully
2.3 Install nacos under Linux
1. Download address
Releases · alibaba/nacos · GitHub
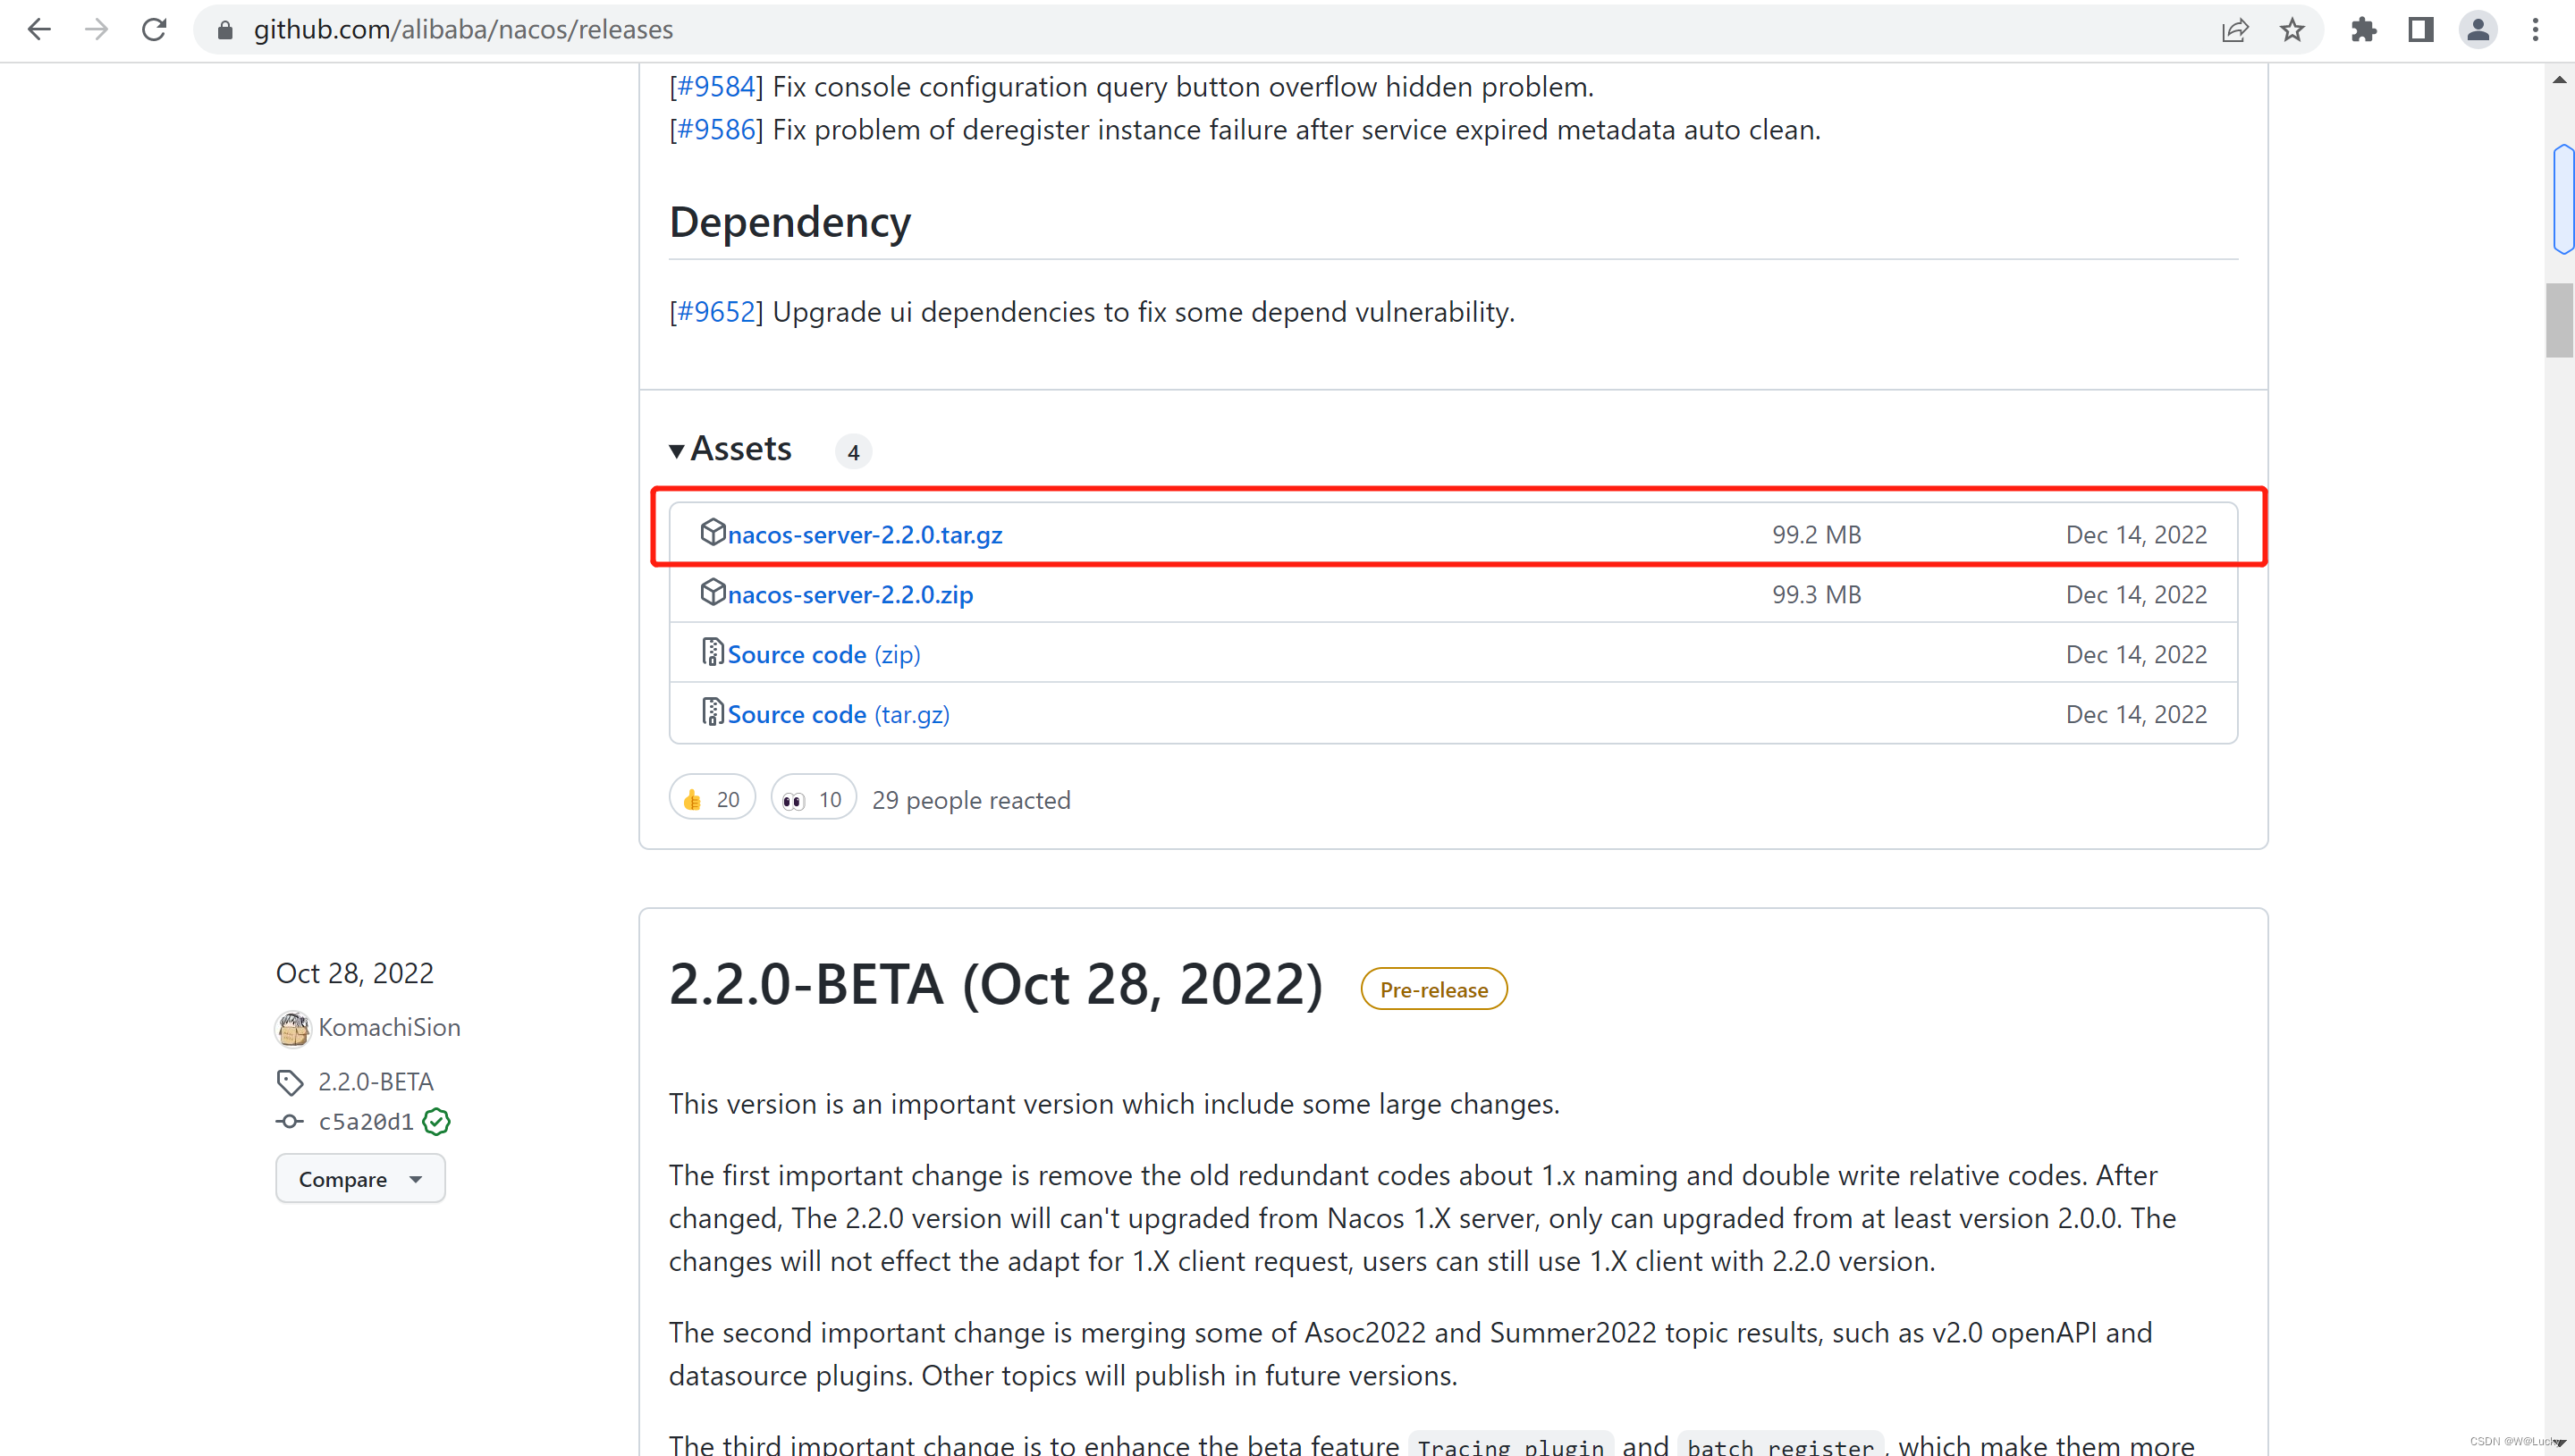
2. Place the jdk8 compressed package in the opt/ folder of the centos server
3. Unzip nacos-server-2.2.0.tar.gz
tar -zxvf nacos-server-2.2.0.tar.gz
4. Start nacos
      2. # 启动nacos

      3. sh startup.sh -m standalone
3 docker installation software
3.1 Install docker under Linux
      2. yum install docker

      3.

      4. # 2、启动docker

      5. systemctl start docker

      6.

      7. # 3、测试

      8. docker -v

      9.

      10. # 4、开机启动docker

      11. systemctl enable docker
3.2 Configure Alibaba Cloud container image acceleration for docker
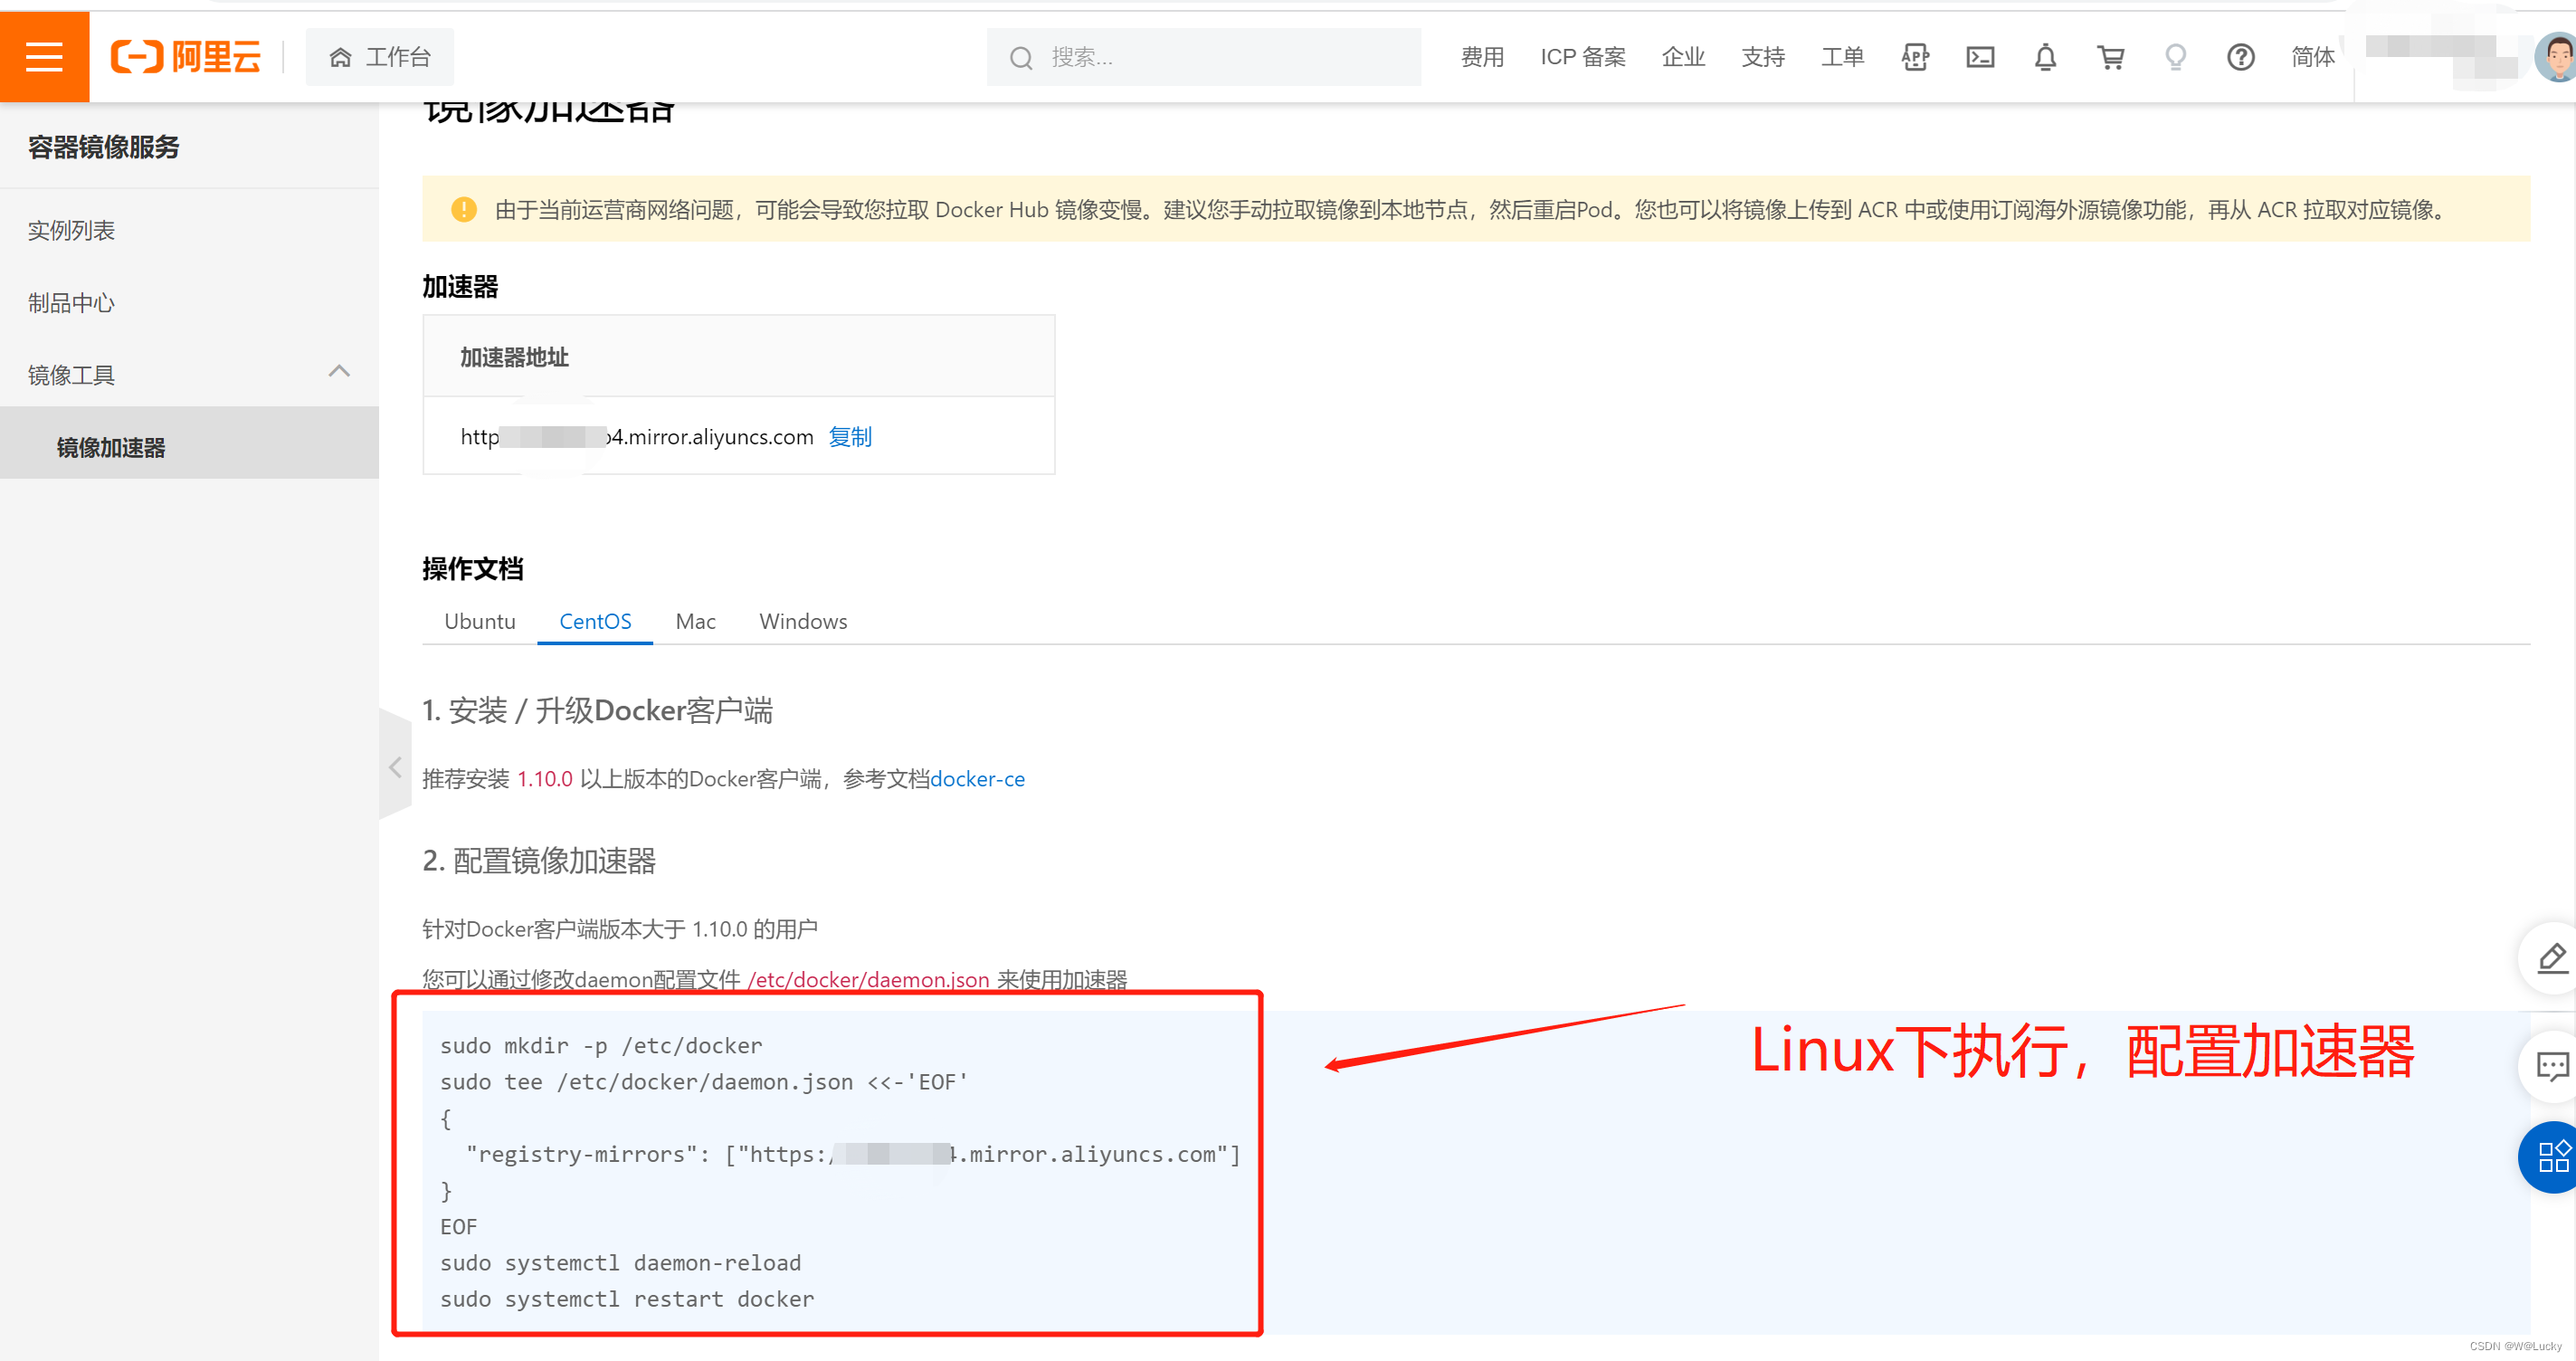
2. cat /etc/docker/daemon.json
3.3 Use docker to install mysql
      2. docker pull mysql:5.7.25

      3. # 安装

      4. docker run --restart=always -d -p 9906:3306  --name mysql5 -e  MYSQL_ROOT_PASSWORD=root mysql:5.7.25

      5.

      6. # 删除镜像

      7. docker rmi repository(来自哪个仓库):tag(标签、记号)

      8. eg: docker rmi [IMAGE_ID] 或 docker rmi docker.io/mysql:5.7   版本号
3.4 Use docker to install tomcat
      2.  docker pull tomcat:8.5.85-jdk8

      3.  # 在root下建docker下建tomcat目录下载创建webapps

      4.  mkdir -p /root/docker/tomcat/webapps

      5.  # 安装

      6.  docker run --restart=always -d -p 9090:8080 --name tomcat8.5 --privileged=true -v /root/docker/tomcat/webapps/:/usr/local/tomcat/webapps tomcat:8.5.85-jdk8
Move the files in webapp.dist in running tomcat to webapps
      2. docker exec -it 825a66 /bin/bash

      3.

      4. mv ./webapps.dist/* ./webapps
Copy webapps in tomcat to the host host
docker cp tomcat8.5:/usr/local/tomcat/webapps /root/docker/tomcat/
To test tomcat, enter the URL in the browser address bar and map the system's port 9090 to the sub-sandbox.
http://192.168.138.10:9090/
4 Reference Blog
1. Build a virtual machine with vagrant
2. Install tomcat using docker