The lightweight open source server Tomcat is deployed locally and publishes web pages to the public network for remote access.
The lightweight open source server Tomcat is deployed locally and publishes web pages to the public network for remote access.
Table of contents
1 Introduction
2. Build local Tomcat web page
2.1 Tomcat installation
2.2 Configure environment variables
2.3 Environment configuration
2.4 Tomcat running test
2.5 Cpolar installation and registration
3. Local web page publishing
3.1.Cpolar cloud settings
3.2 Cpolar local settings
4. Public network access test
5 Conclusion
A few days ago, I discovered a giant artificial intelligence learning website. It is easy to understand and humorous. I couldn’t help but share it with everyone. Click to jump to the website
1 Introduction
As a lightweight server, Tomcat not only has an interesting name (reminiscent of childhood), but also has powerful functions. Since it can load JavaWeb programs, it has become an essential environment software for configuring JSP and Java systems, as well as for development and debugging. The first choice for JSP programs. Tomcat runs stably and is open source and free. With the support of Apache and Sun, it is free and open source, making it widely used in small and medium-sized systems and scenarios with few concurrent access users. But if you want Tomcat web pages to be accessible in a public Internet environment, you need the assistance of cpolar intranet penetration. Now. The author will introduce to you how to use cpolar intranet penetration to publish Tomcat web pages to the public Internet.
2. Build local Tomcat web page
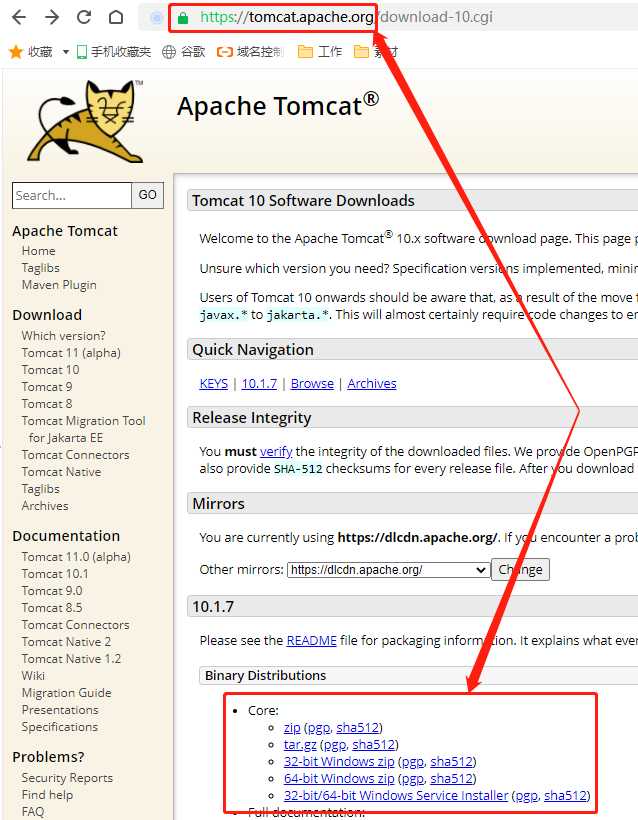
Tomcat has many advantages. To save everyone’s time, I will not go into details here and go directly to the installation settings of Tomcat. As an open source free software, Tomcat can be found and downloaded on its official website ( https://tomcat.apache.org ). The operating system I use is Windows, and the JDK version is 17.
On the Tomcat official website, we find the download page for the latest version and click on the corresponding operating system version to download.
2.1 Tomcat installation
After the download of the required version of the Tomcat program file is completed, you can install it. First, unzip the downloaded compressed file. But don't operate it for now.

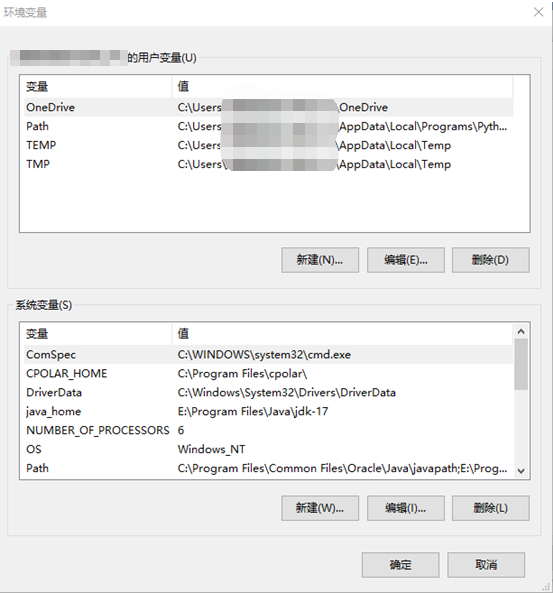
2.2 Configure environment variables
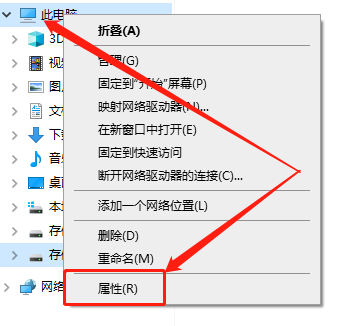
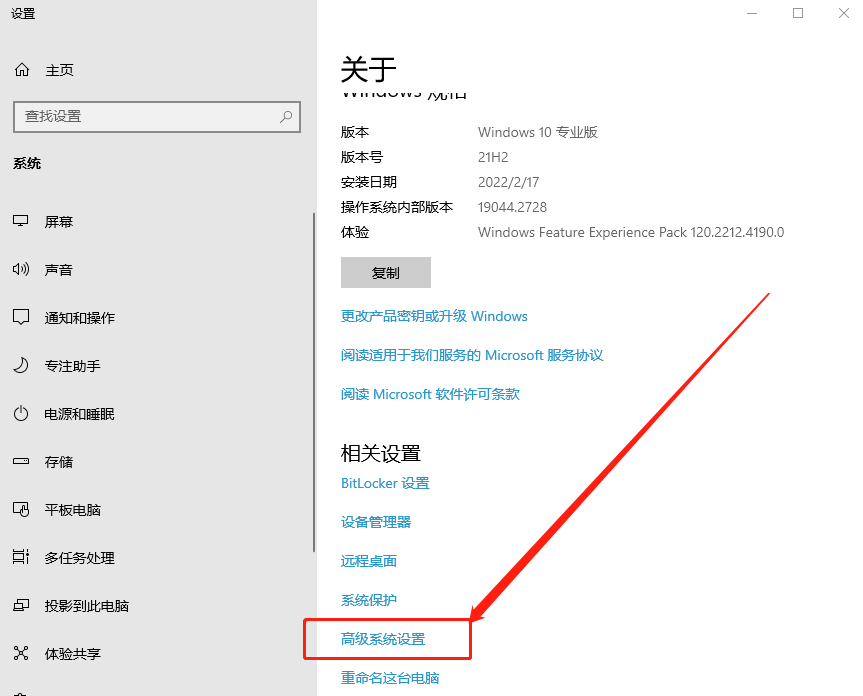
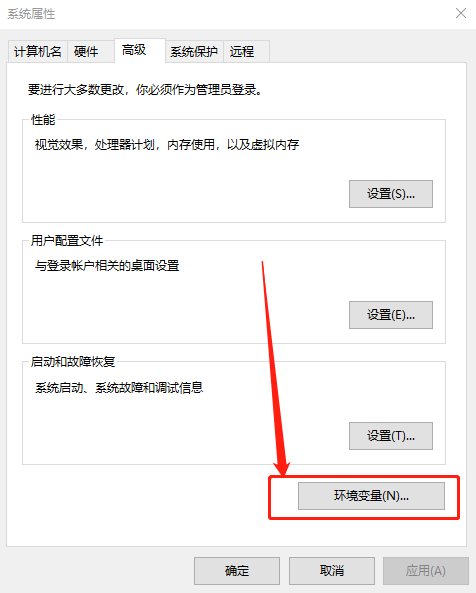
After the download is completed, don't rush to operate Tomcat. Instead, configure the environment variables. Specifically, right- My Computerclick , select properties on the page that opens , and click the button to enter the environment variable settings. select properties on the page that opens , and click the button to enter the environment variable settings. System Advanced System Settings Environment Variables
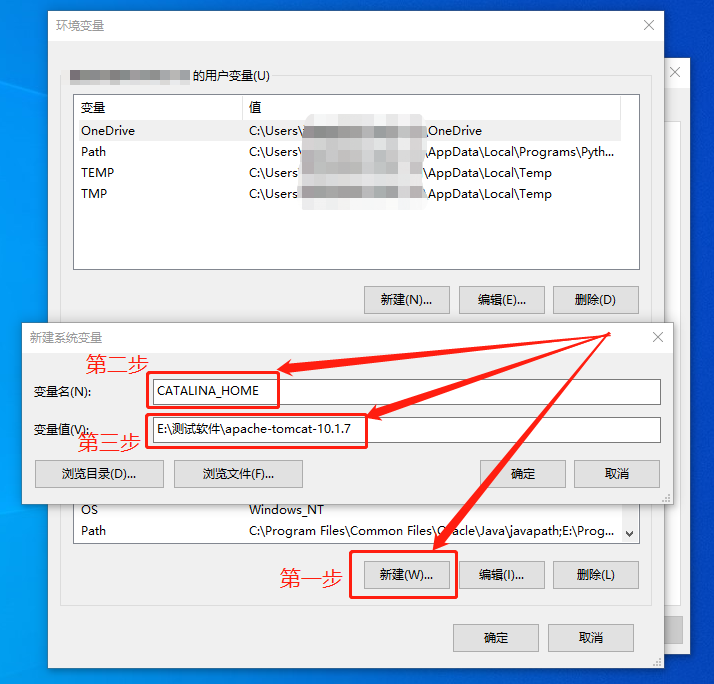
On Environment variables the page, create a new CATALINA_HOME system variable and make the following settings.
- Variable name: CATALINA_HOME
- Variable value: E:\Test Software\apache-tomcat-10.1.7 [The variable value is the decompression location of tomcat. You can click the "Browse Directory" button below the "Variable Value" field to select the path. 】
After setting the variable name and variable value, click ConfirmSave.
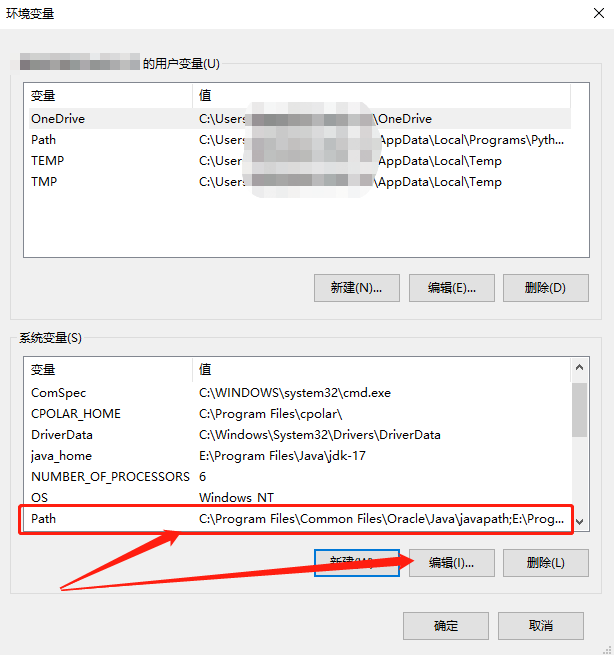
Next, select an existing Pathentry, click the button, click on the right side of the Edit pop-up page , add the following command to the command list, and then click the button to save the changes. The added variable values are:Edit Environment Variables New Confirm`
- %CATALINA_HOME%\lib
- %CATALINA_HOME%\lib\servlet-api.jar
- %CATALINA_HOME%\lib\jsp-api.jar

At this point, the setting of environment variables is completed. The next step is to set up tomcat
2.3 Environment configuration
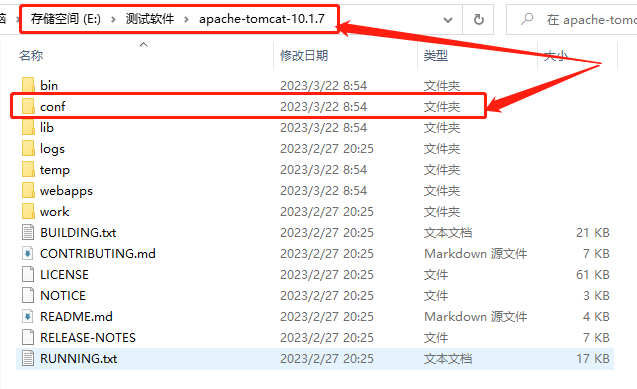
conf folderAfter completing the environment variable settings, we need to modify the files under tomcat user.xmland add a runnable user.
According to the decompression location of tomcat, find the folder in it conf, open the folder, and find tomcat-user.xmlthe file.
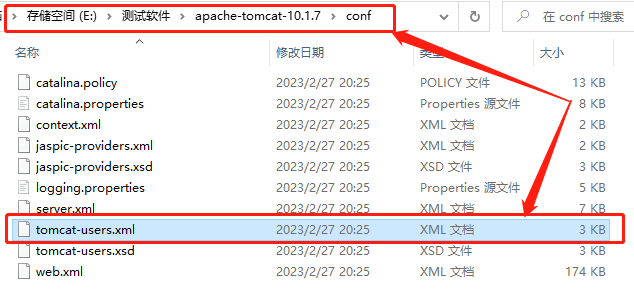
After finding the file, double-click it to open it and add the following code to the last line of the file:

After adding the code, just save and exit.
2.4 Tomcat running test
After completing the environment variable settings and adding the tomcat user, you can open the tomcat directory bin文件夹and double-click startupto start tomcat.
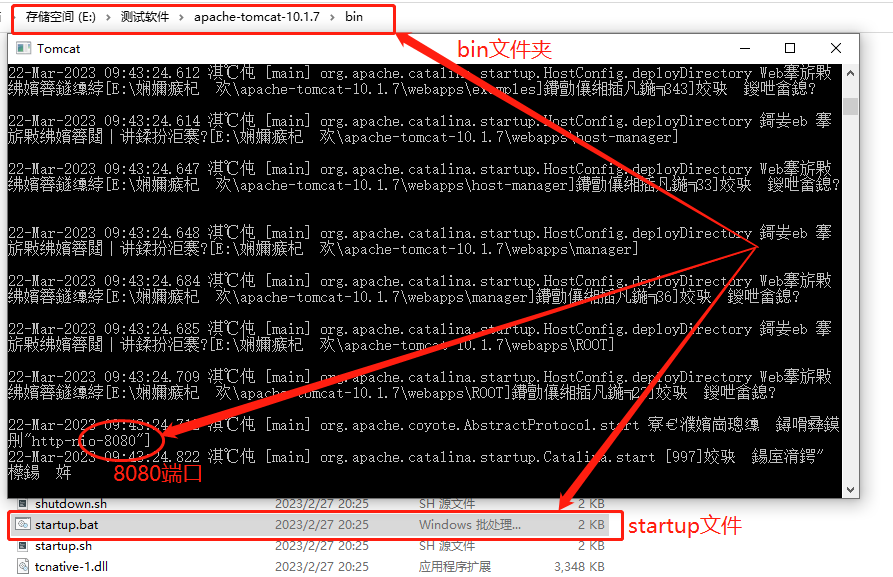
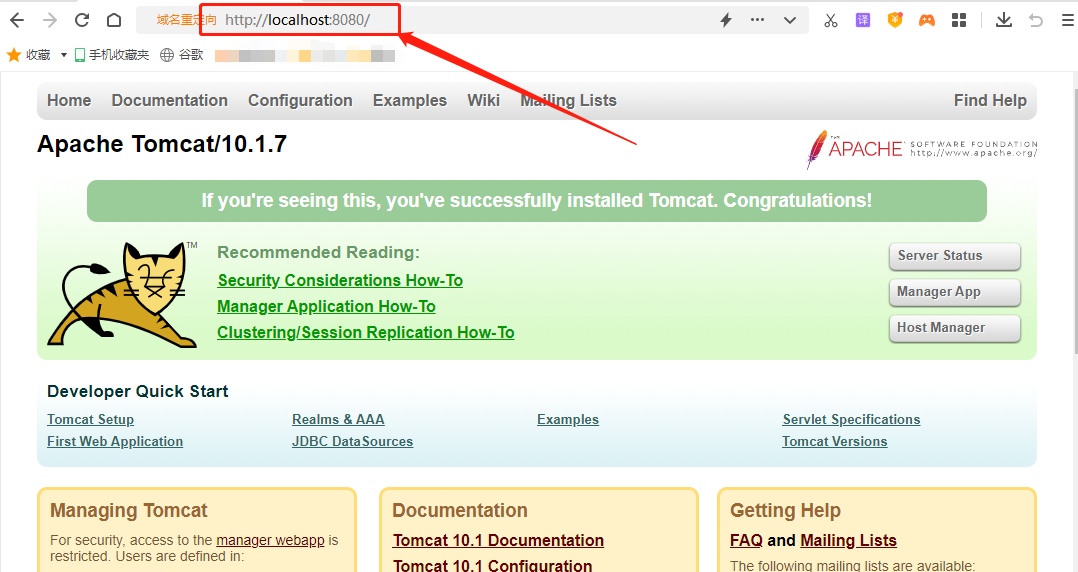
After starting tomcat, we can see that tomcat outputs through port 8080, so as long as you enter it in the address bar of the local computer browser, localhost:8080you can open the tomcat homepage.
At this time, tomcat is still in its original state. As for how to make a web page that looks good, it is not the main purpose of this article. Next, we need to find a way to create a data tunnel for the tomcat web page that can penetrate the intranet so that it can be accessed by users on the public Internet.
2.5 Cpolar installation and registration
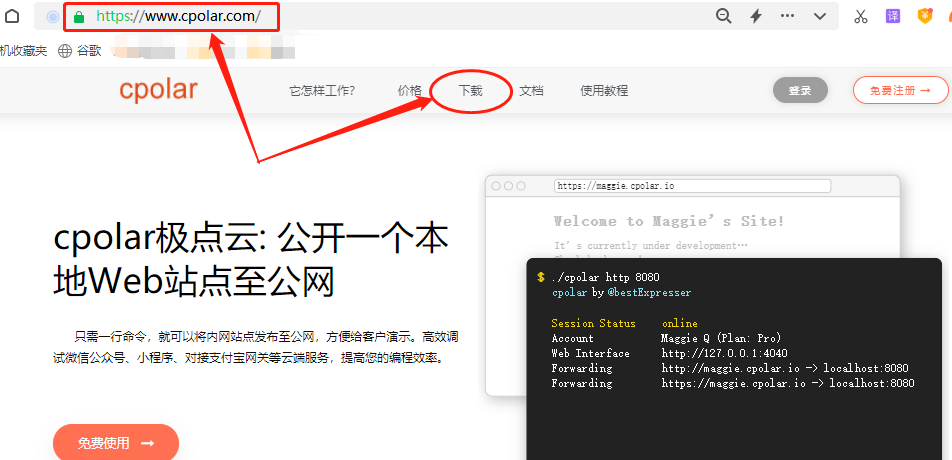
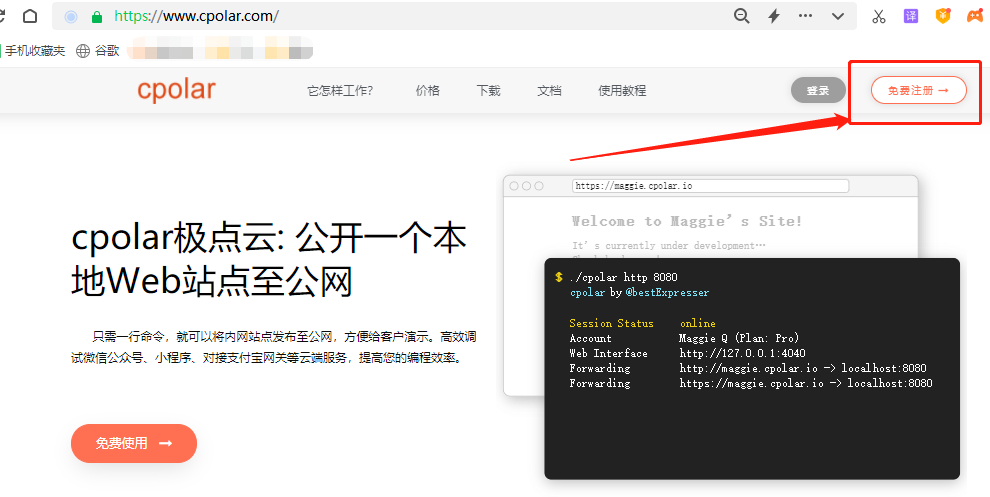
Compared with the complicated settings of tomcat, the installation and use of cpolar intranet penetration is obviously much simpler. Just log in to cpolar's official website ([ cpolar official website - secure intranet penetration tool | no public IP required | remote access | build Website ]), find the button at the top of the homepage 下载, and find the corresponding version of the software download on the download page of cpolar (the author is using the Windows operating system, so I chose the Windows version to download).

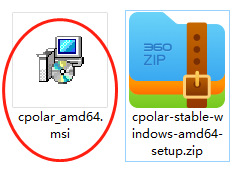
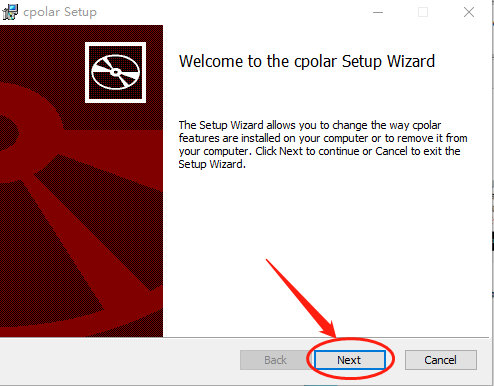
The Cpolar installation program is downloaded. Unzip it to your local computer. Double-click the unzipped .msifile and follow the next step to complete the installation. Of course, you can also select the cpolar installation folder during installation, which is also a routine operation.
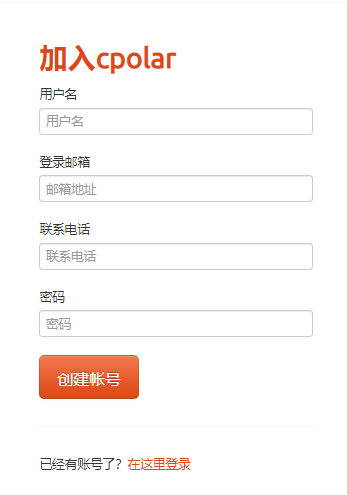
Since cpolar will create an independent data tunnel for each user, supplemented by user passwords and token codes to ensure data security, we need to Since cpolar will create an independent data tunnel for each user supplemented by user passwords and token codes to ensure data security, we need to register users before using cpolar. The registration process is also very simple. Just click on the upper right corner of the cpolar homepage user registration and fill in the necessary information on the registration page to complete the registration.
3. Local web page publishing
At this point, we have created a web page using tomcat and can access it on the local address. cpolar, which provides intranet penetration data tunnel, has also been installed and registered. Next, we can use cpolar to create a data tunnel and publish the local tomcat to the public Internet.
Because the data tunnel of the free version of cpolar is reset every 24 hours. The author does not want to reconnect tomcat web page settings every day, so I upgraded cpolar to the VIP version so that I can obtain an intranet penetration data tunnel that can exist stably for a long time.
3.1.Cpolar cloud settings
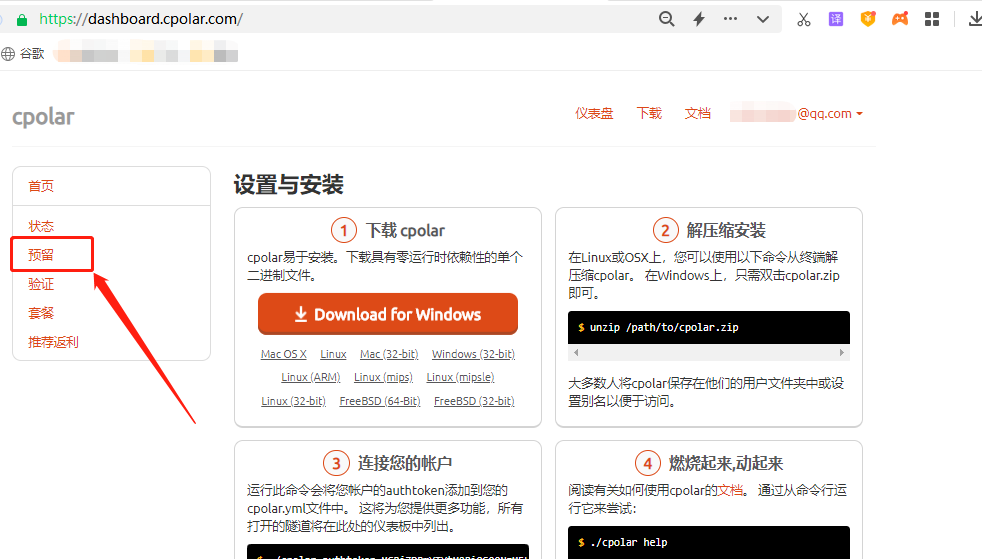
To achieve the purpose of intranet penetration, you need to first log in to cpolar's official website, find reserve the button on the left side of the user's home page, and click to enter cpolar's data tunnel reservation page. A public Internet address is generated here (can also be regarded as the entrance of A public Internet address is generated here (can also be regarded as the entrance of the data tunnel). At this time, this public Internet address is not connected to the local web page output port, so it can also be regarded as a blank data tunnel.
On the reservation page, you can see many types of data tunnels that can be reserved. Here we select Reserve second-level sub-domainsthe field. domain name, you can also choose reserve customized domain namethe field, but you need to resolve your own domain name at the domain name provider before it can be used with cpolar.
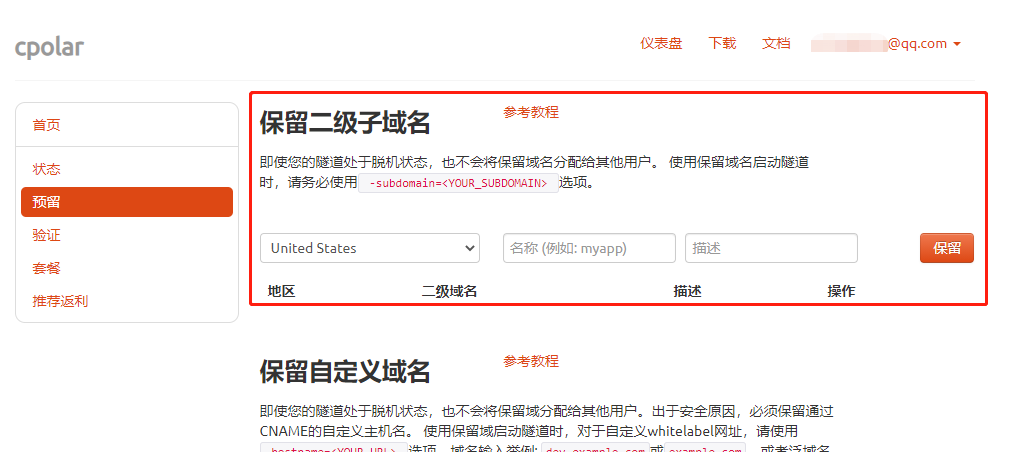
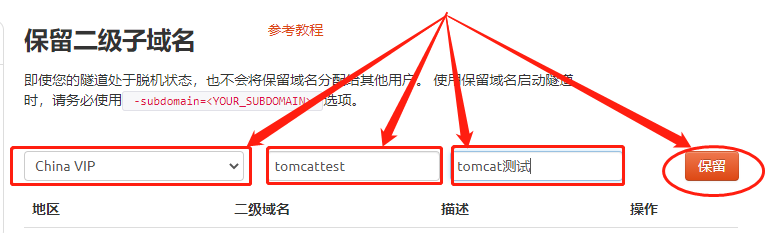
In Reserve second level sub-domains the fields, several simple settings of information need to be made: * Region: The area where the server is located, just select the nearest one.
Area: The area where the server is located, just select the nearest onesecond-level domain name: Will eventually appear in the generated public Internet address as one of the identifiers of the network addressDescription: Can be seen as a description of this data tunnel, as long as it can be distinguished from other tunnels
After completing these settings, you can click Reserve the button on the right to retain this data tunnel.
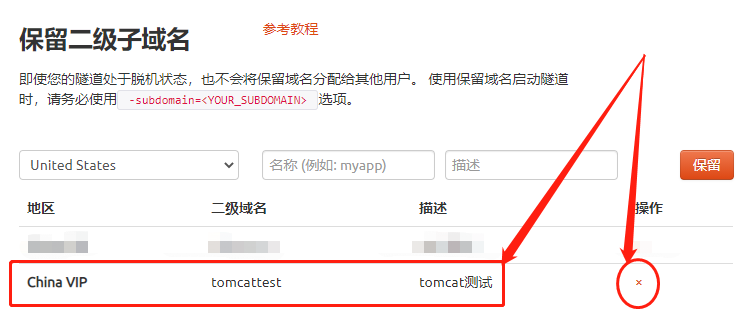
Of course, if you no longer plan to use this data tunnel, you can click on the right xto delete it easily to save valuable tunnel quota.
3.2 Cpolar local settings
After completing the settings of the cpolar cloud and retaining the blank data tunnel, we can return to the cpolar client on the local computer and connect the blank data tunnel generated by the cloud to the local Alipay test page, so that we can access tomcat on the public Internet. web pages.
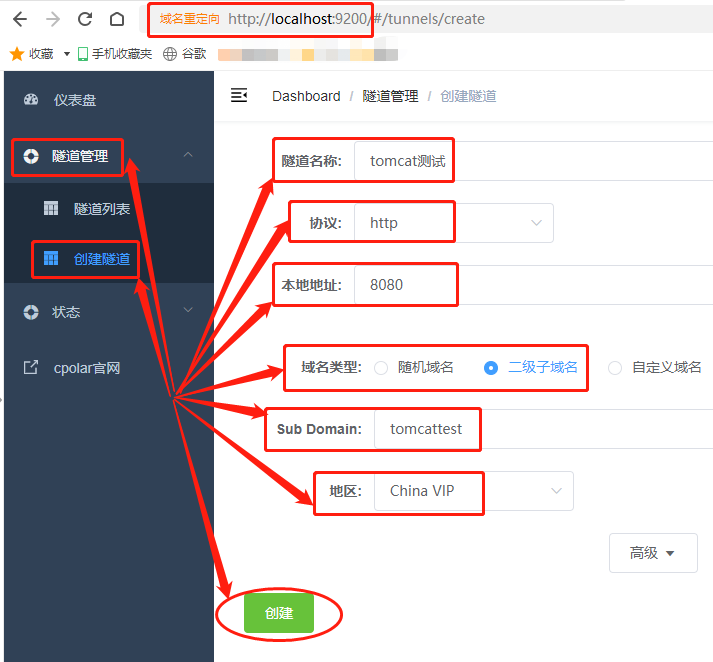
Open and log in to the cpolar client locally (you can enter localhost:9200 in the browser to access directly, or click the cpolar client shortcut in the start menu), click the button Tunnel Managementon the left side of the client's main interface Create Tunnelto enter the local tunnel Create page (if you want to create a temporary data tunnel that does not reset the address for 24 hours, you can set it up directly here instead of setting up a blank data tunnel on the cpolar official website).
On this page, you also need to make several information settings, which include.
Tunnel name- It can be regarded as cpolar's local tunnel information annotation, as long as it is convenient for us to distinguish; > 2.Protocol- Tomcat outputs a web page, so the http protocol is selected; > 3.Local address- The local address of the tunnel.Local address- The local address is the output port number of the local website, and the default output port of tomcat is 8080, so 8080 is also filled in here; > 4.Domain type- In this example, we have reserved the data tunnel of the second-level subdomain name in the cpolar cloud, so check " Second-level subdomain name" (if the reserved domain name is a custom domain name, check the custom domain name), and Fill in the reserved second-level subdomain name in the "Sub Domain" column on the next line. Here we fill in "tomcattest" (if you are only creating a temporary data tunnel, directly check "Random domain name"). Here we fill in "tomcattest" (if you are only creating a temporary data tunnel, directly check "Random domain name", and the cpolar client will generate the network address by itself.)Region- Just like when setting up the cpolar cloud, we fill it in according to the actual location.
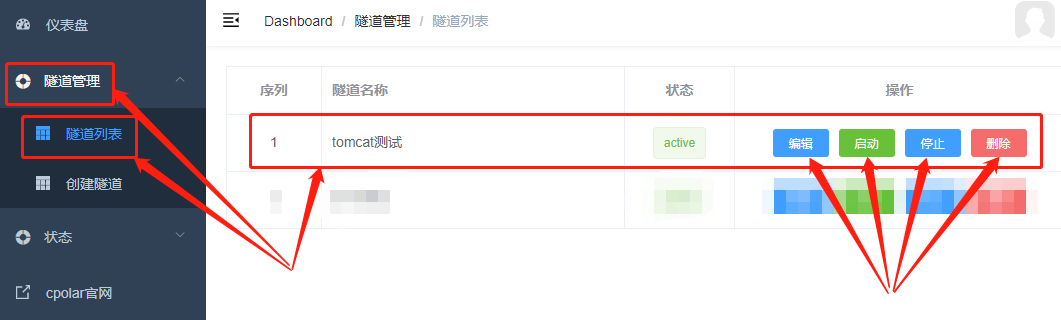
After completing the data tunnel connection between the cpolar client and the cpolar cloud, the cpolar client will automatically jump to the page Tunnel Management under the item Tunnel List. under the item Tunnel list. On this page, we can see the status of the data tunnel (whether it is smooth), or control the opening and closing of the tunnel. or delete. If you need to change If you need to change the tunnel information, you can also do so through the "Edit" button here.
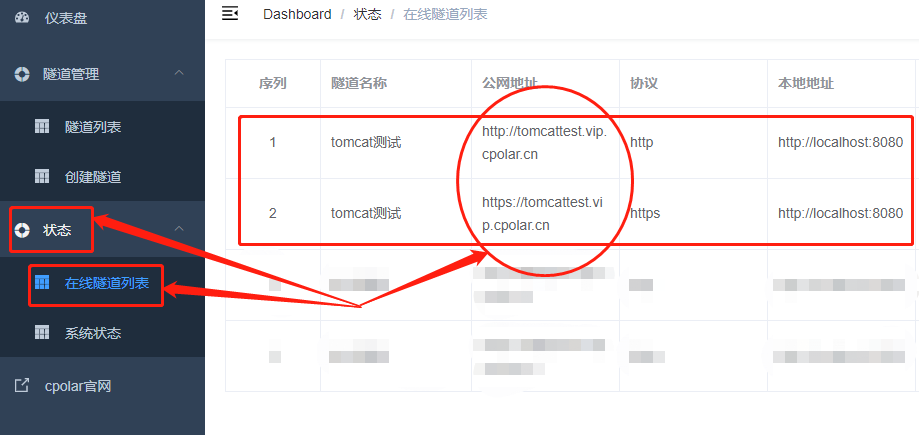
The public Internet address of this data tunnel can be seen on the Status- Online Tunnel List page.
4. Public network access test
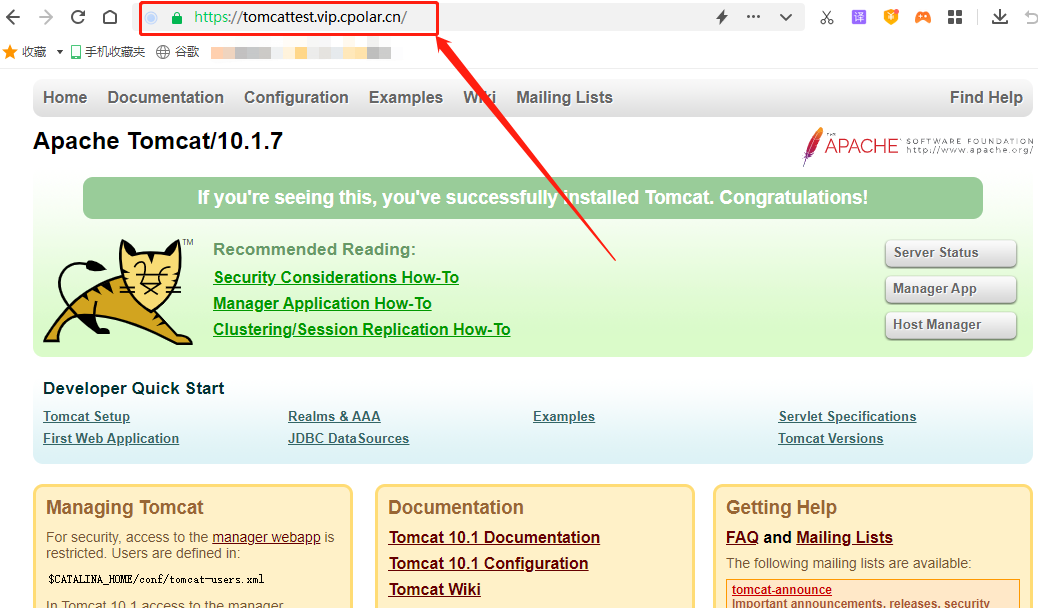
We paste the public Internet address generated by cpolar intranet penetration into the browser address bar of other computers, and we can see that the tomcat web page on the local computer can be displayed. This means that we have successfully used cpolar intranet penetration to publish local tomcat web pages to the public Internet.
5 Conclusion
Although this article seems to be long, in actual operation, it will be delayed for a while when tomcat sets the environment variables, while the data tunnel setting part of cpolar can be completed quickly. In fact, not only Tomcat, but also other web servers, as long as you know the output port of the software (webpage), you can use cpolar to create a data tunnel that penetrates the intranet and publish the software (webpage) to the public Internet.