Linux Virtual Machine Installation (Vagrant)
Linux Virtual Machine Installation (Vagrant)
1. Introduction to Linux
Linux is a free and open source operating system. There are many different versions of Linux, but all of them use the Linux kernel. Linux can be installed in various computer hardware devices, such as cell phones, tablets, routers, desktop computers
2. Application Scenario Analysis
- Desktop applications
Linux is not much used in desktop scenarios, this scenario generally still uses windows. - Service side (back-end)
E-commerce, portal back-end services, generally use linux as the operating system, java, c++, python, go, run and deployed in linux services - Embedded
The smallest and most core version of linux is only a few hundred K. Smart IOT devices are convenient for embedded development. - Cloud Computing
Operations and deployment scenarios, linux
3. Vagrant
3.1 What is vagrant?
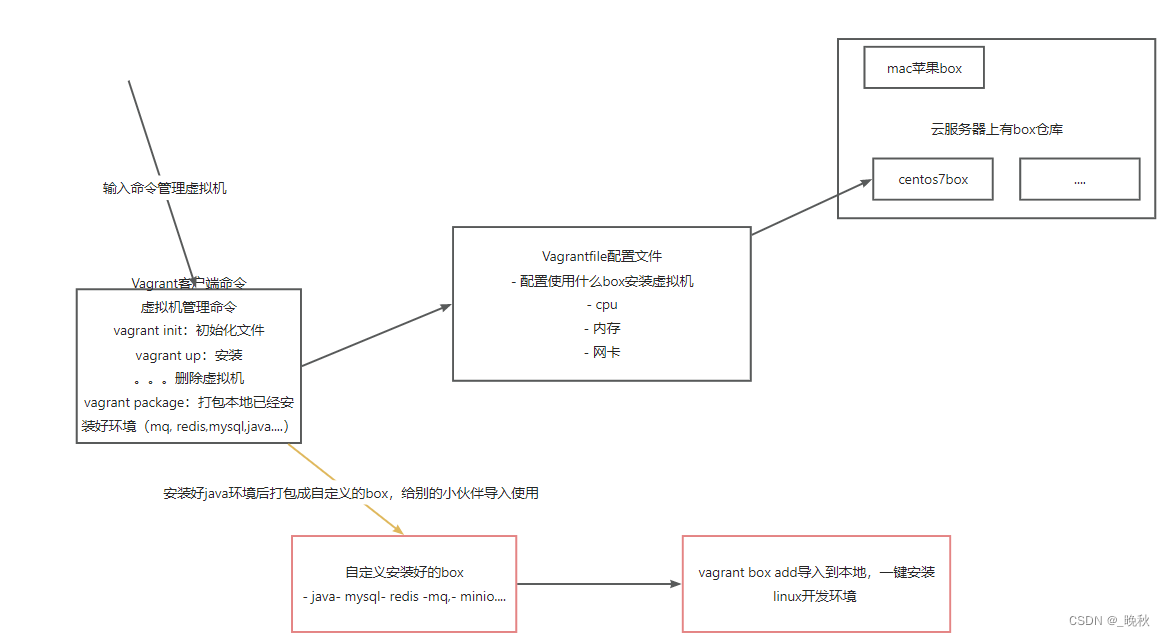
Vagrant is a popular virtual machine management software that allows us to use commands to download virtual machine images directly from the cloud, and then create and manage them. vagrant integrates with the major virtual machine management tools vmvare and virtualbox, and by default virtualbox is used.
The essence of vagrant is in a Vagrantfile, which is the same as docker's Dockerfile. All we need to do is write the installation and deployment steps in the Vagrantfile, and then we can easily deploy. vagrant also supports making the current system into a .box image, similar to a docker image, which makes it easy to migrate environments.
vagrant can package the configured environment into a box and share it with others for direct use.
Before containers became popular, Vagrant was used to orchestrate virtual machines and automate the deployment of development environments. With Docker/Kubernetes, it's really easier to orchestrate applications directly with containers. However, there are still some tasks, such as installation of the container platform itself, deployment testing of multi-node clusters, etc., which are more convenient to solve with virtual machines.
3.2 vagrant hands-on
3.2.1 Installing Virtualbox
VirtualBox is a free and open source virtual machine that is smaller than VMware, which I personally prefer. VMware is also supported by Vagrant, but VMware is paid, so the corresponding Vagrant version is also paid. Download https://www.virtualbox.org/wiki/Downloads
-
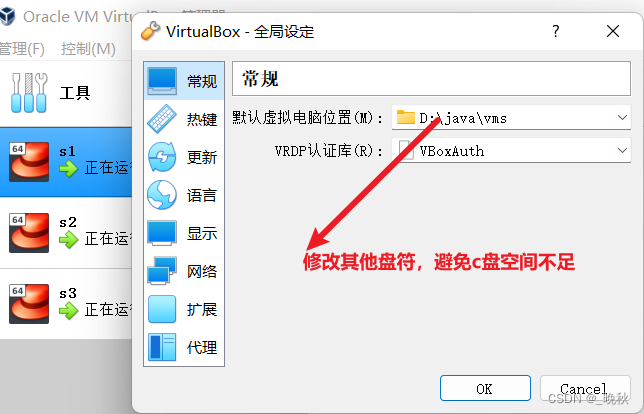
- Installation directory
Recommended installation directory: d:\java...
- Installation directory
- 2.Configuration
3.2.2 Installing vagrant
https://www.vagrantup.com/downloads下载最新版Vagrant Note that Vagrant does not have a graphical interface, so there is no desktop shortcut after installation.
-
- Installation
Recommended installation directory d:\java...
- Installation
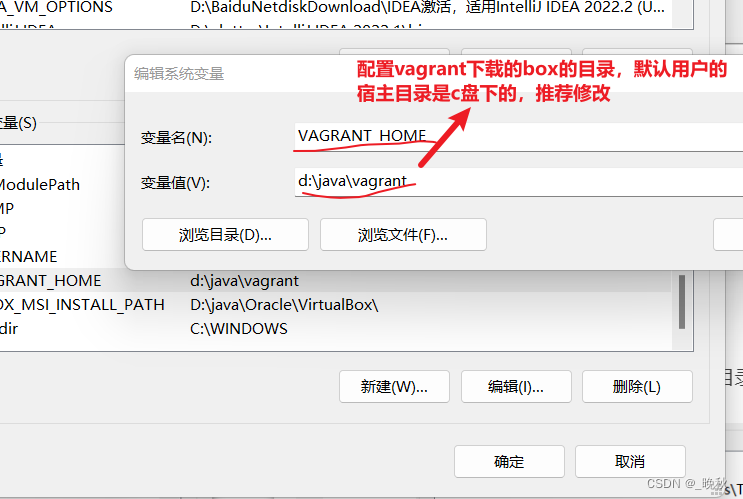
- 2.Configuration
vagrant_box default download user's host directory \vagrant_box
3.2.3 Install centos7 virtual machine
3.2.3.1 Downloading the box
You can download more boxes from http://www.vagrantbox.es/ for different systems or even for a configured environment. Although you can use the URL in Vagrant to download and install the box, it is recommended that you download the box first, considering the network situation. Although you can use the URL in Vagrant directly, Vagrant will download and install the box automatically, but considering the network situation, it is recommended to download the box by yourself.
3.2.3.2 vagrantfile
-
- Initialize the configuration file
Create the directoryd:\java\virtual\s13\.
- Initialize the configuration file
Open a command prompt in the directory and execute it to generate the configuration file
vagrant init centos
-
- Modify the configuration file as follows
Vagrantfile file reference is as follows
- Modify the configuration file as follows
Vagrantfile
    # -*- mode: ruby -*-
    # vi: set ft=ruby :

    # Vagrantfile API/syntax version. Don't touch unless you know what you're doing!
    VAGRANTFILE_API_VERSION = "2"

    Vagrant.configure(VAGRANTFILE_API_VERSION) do |config|

      (1..3).each do |i|
        config.vm.define vm_name = "s#{i}"  do |config|
            config.vm.provider "virtualbox" do |v|
                v.customize ["modifyvm", :id, "--name", vm_name]
    	    v.customize ["modifyvm", :id, "--memory", "8192"]
                v.customize ["modifyvm", :id, "--cpus", "2"]
            end
            config.vm.box = "centos_v1"
            config.vm.hostname =vm_name
            config.ssh.username = "root"
            config.ssh.password = "vagrant"
    							#		config.ssh.shell = "powershell"
    							#config.ssh.shell = "bash -l"
            config.vm.network :private_network, ip: "192.168.56.1#{i}"
    	config.vm.provision :shell, :path => "bootstrap.sh"
        end
      end
    end
![]() bootstrap.sh
bootstrap.sh
    #!/usr/bin/env bash

    # The output of all these installation steps is noisy. With this utility
    # the progress report is nice and concise.

    echo "Update /etc/hosts"
    cat > /etc/hosts <<EOF
    127.0.0.1       localhost

    192.168.56.11 s1
    192.168.56.12 s2
    192.168.56.13 s2
    EOF

    echo "Disable iptables"
    setenforce 0 >/dev/null 2>&1 && iptables -F

    ### Set env ###
    echo "export LC_ALL=en_US.UTF-8"  >>  /etc/profile
    cp /usr/share/zoneinfo/Asia/Shanghai /etc/localtime
![]()
3.2.3.3 box files
Place the .box file in the same directory as Vagrantfile and bootstrap.sh.
-
- List local boxes
    D:\java\virtual\s13>vagrant box list
    centos-travel (virtualbox, 0)
-
- Add box
Add the box you just downloaded to vagrant.
- Add box
    D:\java\virtual\s13>vagrant box add centos_v1 ./centos_v1.box
    ==> box: Box file was not detected as metadata. Adding it directly...
    ==> box: Adding box 'centos_v1' (v0) for provider:
        box: Unpacking necessary files from: file://D:/java/virtual/s13/vagrant-centos-7.2.box
        box:
    ==> box: Successfully added box 'centos_v1' (v0) for 'virtualbox'!
- 3.In the execution list
    D:\java\virtual\s13>vagrant box list
    centos-travel (virtualbox, 0)
    centos_v1     (virtualbox, 0)
- 4.Delete box
    D:\java\virtual\s13>vagrant box remove centos-travel
    Removing box 'centos-travel' (v0) with provider 'virtualbox'..
3.2.3.4 Installing a virtual machine
-
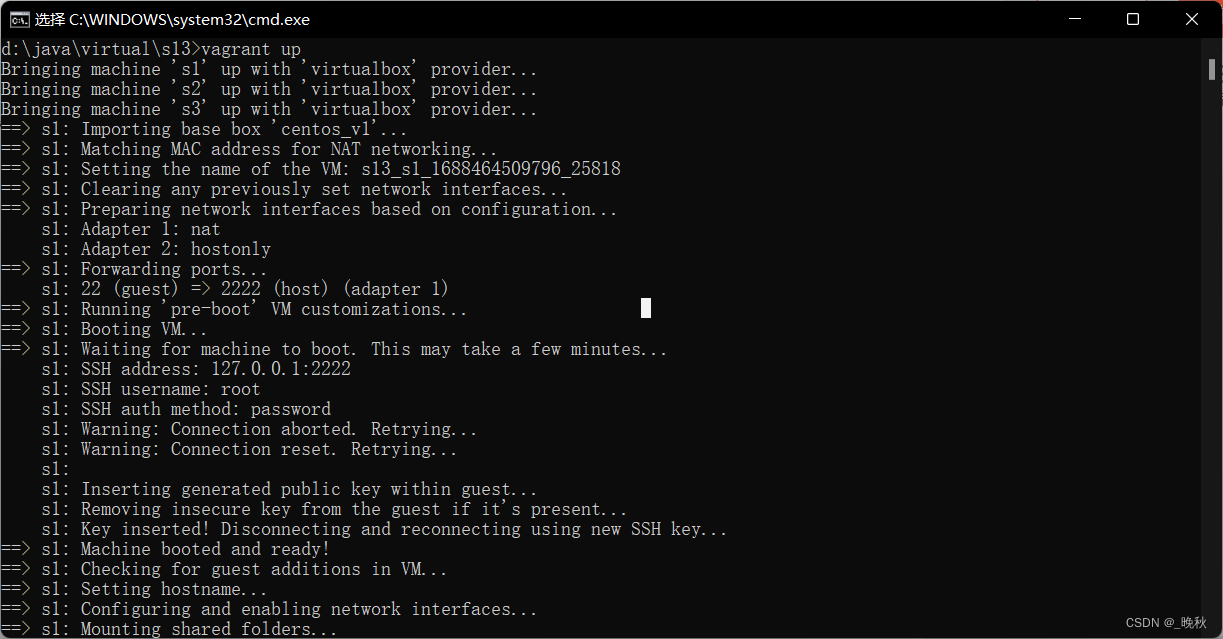
- Installation
It must be installed in the directory where the vagrantfile is located
- Installation
vagrant up
-
- Check the status using VirtualBox

- Check the status using VirtualBox
-
- Testing with FinalShell
Open FinalShell
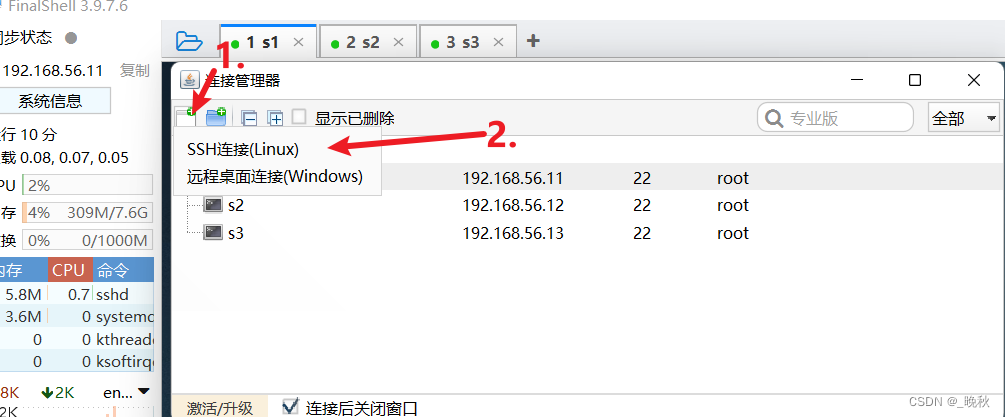
Create a connection, the same way you create a connection for all three VMs
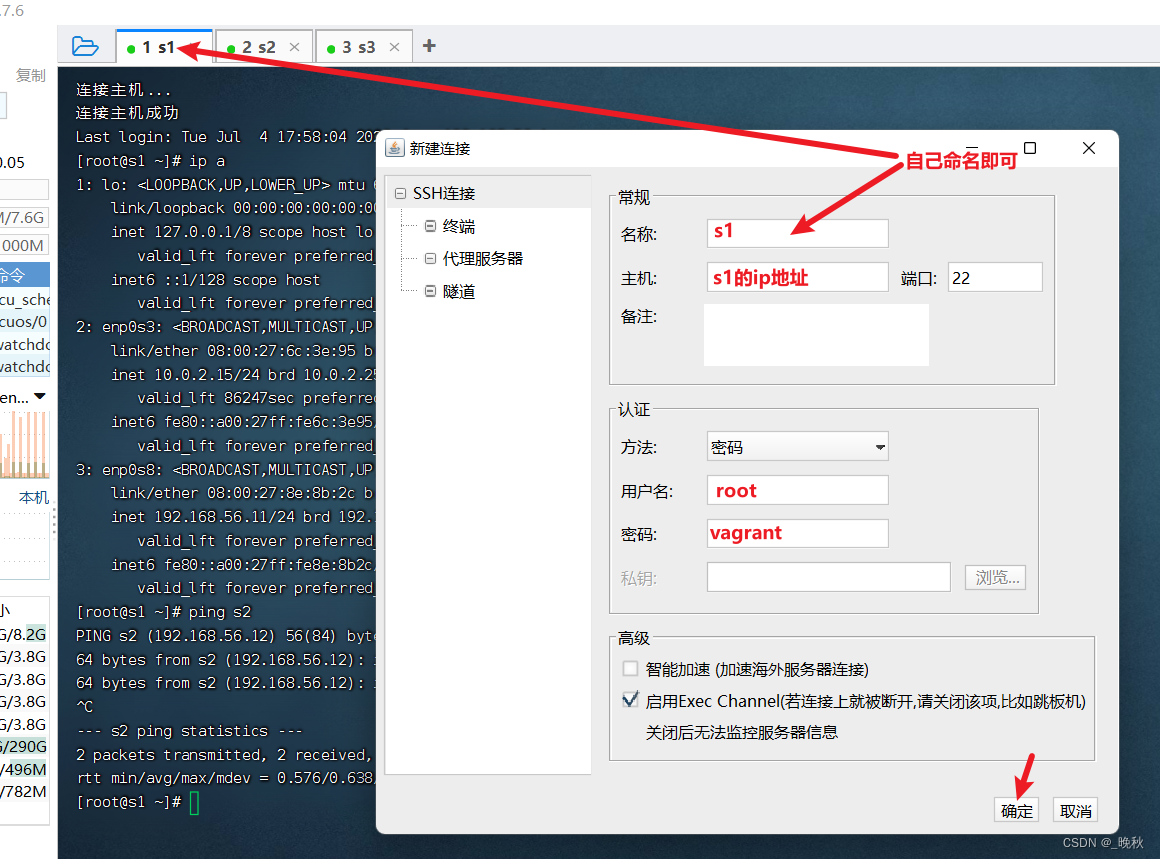
Use the command ip a to view the IP address, and ping the ip address to see if it is pingable with the other VMs
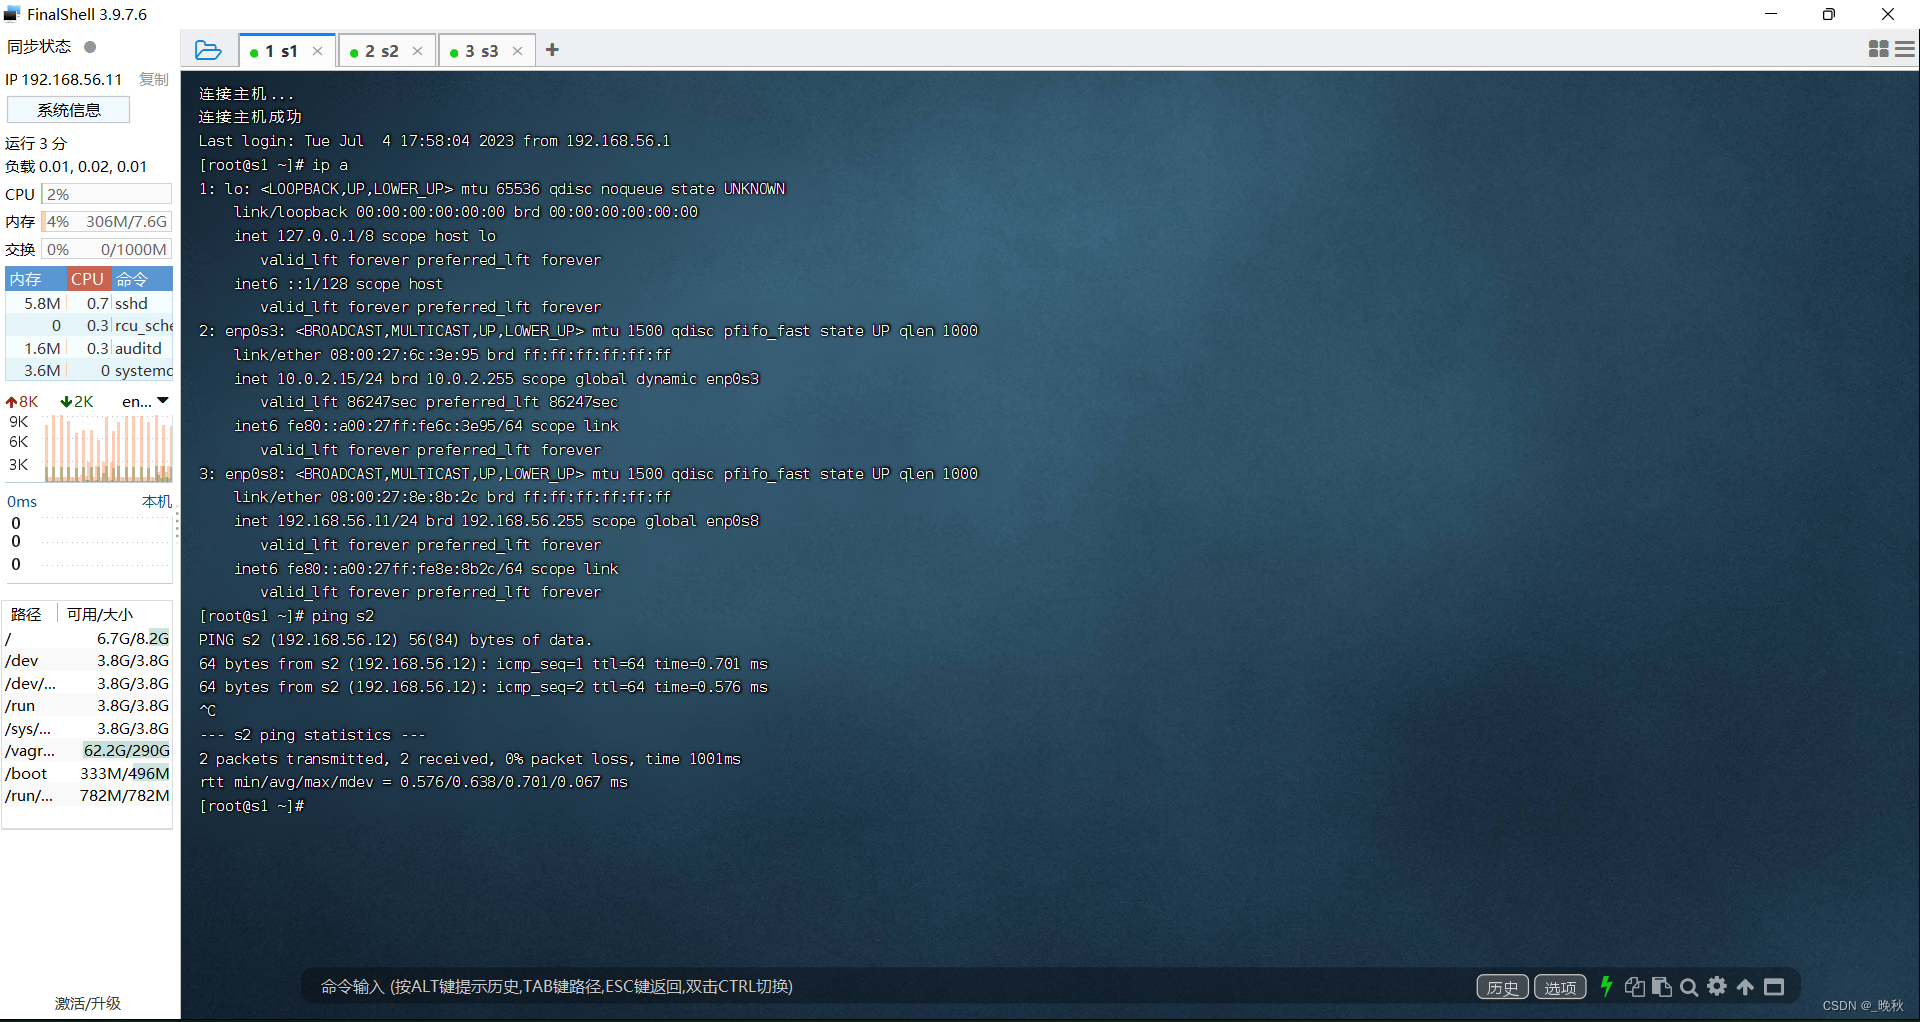
- Testing with FinalShell