K8s deploys rabbitmq and data migration
K8s deploys rabbitmq and data migration
docker pull rabbitmq:3.9.28-management
1. Deployment template
apiVersion: v1
kind: Service
metadata:
name: rabbitmq
spec:
ports:
- name: amqp
port: 5672
targetPort: 5672
- name: management
port: 15672
targetPort: 15672
selector:
app: rabbitmq
---
apiVersion: apps/v1
kind: StatefulSet
metadata:
name: rabbitmq
spec:
replicas: 1
selector:
matchLabels:
app: rabbitmq
template:
metadata:
labels:
app: rabbitmq
spec:
imagePullSecrets:
- name: harbor
containers:
- name: rabbitmq
image: rabbitmq:3.9.28-management
ports:
- containerPort: 5672
- containerPort: 15672
resources:
limits:
cpu: 1024m
memory: 2048Mi
requests:
cpu: 100m
memory: 200Mi
livenessProbe:
initialDelaySeconds: 30
periodSeconds: 10
timeoutSeconds: 5
successThreshold: 1
failureThreshold: 3
tcpSocket:
port: 5672
readinessProbe:
initialDelaySeconds: 10
periodSeconds: 10
timeoutSeconds: 5
successThreshold: 1
failureThreshold: 3
tcpSocket:
port: 5672
env:
- name: RABBITMQ_DEFAULT_USER
value: "guest"
- name: RABBITMQ_DEFAULT_PASS
value: "guest"
volumeMounts:
- name: data
mountPath: /var/lib/rabbitmq/
- name: localtime
readOnly: true
mountPath: /etc/localtime
volumes:
- name: data
hostPath:
type: DirectoryOrCreate
path: /data/znst/rabbitmq
- name: localtime
hostPath:
type: File
path: /etc/localtime
nodeName: gem-yxyw-t-c02

Exposed port service
apiVersion: v1
kind: Service
metadata:
name: rabbitmq
spec:
type: NodePort
ports:
- name: rabbitmq
port: 5672
targetPort: 5672
nodePort: 30004
- name: management
port: 15672
targetPort: 15672
nodePort: 30005
selector:
app: rabbitmq

actual deployment
apiVersion: v1
kind: Service
metadata:
name: znst-rabbitmq-test
spec:
type: NodePort
ports:
- name: rabbitmq
port: 5672
targetPort: 5672
nodePort: 30004
- name: management
port: 15672
targetPort: 15672
nodePort: 30005
selector:
app: znst-rabbitmq-test
---
apiVersion: apps/v1
kind: StatefulSet
metadata:
name: znst-rabbitmq-test
spec:
replicas: 1
selector:
matchLabels:
app: znst-rabbitmq-test
template:
metadata:
labels:
app: znst-rabbitmq-test
spec:
imagePullSecrets:
- name: harbor
containers:
- name: rabbitmq
image: rabbitmq:3.9.28-management
ports:
- containerPort: 5672
- containerPort: 15672
env:
- name: RABBITMQ_DEFAULT_USER
value: "guest"
- name: RABBITMQ_DEFAULT_PASS
value: "Gd*(53#SALEMQ"
resources:
limits:
cpu: 1024m
memory: 2048Mi
requests:
cpu: 100m
memory: 200Mi
livenessProbe:
initialDelaySeconds: 30
periodSeconds: 10
timeoutSeconds: 5
successThreshold: 1
failureThreshold: 3
tcpSocket:
port: 5672
readinessProbe:
initialDelaySeconds: 10
periodSeconds: 10
timeoutSeconds: 5
successThreshold: 1
failureThreshold: 3
tcpSocket:
port: 5672
volumeMounts:
- name: data
mountPath: /var/lib/rabbitmq/
- name: localtime
readOnly: true
mountPath: /etc/localtime
volumes:
- name: data
hostPath:
type: DirectoryOrCreate
path: /data/znst/rabbitmq
- name: localtime
hostPath:
type: File
path: /etc/localtime
nodeName: cn-shenzhen.10.0.21.33

2. Service connection
http://10.0.21.33:30005/ web login address
http://10.0.21.33:30004 actual service calling address
    host: 10.0.21.33
    port: 30004
    username: guest
    password: Gd*(53#SALEMQ
3. New user of rabbitmq: enter the container or pod operation
If you want to log in to the RabbtiMQ web management platform across machines, you need to create a new user instead of using the default user guest.
Record the steps to add a new user below:
1).Add a new user with the username root and password 123456
rabbitmqctl add_user root 123456
2). Assign all permissions to this user
rabbitmqctl set_permissions -p / root ". " ". " ".*"
3). Set the user to the administrator role
rabbitmqctl set_user_tags root administrator
can now use the root user to log in to the RabbitMQ web management platform on other machines.
Extra chapter data migration
cd /data/znst/
tar -zcvf rabbitmq.tar.gz rabbitmq
logs in to the target host and copies the past data directory and executes
tar -xvf rabbitmq.tar.gz to overwrite the original data directory and restart the service
4. RabbitMQ data migration
If the rabbitmq log and storage data disk space is not consumed in time or the amount of data is too large during use, the disk space usage will increase day by day, and in severe cases, the rabbitmq server may crash. Once it is found that rabbitmq disk space is insufficient, or the server is down and the service fails to restart, a larger disk is needed to store rabbitmq data to ensure that the service starts normally. In order to ensure that data is not lost, how to migrate data is particularly important. The following are data migration steps, please perform them in order.
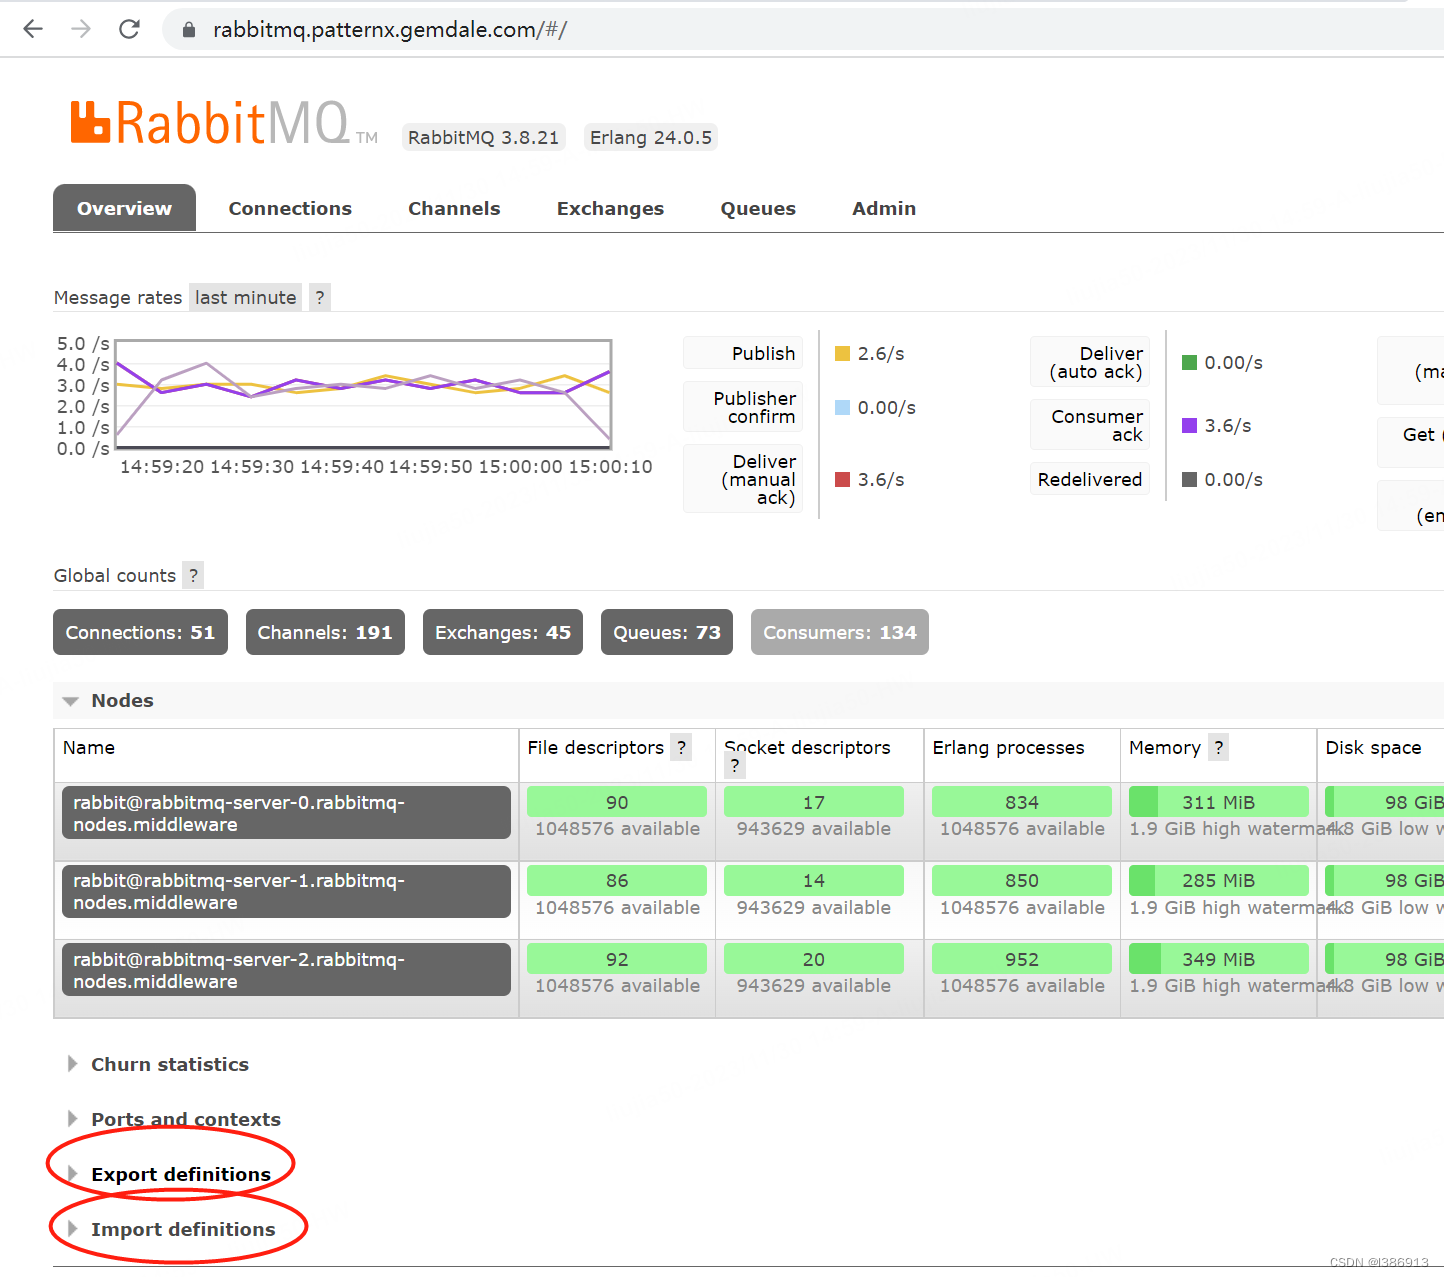
1. RabbitMq management interface monitoring data
2. Default storage path
MNESIA_BASE back-end storage directory, the default is /var/lib/rabbitmq/mnesia
LOG_BASE log directory, the default is /var/log/rabbitmq/
Note: If rabbitmq has been modified when deploying the server service, you need to copy the storage data and logs to the corresponding directory.
3. Copy the original stored data and log files.
Copy the data files and use the file transfer tool to download the files for later use.
cd /var/lib/rabbitmq/mnesia
Copy the log file and download the file through the file transfer tool for later use
cd /var/log/rabbitmq/
4. Create a new log and file storage location, and upload the original data to the newly created file directory
#Enter the data storage path
cd /data/rabbitmq/data
#Upload data file
#Enter the log storage path
cd /data/rabbitmq/data
#Upload log storage file
After the file is uploaded, the permissions of the directory need to be modified. If not modified, the service restart will fail.
chown -R rabbitmq:rabbitmq /data/rabbitmq
5. Modify the storage path of log files and data files in the rabbitmq configuration file
#Enter the directory
cd /etc/rabbitmq
#Open the file
vim rabbitmq-env.conf
#Add the following content
RABBITMQ_MNESIA_BASE=/data /rabbitmq/data
RABBITMQ_LOG_BASE=/data/rabbitmq/log
6. Restart the rabbitmq service
systemctl restart rabbitmq-server.service
7. Log in to the management interface and check whether the data is normal
. If the original account can log in successfully, it means that the data migration is successful, because if the data migration fails , user data will be lost, and the original account failed to log in.
Exporting queues through the graphical interface is equivalent to exporting and importing table structure
Overview》Export definitions Export
Overview》Import definitions Import
