It is so simple to implement delayed messages in RabbitMQ, the entire plug-in is complete
It is so simple to implement delayed messages in RabbitMQ, the entire plug-in is complete
There are two ways to implement delayed messages in RabbitMQ, one is to use a dead letter queue , and the other is to use a delay plug-in. We have talked about the dead letter queue implementation before. This time we will talk about a simpler implementation using a delay plug-in.
Plug-in installation
First we need to download and install the RabbitMQ delay plug-in.
-
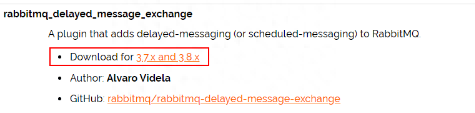
Go to the official website of RabbitMQ to download the plug-in. The plug-in address is: https://www.rabbitmq.com/community-plugins.html
-
Directly search rabbitmq_delayed_message_exchange to find the plug-in we need to download. Download the version matching RabbitMQ. Don’t make a mistake;
edit
Add a comment on the image, no more than 140 words (optional)
- Copy the plug-in file to the plugins directory of the RabbitMQ installation directory;
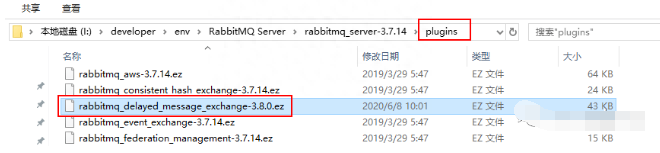
Edit switch to center
Add a comment on the image, no more than 140 words (optional)
- Enter the sbin directory of the RabbitMQ installation directory and use the following command to enable the delay plug-in;
rabbitmq-plugins enable rabbitmq_delayed_message_exchange
* After successfully enabling the plug-in, you will see the following information, and then restart the RabbitMQ service.

Edit switch to center
Add a comment on the image, no more than 140 words (optional)
###
Implement delayed messages
> Next, we need to implement the delayed message function in SpringBoot. This time we still use the product order scenario. For example, if a user places an order and does not pay for the order within 60 minutes, the order will be cancelled. This is a typical usage scenario of delayed messages.
* First we need to add AMQP related dependencies in the pom.xml file;
- Then add the relevant configuration of RabbitMQ in application.yml;
spring: rabbitmq: host: localhost # rabbitmq's connection address port: 5672 # rabbitmq's connection port number virtual-host: /mall # rabbitmq's virtual host username: mall # rabbitmq's username password: mall # rabbitmq's password publisher-confirms : true #If a callback is required for asynchronous messages, it must be set to true
- Next, create the Java configuration of RabbitMQ, which is mainly used to configure switches, queues and binding relationships;
	/** Message Queue Configuration * Created by macro on 2018/9/14. **/
	@Configuration public class RabbitMqConfig{
		/** The switch to which the Order Delay Plugin Message Queue is bound **/
		@Bean CustomExchange orderPluginDirect() {
			// create a custom exchange that can send delayed messages
			Map<String, Object> args = new HashMap<>();
			args.put("x-delayed-type", "direct");
			return new CustomExchange(QueueEnum.QUEUE_ORDER_PLUGIN_CANCEL.getExchange(), "x-delayed-message", true, false,args);
		}
		/**  Order Delayed Plugin Queue **/
		@Bean public Queue orderPluginQueue() {
			return new Queue(QueueEnum.QUEUE_ORDER_PLUGIN_CANCEL.getName());
		}
		/** Bind the order delayed plugin queue to the switch **/
		@Bean public Binding orderPluginBinding(CustomExchange orderPluginDirect,Queue orderPluginQueue){
			return BindingBuilder.bind(orderPluginQueue).to( orderPluginDirect).with(QueueEnum.QUEUE_ORDER_PLUGIN_CANCEL.getRouteKey()).noargs();
		}
	}
- Creates an issuer of a cancel order message that sets the delay time for the message to be sent from the switch to the queue by setting the x-delay header to the message;
/** Sender of the CancelOrder message * Created by macro on 2018/9/14. **/
@Component public class CancelOrderSender {
	private static Logger LOGGER = LoggerFactory. getLogger(CancelOrderSender.class);
	@Autowired private AmqpTemplate amqpTemplate;
	public void sendMessage(Long orderId,final long delayTimes ){
		// send a message to the delayed queue
		amqpTemplate.convertAndSend(
			QueueEnum.QUEUE_ORDER_PLUGIN_CANCEL.getExchange(), QueueEnum.QUEUE_ORDER_PLUGIN_CANCEL. getRouteKey(), orderId, new MessagePostProcessor() {
				@Override public Message postProcessMessage(Message message) throws AmqpException {
					// Give the message a set the delay milliseconds value message.getMessageProperties().setHeader("x-delay",delayTimes);
					return message;
				}
			}
		);
		LOGGER.info("send delay message orderId:{}", orderId);
	}
}
/** * Handler for cancel order messages * Created by macro on 2018/9/14. */
@Component @RabbitListener(queues = "mall.order.cancel.plugin")
public class CancelOrderReceiver {
	private static Logger LOGGER = LoggerFactory.getLogger(CancelOrderReceiver.class);
	@Autowired private OmsPortalOrderService portalOrderService;
	@RabbitHandler public void handle(Long orderId){
		LOGGER.info("receive delay message orderId:{}", orderId);
		portalOrderService.cancelOrder(orderId);
	}
}
*Then add the following logic to our order business implementation class to send a delay message to the message queue to cancel the order before the order is successfully placed, so that the order can be canceled if it is not paid;
/*** Front desk order management Service * Created by macro on 2018/8/30. */
@Service public class OmsPortalOrderServiceImpl implements OmsPortalOrderService {
	private static Logger LOGGER = LoggerFactory.getLogger(OmsPortalOrderServiceImpl.class);
	@Autowired private CancelOrderSender cancelOrderSender;
	@ Override public CommonResult generateOrder(OrderParam orderParam) {
		//todo executes a series of order operations, for details refer to the mall project
		LOGGER.info("process generateOrder");
		//After the order is completed, a delayed message is opened, used when the user does not Cancel the order when paying (orderId should be generated after placing the order)
		sendDelayMessageCancelOrder(11L);
		return CommonResult.success(null, "Order successfully");
	}
	@Override public void cancelOrder(Long orderId) {
		//todo executes a series of cancellations For order operations, please refer to the mall project
		LOGGER.info("process cancelOrder orderId:{}",orderId);
	}
	private void sendDelayMessageCancelOrder(Long orderId) {
		//Get the order timeout, assuming it is 60 minutes (30 seconds for testing)
		long delayTimes = 30 * 1000; //Send delayed message cancelOrderSender.sendMessage(orderId, delayTimes);
	}
}
After starting the project, call the order interface in Swagger;
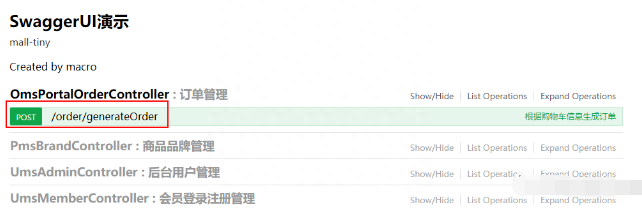
Edit switch to center
Add a comment on the image, no more than 140 words (optional)
- After checking the console log after the call is completed, we can find that the difference between message sending and message receiving processing is exactly 30s, which is the delay time we set.
2020-06-08 13:46:01.474 INFO 1644 --- [nio-8080-exec-1] c.m.m.t.s.i.OmsPortalOrderServiceImpl : process generateOrder 2020-06-08 13:46:01.482 INFO 1644 --- [nio-8080-exec-1] c.m.m.tiny.component.CancelOrderSender : send delay message orderId:11 2020-06-08 13:46:31.517 INFO 1644 --- [cTaskExecutor-4] c.m.m.t.component.CancelOrderReceiver : receive delay message orderId:11 2020-06-08 13:46:31.520 INFO 1644 --- [cTaskExecutor-4] c.m.m.t.s.i.OmsPortalOrderServiceImpl : process cancelOrder orderId:11
Comparison of two implementation methods
We have used the dead letter queue method before. Here we compare the two methods and first talk about the implementation principles of these two methods.
dead letter queue
The dead letter queue is a queue. If a message is sent to the queue and exceeds the set time, it will be forwarded to the queue set to process timeout messages. This feature can be used to delay the message.
delay plugin
By installing plug-ins and customizing the switch, the switch has the ability to delay sending messages, thereby achieving delayed messages.
in conclusion
Since the dead letter queue method requires the creation of two switches (dead letter queue switch + processing queue switch) and two queues (dead letter queue + processing queue), while the delay plug-in method only needs to create one switch and one queue, so the latter uses It's simpler.
Resource acquisition:
everyone likes, collects, follows, comments , check 👇🏻👇🏻👇🏻 WeChat public account to get contact information 👇🏻👇🏻👇🏻
Recommended subscription for wonderful columns: in the column below 👇🏻👇🏻👇🏻👇🏻
[every day Four hours of learning: Java+Spring+JVM+distributed high concurrency, architects are just around the corner](https://blog.csdn.net/m0_63437643/article/details/127276380?spm=1001.2014.3001.5501 "Learn four hours a day: Java+Spring+JVM+distributed high concurrency, architects are just around the corner")
