Installation and Configuration of RabbitMQ
2. Installing and configuring RabbitMQ
2.1. Download and Installation
2.1.1. Download
**Download the Erlang rpm package **1.
RabbitMQ is written in Erlang language, so the Erlang environment must be available. Note: The Erlang environment must match the RabbitMQ version:
RabbitMQ Erlang Version Requirements - RabbitMQ
**2. Download the socat rpm package **.
rabbitmq installation depends on socat, so you need to download socat.
Download socat at http://repo.iotti.biz/CentOS/7/x86_64/socat-1.7.3.2-5.el7.lux.x86_64.rpm
**Download the RabbitMQ rpm package **3.
RabbitMQ download address: Downloading and Installing RabbitMQ - RabbitMQ (according to their own needs and matching relationship, download the corresponding rpm package) rabbitmq-server-3.8.1-1.el7.noarch.rpm
Also available from github, etc. https://hub.fastgit.org/rabbitmq/rabbitmq-server/releases/
2.1.2. Installation
1. Install Erlang, Socat, RabbitMQ
**①rpm -ivh ****erlang-21.3.8.9-1.el7.x86_64.rpm **
** ②rpm -ivh ** socat-1.7.3.2-1.el6.lux.x86_64.rpm
You need to install socat before installing rabbitmq, otherwise, it will report an error.
You can use yum to install socat: yum install socat, here we use rpm installation method
**③rpm -ivh rabbitmq-server-3.8.1-1.el7.noarch.rpm **
/usr/lib/rabbitmq/bin/
2. Enable the management plugin
rabbitmq-plugins enable rabbitmq_management
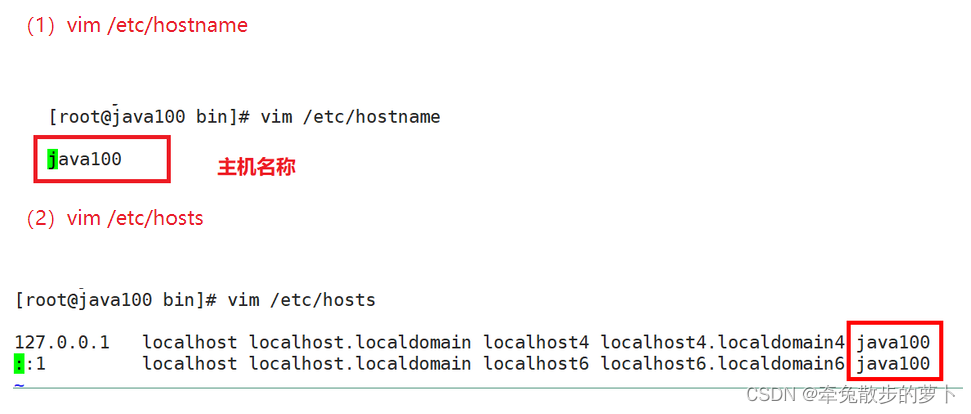
3. Modify the hostname
(1) vim /etc/hostname
4. Start RabbitMQ
systemctl start rabbitmq-server.service
systemctl status rabbitmq-server.service
systemctl restart rabbitmq-server.service
systemctl stop rabbitmq-server.service
5. View processes
ps -ef | grep rabbitmq
2.1.3. Testing
- Turn off the firewall: systemctl stop firewalld.service
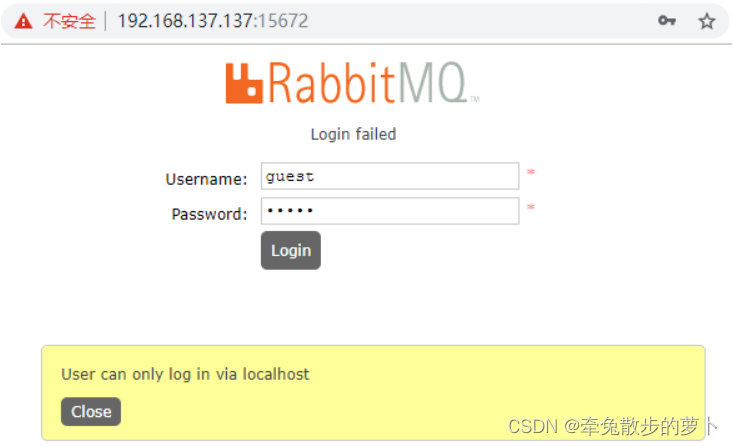
- Enter the address in your web browser: http://虚拟机ip:15672/
- Enter the default account password: guest : guest, guest users are not allowed to connect remotely by default.
Add customized account
- Add admin account password: rabbitmqctl add_user admin admin
- Assign account roles: rabbitmqctl set_user_tags admin administrator
- Change password: rabbitmqctl change_password admin 123456
- View the list of users: rabbitmqctl list_users
Login with new account, success screen
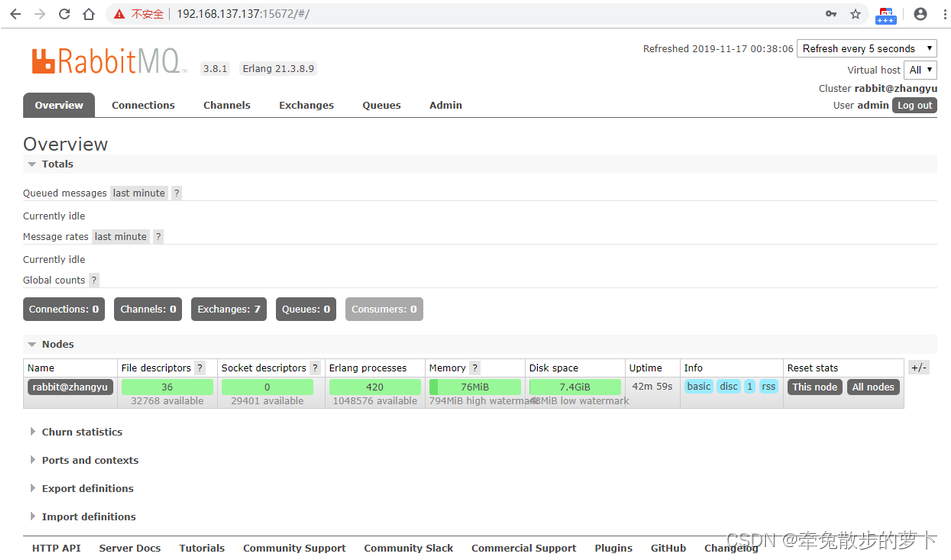
Introduction to the administration interface tab
- overview: overview
- connections: both producers and consumers need to establish a connection with RabbitMQ to complete the production and consumption of messages, where you can view the connection situation
- channels: channels, after the establishment of the connection, the channel will be formed, the delivery of the message to get dependent on the channel.
- Exchanges: switches, used to realize the message routing
- Queues: queues, that is, message queues, messages are stored in the queue, waiting for consumption, after consumption is removed from the queue.
Port: Port: **Port.
- 5672: programming language client connection port for rabbitMq
- 15672: rabbitMq management interface port
- 25672: port for rabbitMq clusters
2.1.4. Uninstallation
- rpm -qa | grep rabbitmq
- rpm -e rabbitmq-server
2.2. Management Interface
2.2.1. Adding Users
If we don't use guest, we can also create a user ourselves:

1、 Super Administrator (administrator)
You can log in to the management console, view all the information, and can operate on users and policies.
2、Monitoring
You can log in to the management console and view information about rabbitmq nodes (process count, memory usage, disk usage, etc.).
3, policymaker (policymaker)
You can log in to the management console and manage policies. However, they cannot view information about the nodes.
4、 Ordinary management (management)
Can only log in to the management console, cannot see node information, and cannot manage policies.
- Other
Cannot log in to the management console, usually are ordinary producers and consumers.
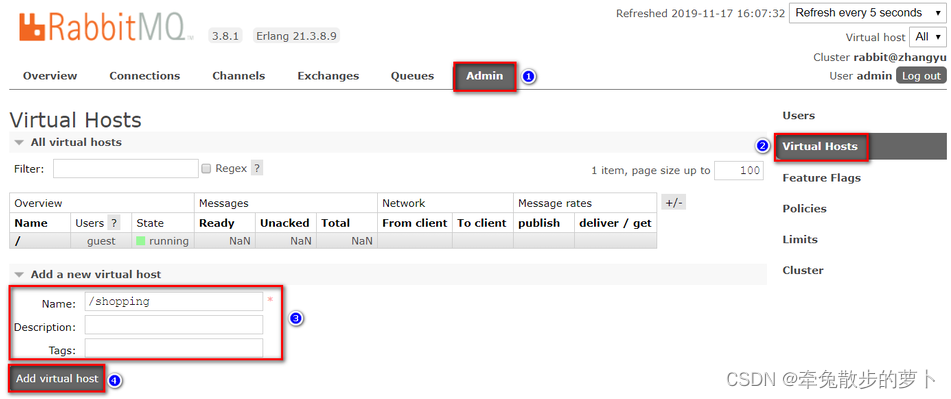
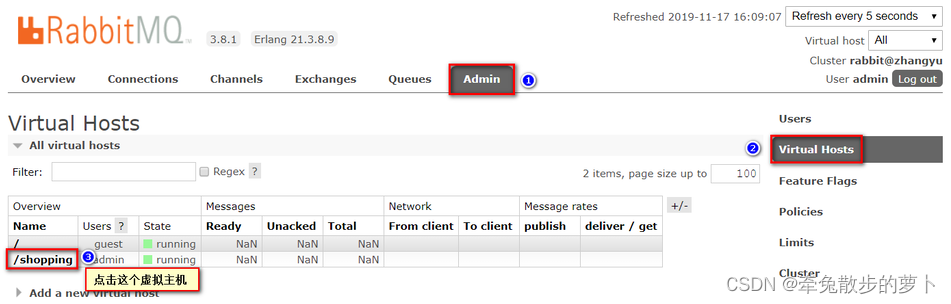
2.2.2. Creating Virtual Hosts
Virtual hosts: similar to database in mysql, they all start with "/".
2.2.3. Setting up permissions !
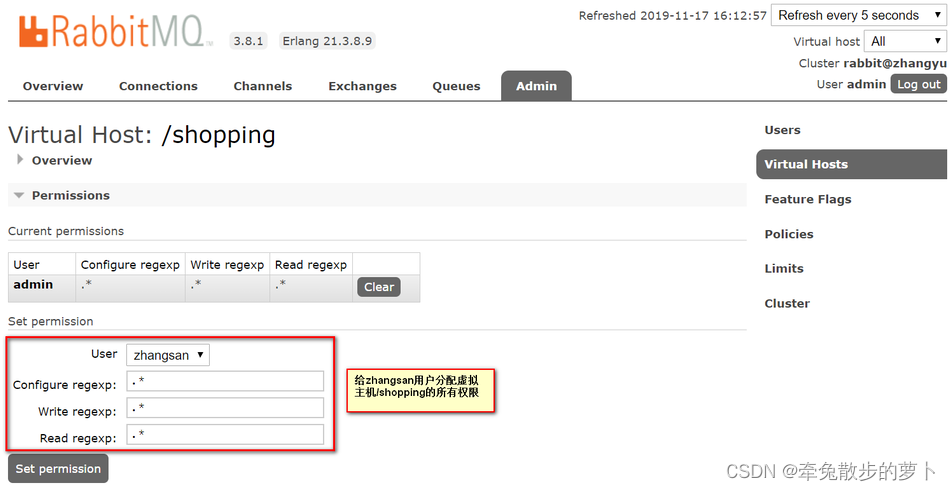 !
!
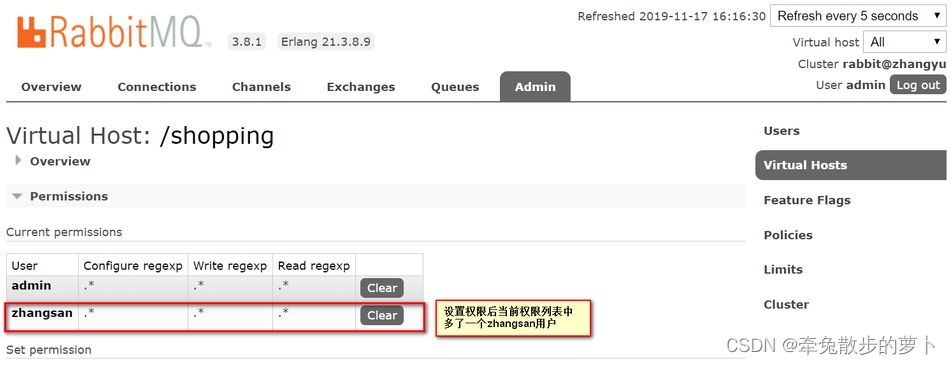 !
!