Apple ID login
Apple ID login
Apple login can be regarded as a third-party login , that is, using Apple ID to log in. The premise is that you already have an Apple developer account. Go directly to the topic.
Add App IDs
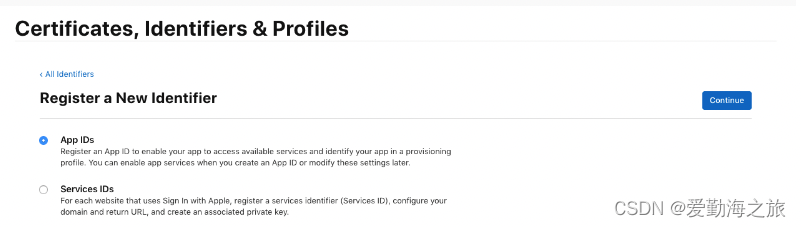
Fill in Bundle ID
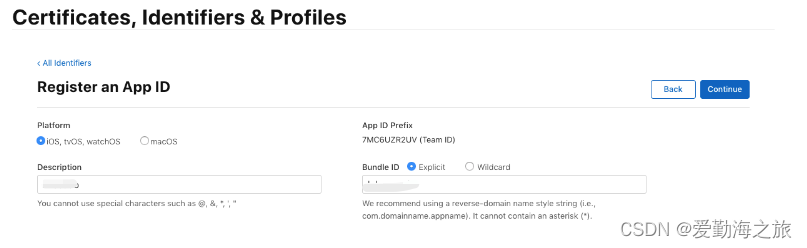
Check "Sign In with Apple"

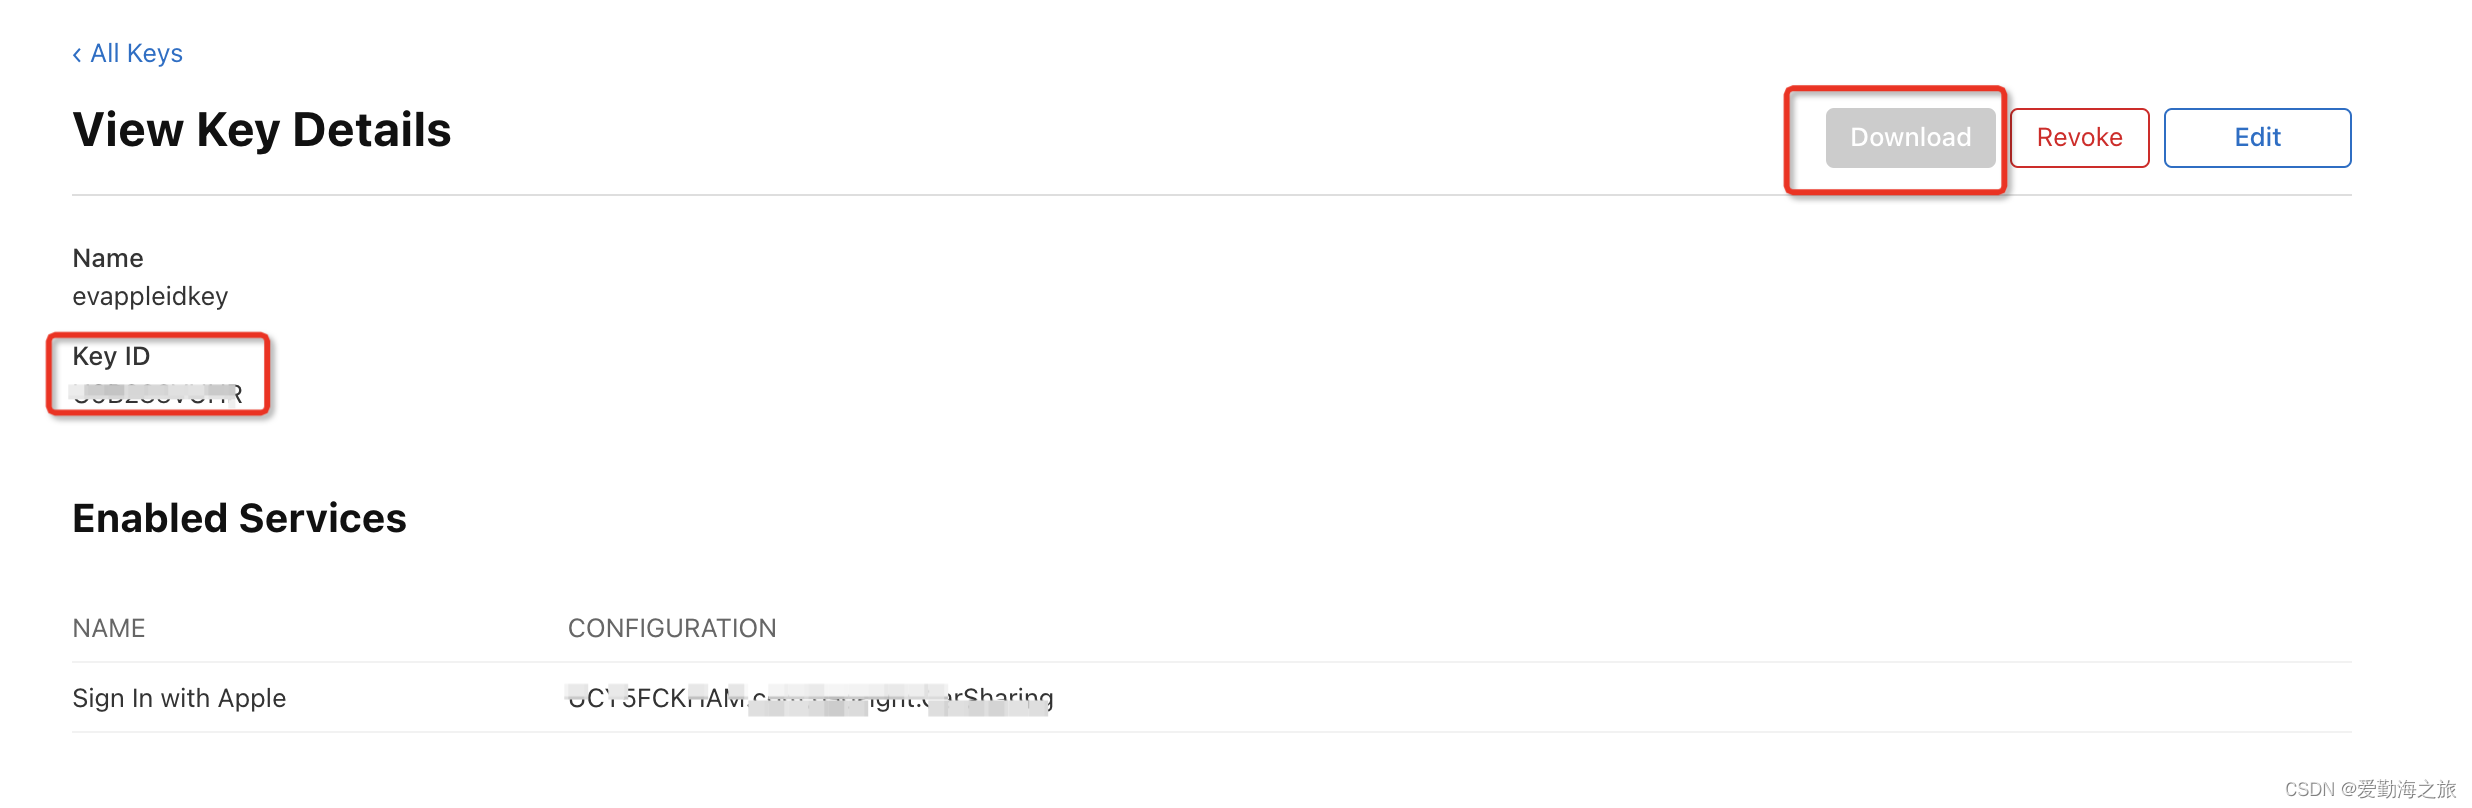
Create Key
Apple will use the public key/private key pair as the OAuth client secret, where the client secret is actually a signed JWT . The next step is to register a new one with Apple. 's private key.

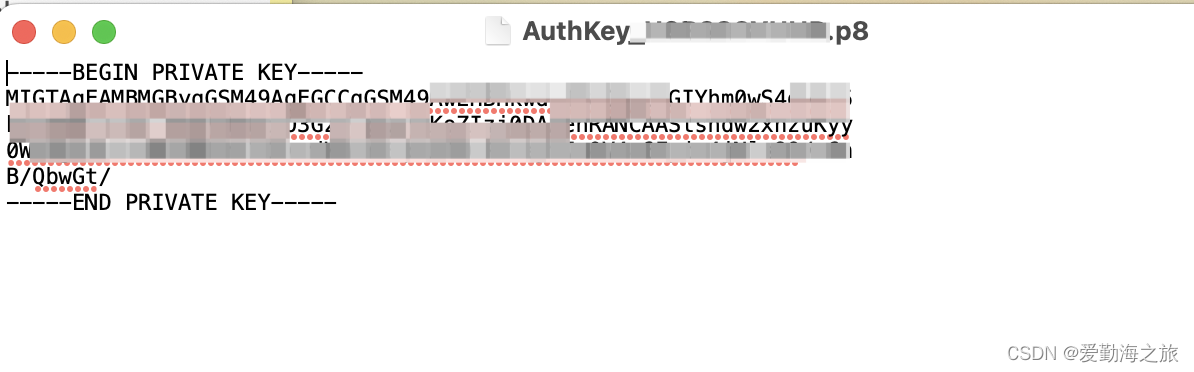
After the creation is completed, a Key IDkey file will be generated. Download the key file, which is actually a .p8file. Double-click to open this file, which contains the required key. This file is very important and can only be downloaded once. Please save it properly! ! !
Generate client secret (Client Secret)
Apple requires you to derive the client key from the private key yourself, rather than a static client key. They use the JWT standard, using the elliptic curve algorithm with P-256 curve and SHA256 hashing . In other words, they use the ES256JWT algorithm. Some JWT libraries do not support elliptic curve methods, so make sure your library supports elliptic curves before you start trying it. The RubyJWT library supports this algorithm, so we will use it to generate the secret.
First, make sure Ruby is installed, then run the following command from the command line to install the JWT gem:
gem install jwt
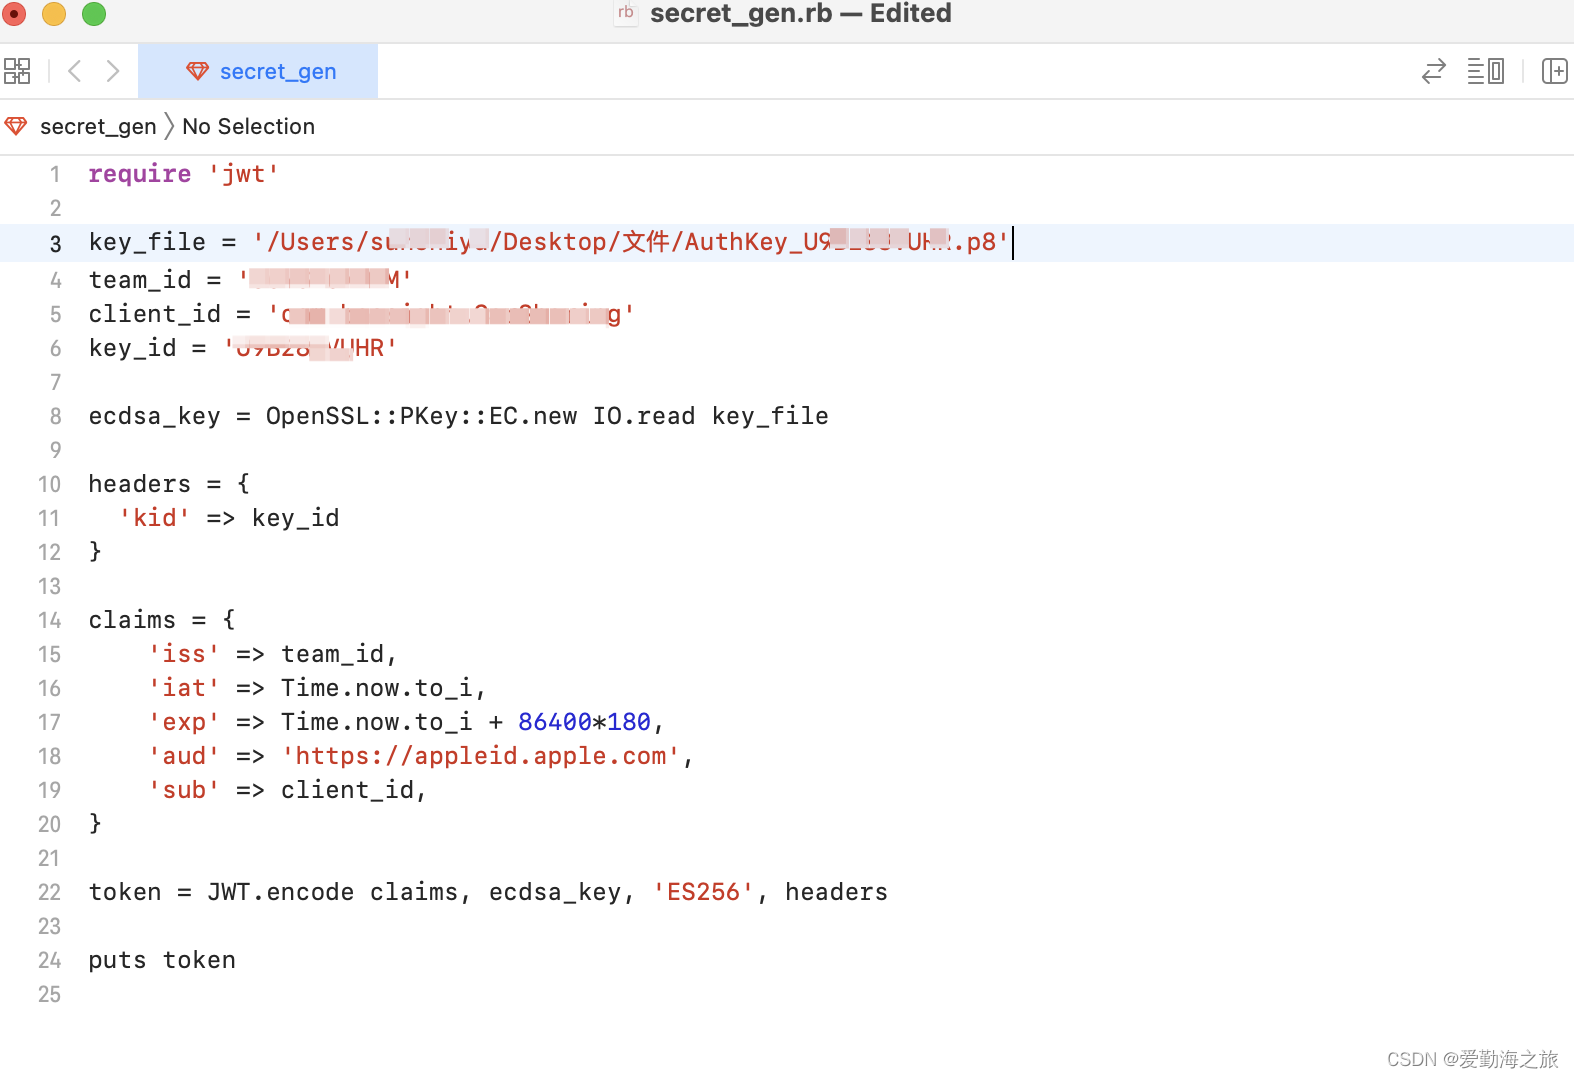
Bundle IDAccording to the , Team ID, Key ID, prepared above, (client key) AuthKey_xxx.p8can be generated . We simply create a file, name it , and then change the suffix to, that is . The template content is as follows:client_secret``txt``secret_gen``.rb``secret_gen.rb
require 'jwt'
key_file = ''
team_id = ''
client_id = ''
key_id = ''
ecdsa_key = OpenSSL::PKey::EC.new IO.read key_file
headers = {
'kid' => key_id
}
claims = {
'iss' => team_id,
'iat' => Time.now.to_i,
'exp' => Time.now.to_i + 86400*180,
'aud' => 'https://appleid.apple.com',
'sub' => client_id,
}
token = JWT.encode claims, ecdsa_key, 'ES256', headers
puts token

The code uses the ES256 algorithm to generate a JWT with a small number of declarations. JWT will expire in 6 months, which is the maximum allowed by Apple. If you generate a new client key JWT every time the user authenticates, you should use a shorter expiration date, but this allows us to generate the key once and use it easily in the sample application.
This will use the four data we have prepared, now you can run it from the command line and it will output a JWT:
[ruby](/search?q=ruby) xxx/xx/xx/secret_gen.rb
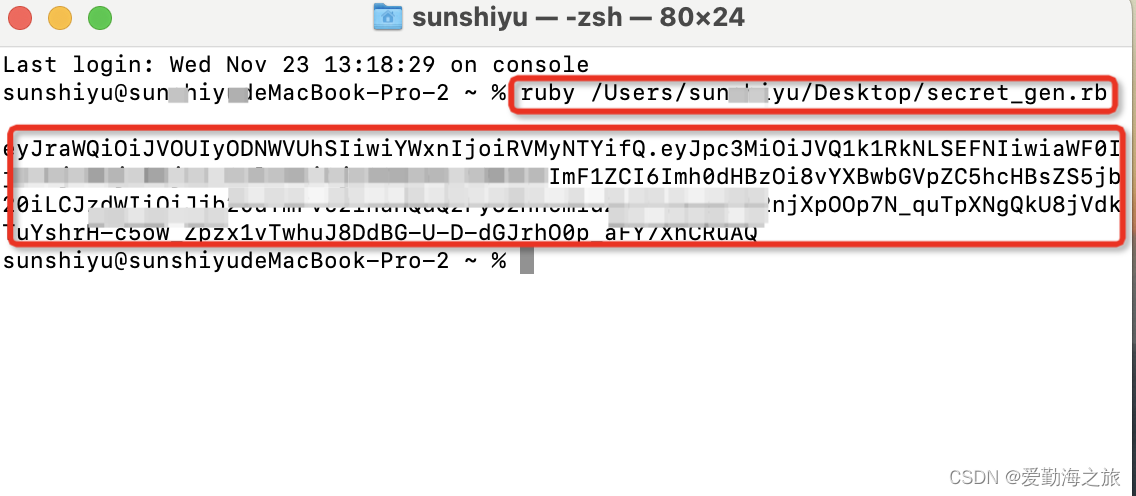
This eyJra.....RuAQis the client key we need. Next we verify whether this key is valid.
Configure Apple login in the project
First import the header file #import <AuthenticationServices/AuthenticationServices.h>, then call up the Apple authorization page
if (@available(iOS 13.0, *)) {
ASAuthorizationAppleIDProvider *appleIdProvider = [[ASAuthorizationAppleIDProvider alloc] init];
ASAuthorizationAppleIDRequest *authAppleIDRequest = [appleIdProvider createRequest];
/*
//Use ASAuthorizationPasswordRequest with caution.
//When ASAuthorizationPasswordRequest is enabled and you stop using your Apple ID (real phone-Settings-Accounts-Password and Security-Apps that use your Apple ID-App list-Discontinue using Apple ID, if there is no login information in the KeyChain and you sign in again with your Apple authorization ( If there is no login information in the KeyChain and you sign in with Apple authorization again (Sign in with Apple), an unknown error will be reported.
ASAuthorizationPasswordRequest* authPasswordRequest = [[[ASAuthorizationPasswordProvider alloc] init] createRequest];
NSMutableArray <ASAuthorizationRequest*> * array = [NSMutableArray arrayWithCapacity:2];
if(authAppleIDRequest) [array addObject:authAppleIDRequest];
if(authPasswordRequest) [array addObject:authPasswordRequest];
NSArray <ASAuthorizationRequest*> * requests = [array copy];
ASAuthorizationController* authorizationController = [[ASAuthorizationController alloc] initWithAuthorizationRequests:requests];
*/
authAppleIDRequest.requestedScopes = @[ASAuthorizationScopeFullName, ASAuthorizationScopeEmail];
//authorization request created by ASAuthorizationAppleIDProvider Controller that manages authorization requests
ASAuthorizationController* authorizationController = [[ASAuthorizationController alloc] initWithAuthorizationRequests:@[[ authAppleIDRequest]];
//Set up the authorization controller to notify the proxy of the success and failure of the authorization request
authorizationController.delegate = self;
//Set the delegate that provides the presentation context in which the system can present the authorization interface to the user.
authorizationController.presentationContextProvider = self; //set the proxy that provides the presentation context, in which the system can present the authorization screen to the user
// Start the authorization flow during controller initialization.
[authorizationController performRequests];
}

Agent callbackASAuthorizationControllerDelegate, ASAuthorizationControllerPresentationContextProviding
    //Successful authorization
    - (void)authorizationController:(ASAuthorizationController *)controller didCompleteWithAuthorization:(ASAuthorization *)authorization API_AVAILABLE(ios(13.0))
    {
        NSString *userID = nil;
        NSString *userName = nil;
        NSString *userEmail = nil;

        EVAppleLoginCredentialModel *model = [[EVAppleLoginCredentialModel alloc] init];

        if ([authorization.credential isKindOfClass:[ASAuthorizationAppleIDCredential class]]) {

            ASAuthorizationAppleIDCredential *credential = authorization.credential;

            // Apple user unique identifier, the value is the same for all apps under the same developer account, developers can use this unique identifier to bind with their own backend system's account system.
            userID = credential.user;

            // Apple user information If authorized, can not get this information again
            userEmail = credential.email;
            NSPersonNameComponents *fullName = credential.fullName;
            userName = [NSString stringWithFormat:@"%@%@", fullName.familyName, fullName.givenName];

            //Used to determine if the currently logged in Apple account is a real user, with the following values: unsupported, unknown, likelyReal.
            ASUserDetectionStatus realUserStatus = credential.realUserStatus; //Server verification parameters to be used.

            // Parameters to be used for server authentication
            NSString *authorizationCode = [[NSString alloc] initWithData:credential.authorizationCode encoding:NSUTF8StringEncoding];
            NSString *identityToken = [[NSString alloc] initWithData:credential.identityToken encoding:NSUTF8StringEncoding];

            NSLog(@"authorization [ASAuthorizationAppleIDCredential] successfully");
            NSLog(@"authorization userID: %@", userID);
            NSLog(@"authorization userName: %@", userName);
            NSLog(@"authorization userEmail: %@", userEmail);
            NSLog(@"authorization realUserStatus: %@", @(realUserStatus));
            NSLog(@"authorization authorizationCode: %@", authorizationCode);
            NSLog(@"authorization identityToken: %@", identityToken);

        } else if ([authorization.credential isKindOfClass:[ASPasswordCredential class]]) {
            //User login uses existing password credentials
            ASPasswordCredential *passwordCredential = authorization.credential;

            User identification of the //Password Credentials object User's unique identification and password
            userID = passwordCredential.user;
            NSString *password = passwordCredential.password;

            NSLog(@"authorization [ASPasswordCredential] successfully");
            NSLog(@"authorization userID: %@", userID);
            NSLog(@"authorization password: %@", password);

            model.user = passwordCredential.user;

            userName = @"";
            userEmail = @"";

        } else {
            assert(0);
        }

        //After the data verification passes, send the data to the server for verification and wait for the server's response.
        //If the user chooses to hide the mailbox, the email can not be obtained, and other data is normal, the server side matches the standard userID.
        if (![ZJUtils isEmpty:userID]) {

            // In the authorization success callback to get the parameters needed by the server to pass to the background
            //At this point we need to do has been completed, see the backend of the validation on the line
            if (self.appleLoginBlock) {
                self.appleLoginBlock(0, @"苹果授权成功", model);
            }

        } else {
            //Authorization data anomalies
            if (self.appleLoginBlock) {
                self.appleLoginBlock(-1, @"苹果授权失败", nil);
            }
        }
    }

    //Authorization failure
    - (void)authorizationController:(ASAuthorizationController *)controller didCompleteWithError:(NSError *)error API_AVAILABLE(ios(13.0))
    {
        NSString *errorMsg = nil;
        UIWindow *window = [UIApplication sharedApplication].keyWindow;
        switch (error.code) {
            case ASAuthorizationErrorCanceled:
                errorMsg = @"The user canceled the authorization request.";
                break;
            case ASAuthorizationErrorFailed:
                errorMsg = @"The authorization request failed";
                break;
            case ASAuthorizationErrorInvalidResponse:
                errorMsg = @"Authorization request response invalid";
                break;
            case ASAuthorizationErrorNotHandled:
                errorMsg = @"Failed to handle authorization request";
                break;
            case ASAuthorizationErrorUnknown:
                errorMsg = @"Authorization request failed for unknown reason";
                break;
        }
        NSLog(@"Apple Authorization Status:%@", errorMsg);
    }

    #pragma mark ASAuthorizationControllerPresentationContextProviding
    - (ASPresentationAnchor) presentationAnchorForAuthorizationController:(ASAuthorizationController *)controller API_AVAILABLE(ios(13.0))
    {
        return self.view.window;
    }
![]() In
In - (void)authorizationController:(ASAuthorizationController *)controller didCompleteWithAuthorization:(ASAuthorization *)authorizationthe callback we get authorizationCodethe verification parameters.
Open postman and let’s test:
https://appleid.apple.com/auth/token?client_id=xxx&client_secret=xxx&code=xxx&grant_type=authorization_code&redirect_uri=https://appleid.apple.com
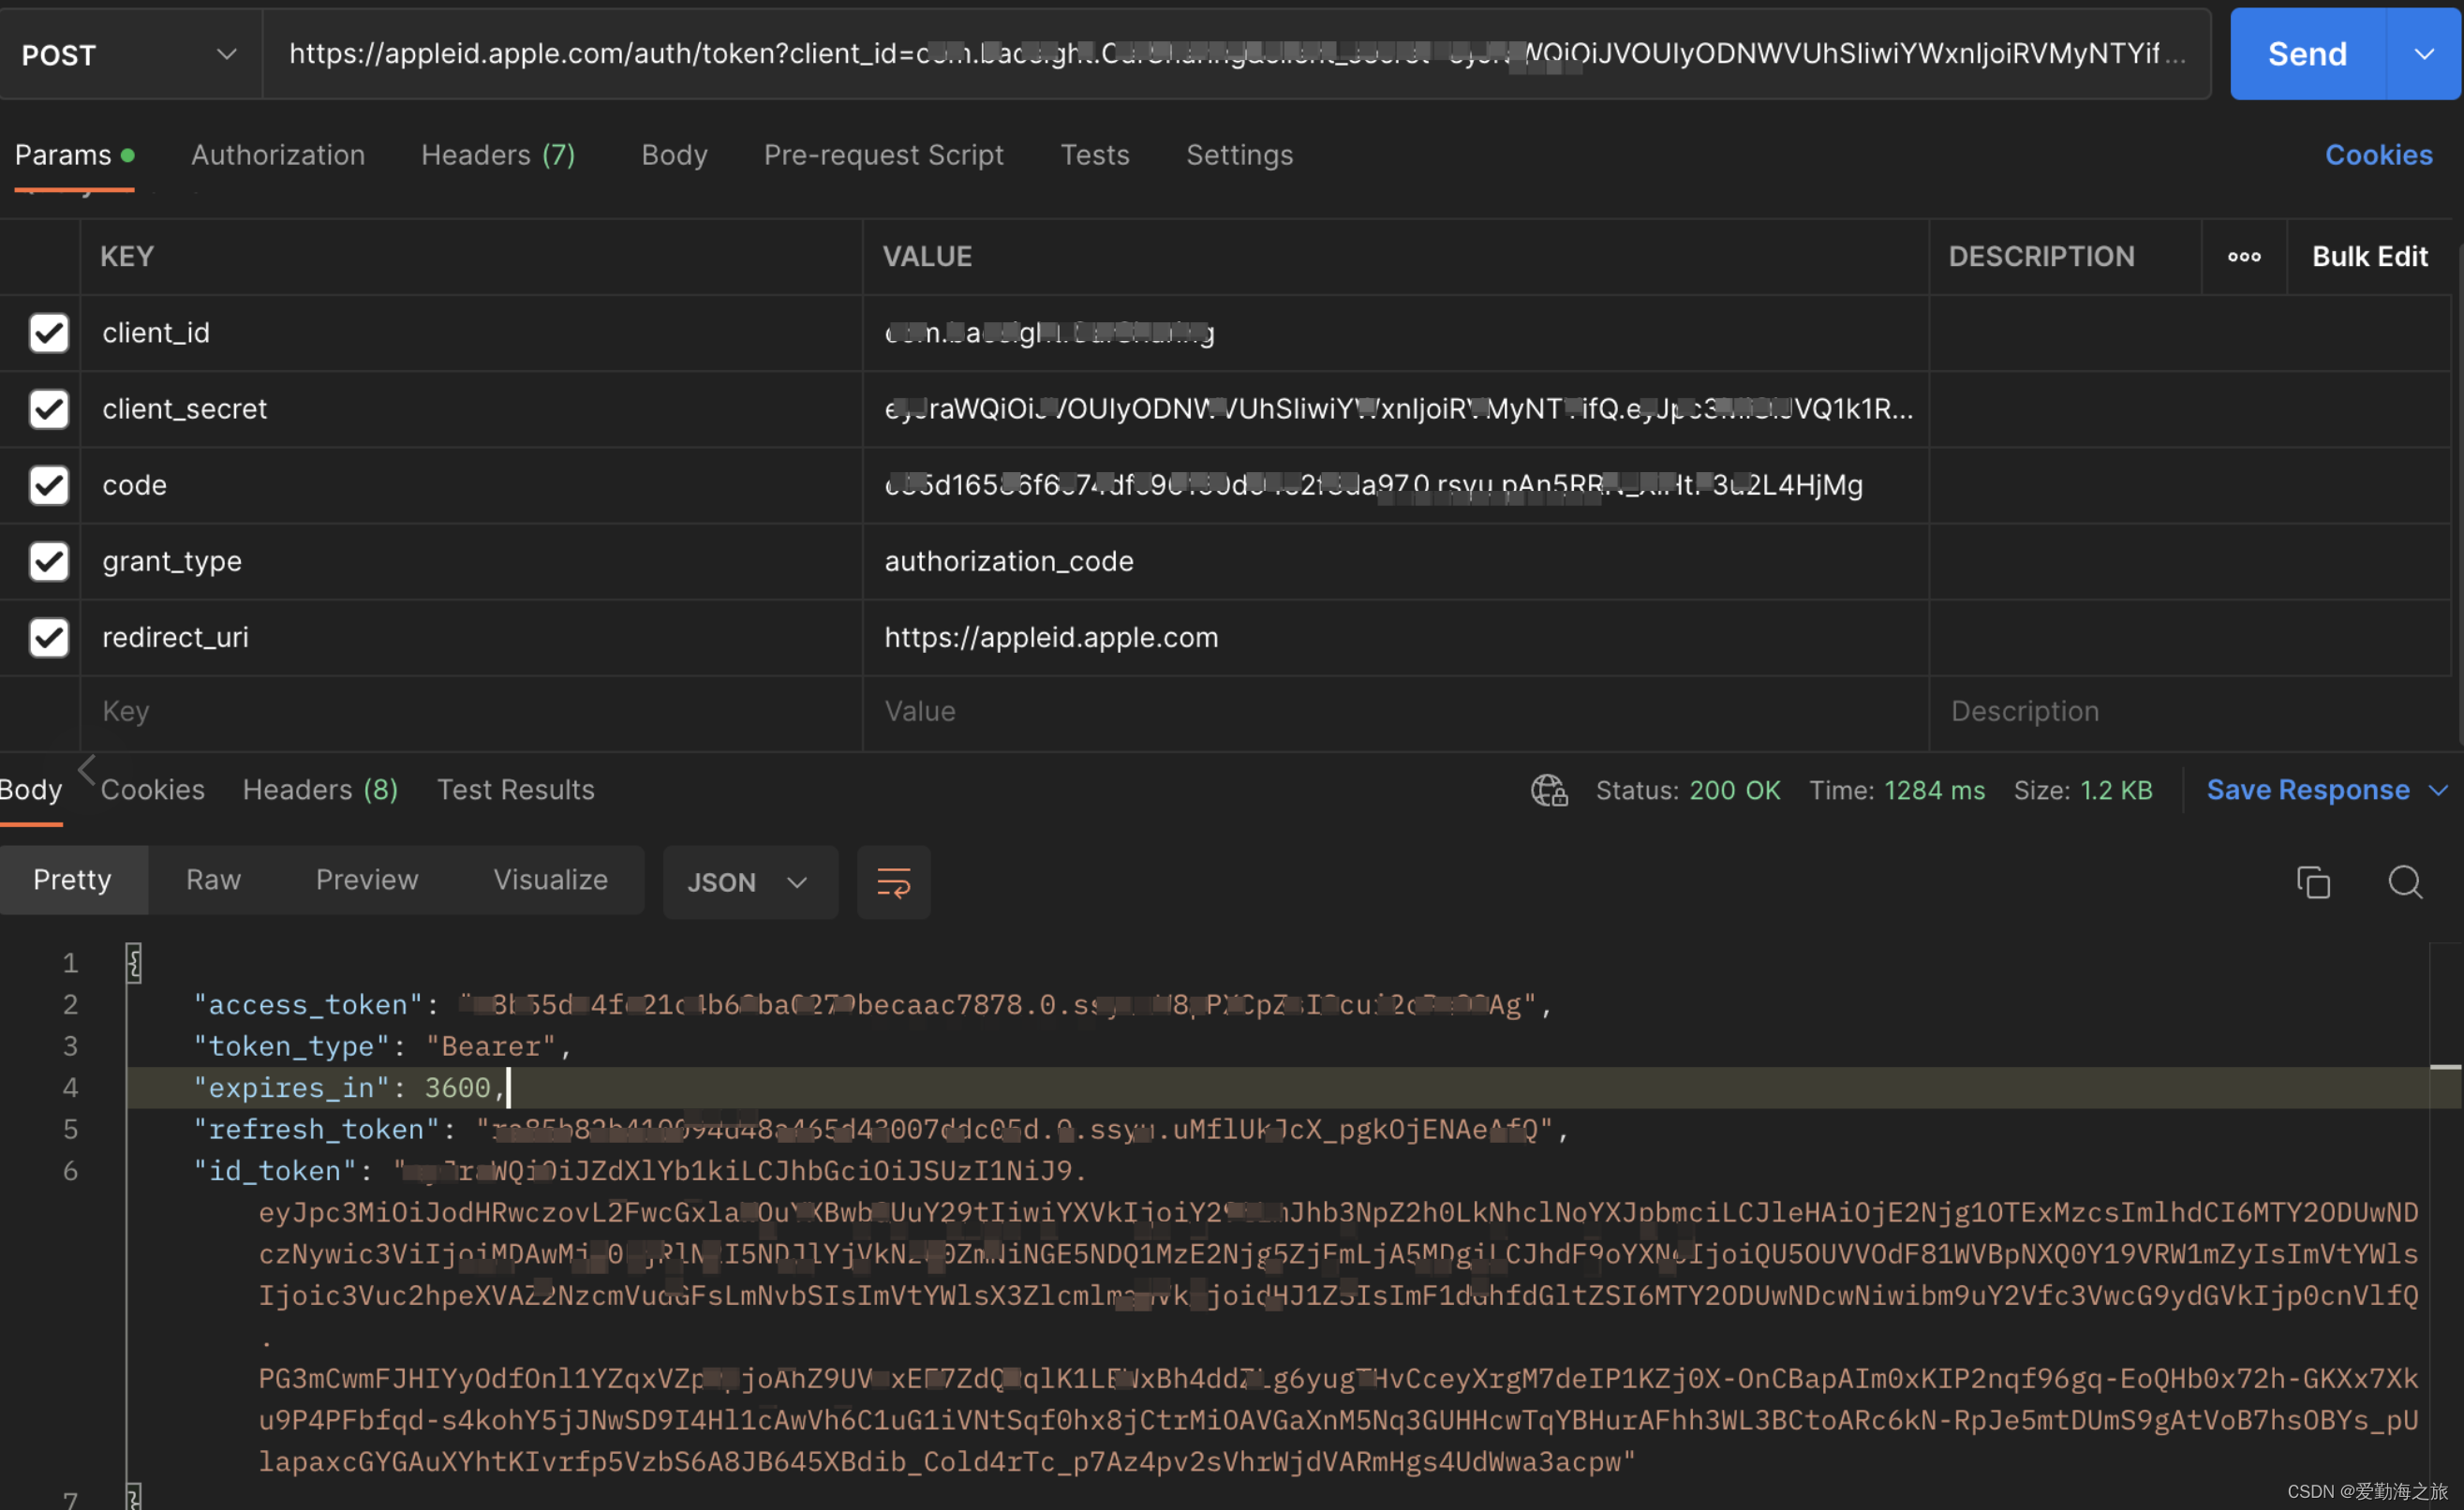
This is basically complete. In fact, most of the work of Apple login is done in the background, including client_secretgeneration, etc. Our client only needs to get the data authorized by Apple and give it to the backend, and the backend will do the verification.
Reference: What the Heck is Sign In with Apple?