【Untitled】
【Untitled】
Spring Boot integrates RabbitMQ to implement delayed messages
About RabbitMQ
Message Queuing (Message Queuing, abbreviated as MQ) was originally created to solve specific business needs in the financial industry. Slowly, MQ was applied to more fields. However, the high price of commercial MQ discouraged many start-up companies, so AMQP (Advanced Message Queuing Protocol) came into being.
Following the release of the AMQP draft, RabbitMQ 1.0 was released two months later.
The architectural model of RabbitMQ can be divided into two parts: client and server. The client includes producers and consumers, and the server includes virtual hosts, switches and queues.
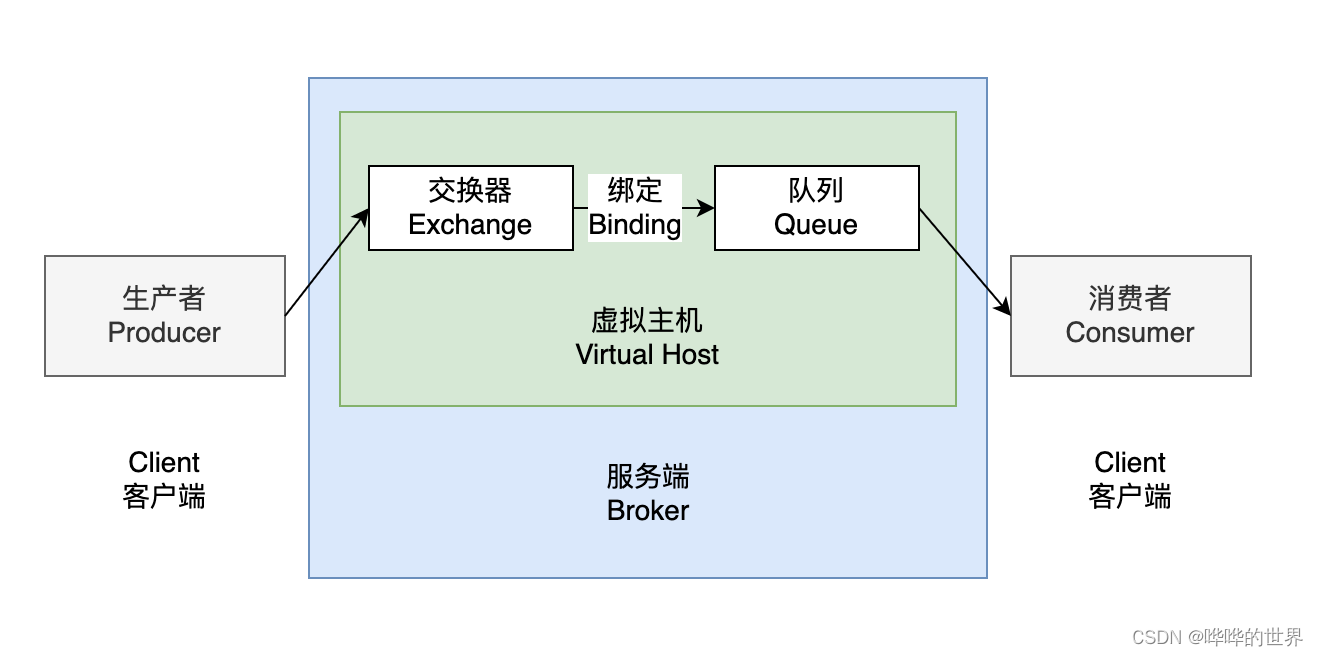
The overall process is very simple. The producer sends the message to the server, and the consumer obtains the corresponding message from the server.
Before sending a message, the producer needs to confirm which exchange it is sending to which virtual host, and then the exchange forwards the message to the queue bound to it through the routing key.
Finally, the consumer obtains its own message from the designated queue for consumption.
Client
Both producers and consumers belong to the client.
Producer: The sender of the message, encapsulates the message to be sent into a certain format and sends it to the server. Messages include message bodies and labels.
Consumer: The receiver of the message, responsible for consuming the message body.
Server
Virtual hosts, switches, and queues all belong to the server.
Virtual host: used to logically isolate switches and queues. Under the same virtual host, the names of switches and queues cannot be repeated. It is somewhat similar to packages in Java. There cannot be classes or interfaces with the same name under the same package.
Exchanger: Responsible for receiving messages from producers and assigning them to corresponding queues according to rules. It does not produce messages, but is just a porter of messages.
Queue: Responsible for storing messages. Messages sent by producers will be placed here and consumers will take them from here.
Connection and channel
Connection and channel are two different concepts. The English name for connection is connection, and the channel is called channel.
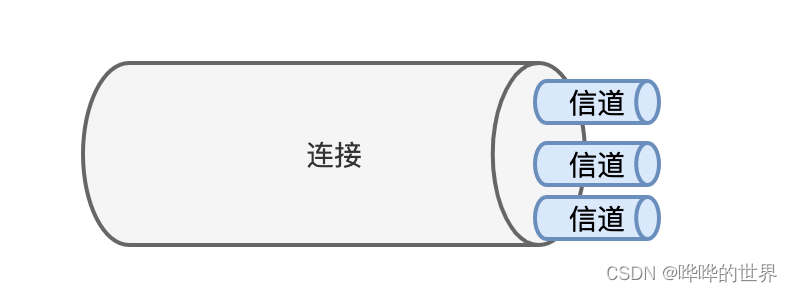
The connection contains multiple channels, and the connection uses a TCP connection, because AMQP is implemented using TCP.
Why not use the connection directly, but create a new channel based on the connection?
Because TCP connections are relatively expensive, they require three handshakes to create and four waves to destroy. Therefore, if each thread creates a new TCP connection when sending/receiving messages to the RabbitMQ server, it will consume a lot of resources, so There is a channel.
Channels are thread-private and connections are thread-shared.
The channel + connection mode not only ensures the privacy between threads, but also reduces system overhead.
Business scenario
There are three main functions of the message queue:
●Asynchronous processing. For example, when doing e-commerce business, the action of submitting an order may involve creating an order, deducting inventory, increasing user points, sending order emails, etc. They are not a serial operation, and sending order emails and increasing user points can be left to the message queue.
●System decoupling, the message queue can serve as a bridge between different systems and is not constrained by the system technology stack.
●Buffering and peak shaving, the message queue can put a large number of requests into the queue, and then hand them over to the business server for processing according to certain order rules.
Working Mode
RabbitMQ supports 7 working modes:
● Simple mode
● Work queue mode
● Broadcast mode
● Routing mode
● Dynamic routing mode
● Remote mode
● Producer confirmation mode
We only demonstrate the first three here.
Simple mode
Simple mode is really super simple , the producer sends the message to the queue, and the consumer obtains the message queue from the queue.
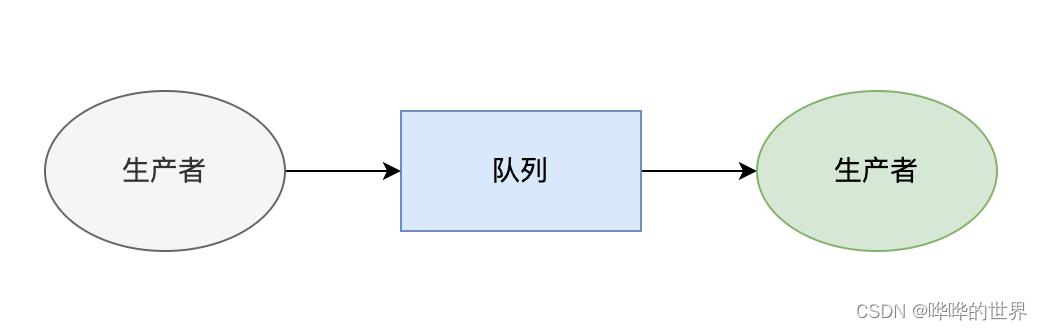
In life, it is similar to the courier putting the package in the express cabinet, and then sending a pick-up code to the pick-up person. The pick-up person uses the pick-up code to pick up the package from the express cabinet📦.
Work queue mode
The work queue mode is essentially just a queue than the simple mode, and the consumer changes from one to multiple. The producer puts the message into the queue, and multiple consumers consume it at once.
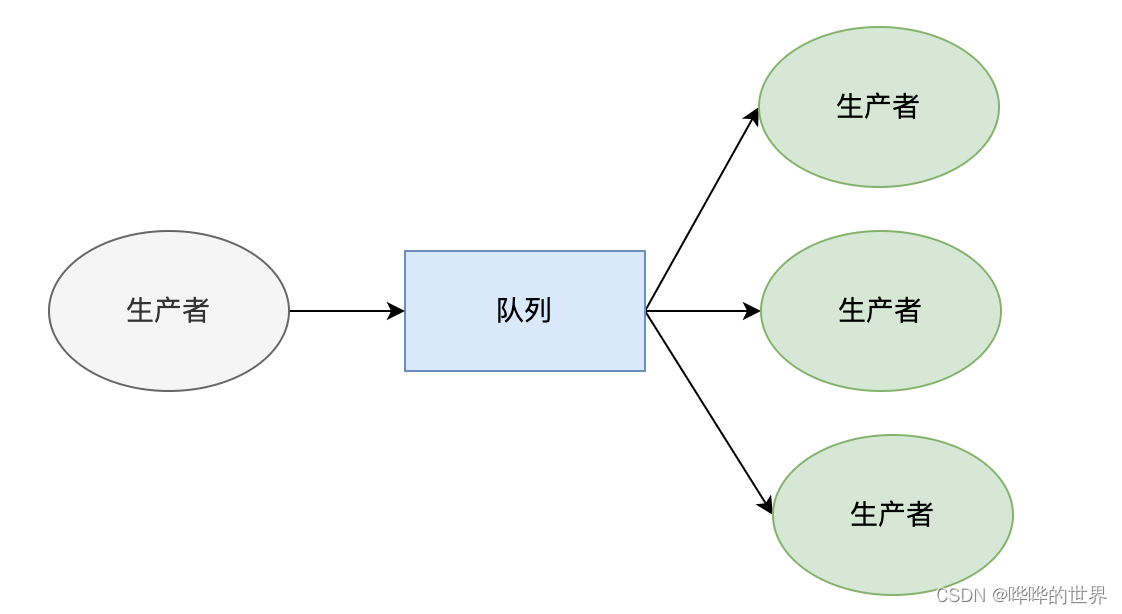
For example, if there are 3 consumers and the producer sends 3 messages to the queue, no one of the 3 consumers will consume a single message, which is a bit like rain and dew.
Of course, you can also configure it to change it to a mode where those who can do more work can do more work.
Broadcast mode
is different from the work queue mode, the broadcast mode involves the exchanger. In the broadcast mode, even if the producer only produces one message, all its corresponding consumers can receive it, which is truly fair, just and open. 😃.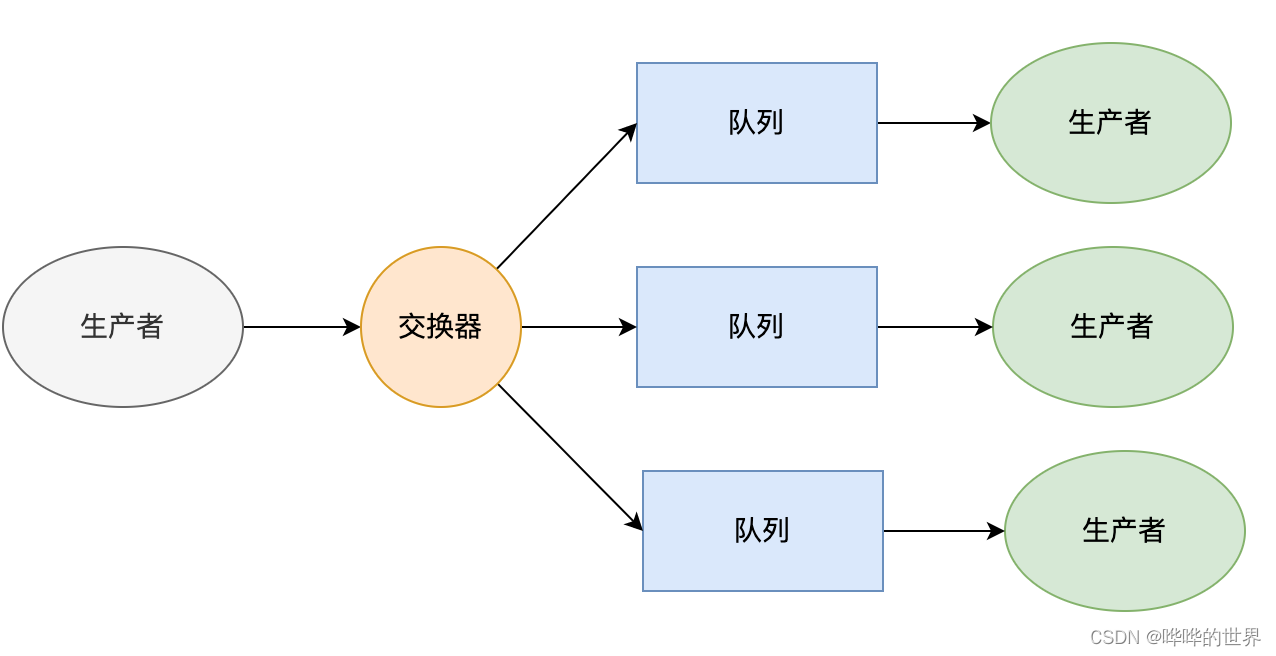
Install and configure RabbitMQ. For
the installation method of RabbitMQ, please refer to the official website:
Downloading and Installing RabbitMQ — RabbitMQ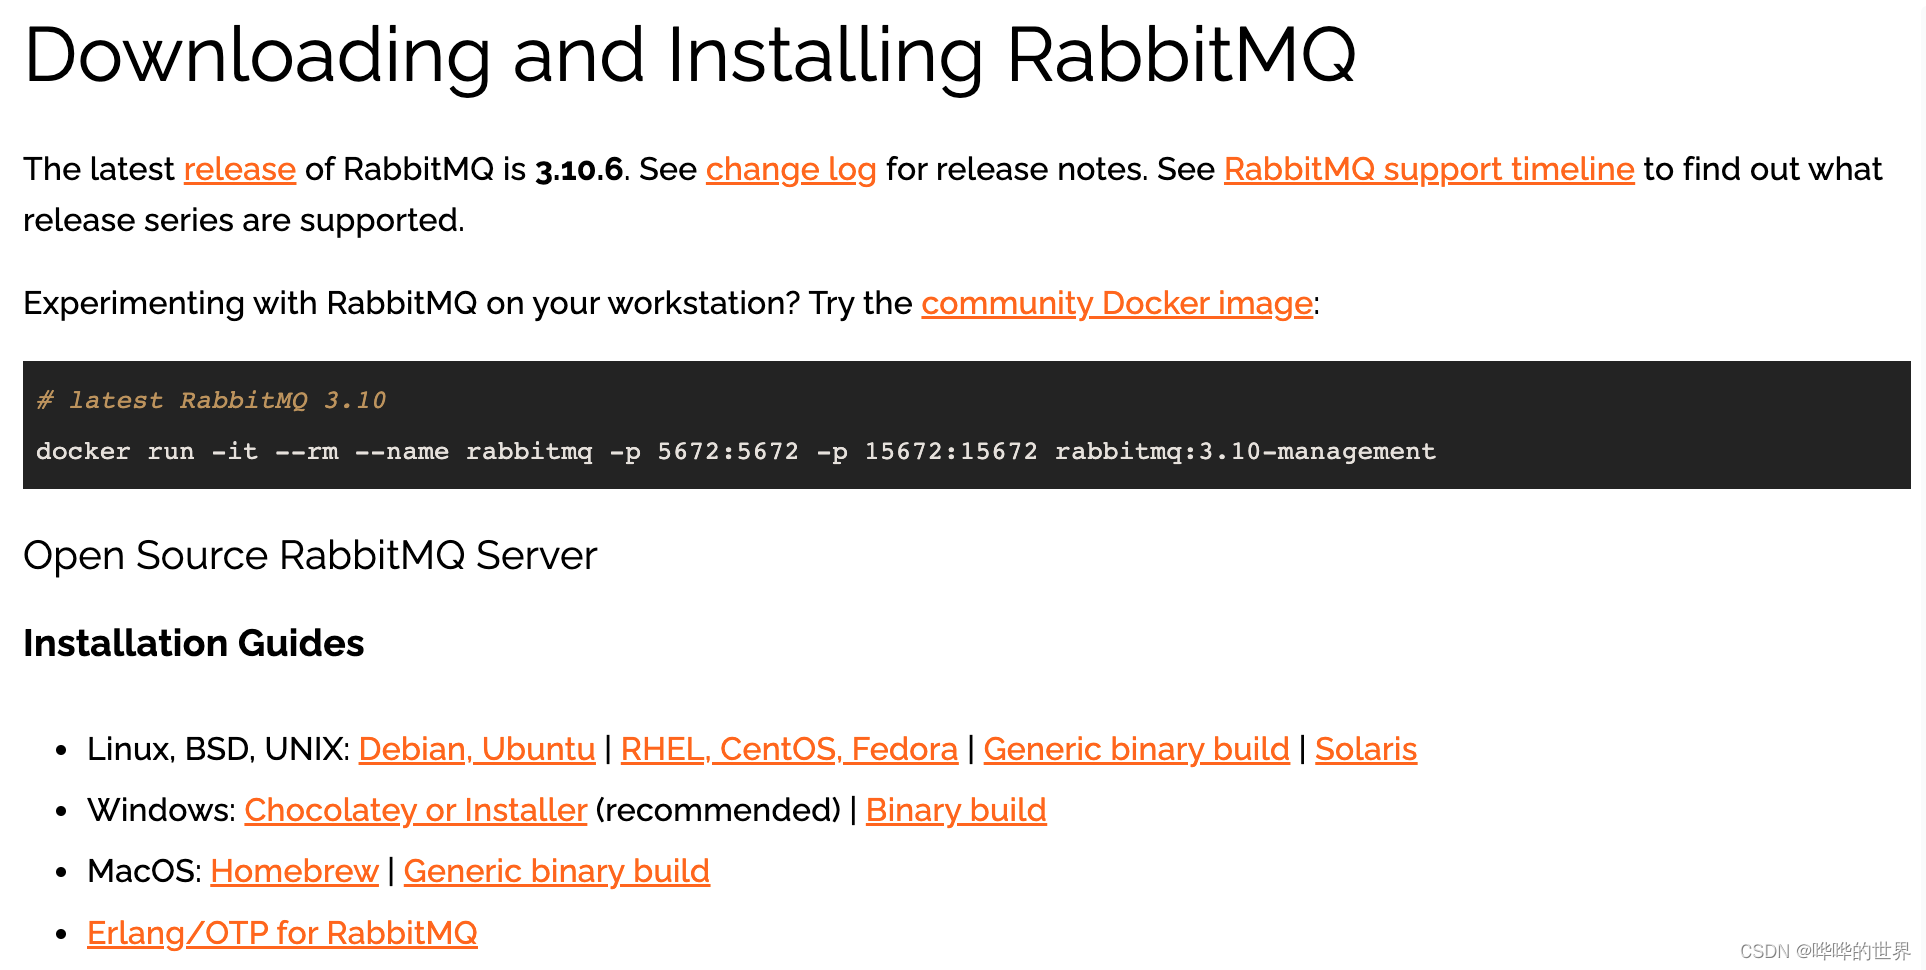
It contains a variety of installation methods, such as Docker, installer and chocolatey for Windows users, and Homebrew for macOS users .
I'm taking Mac as an example here.
Execute brew update to update homebrew.
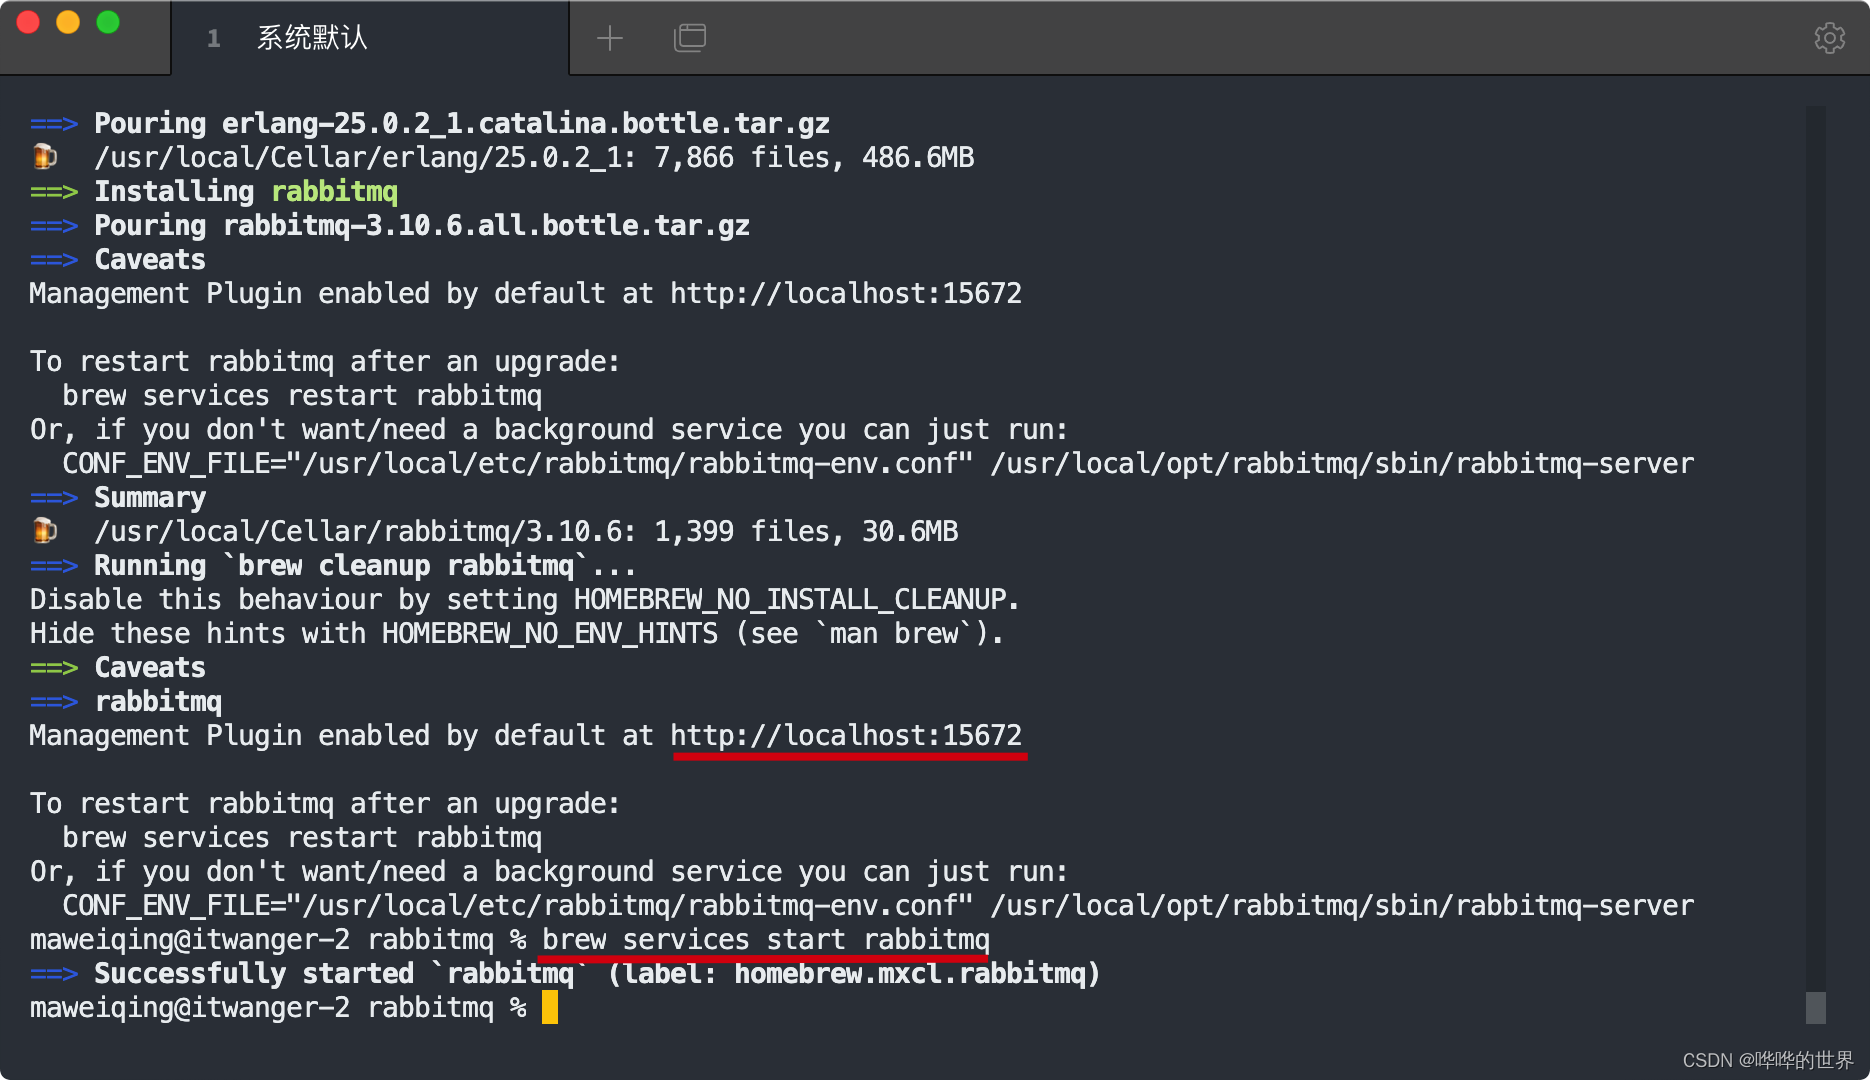
Execute brew install rabbitmq to install RabbitMQ.
You can see that RabbitMQ depends on erlang (Erlang is a multi-purpose programming language mainly used for developing concurrent and distributed systems), because RabbitMQ is written in erlang.
Execute brew services start rabbitmq to start the RabbitMQ service.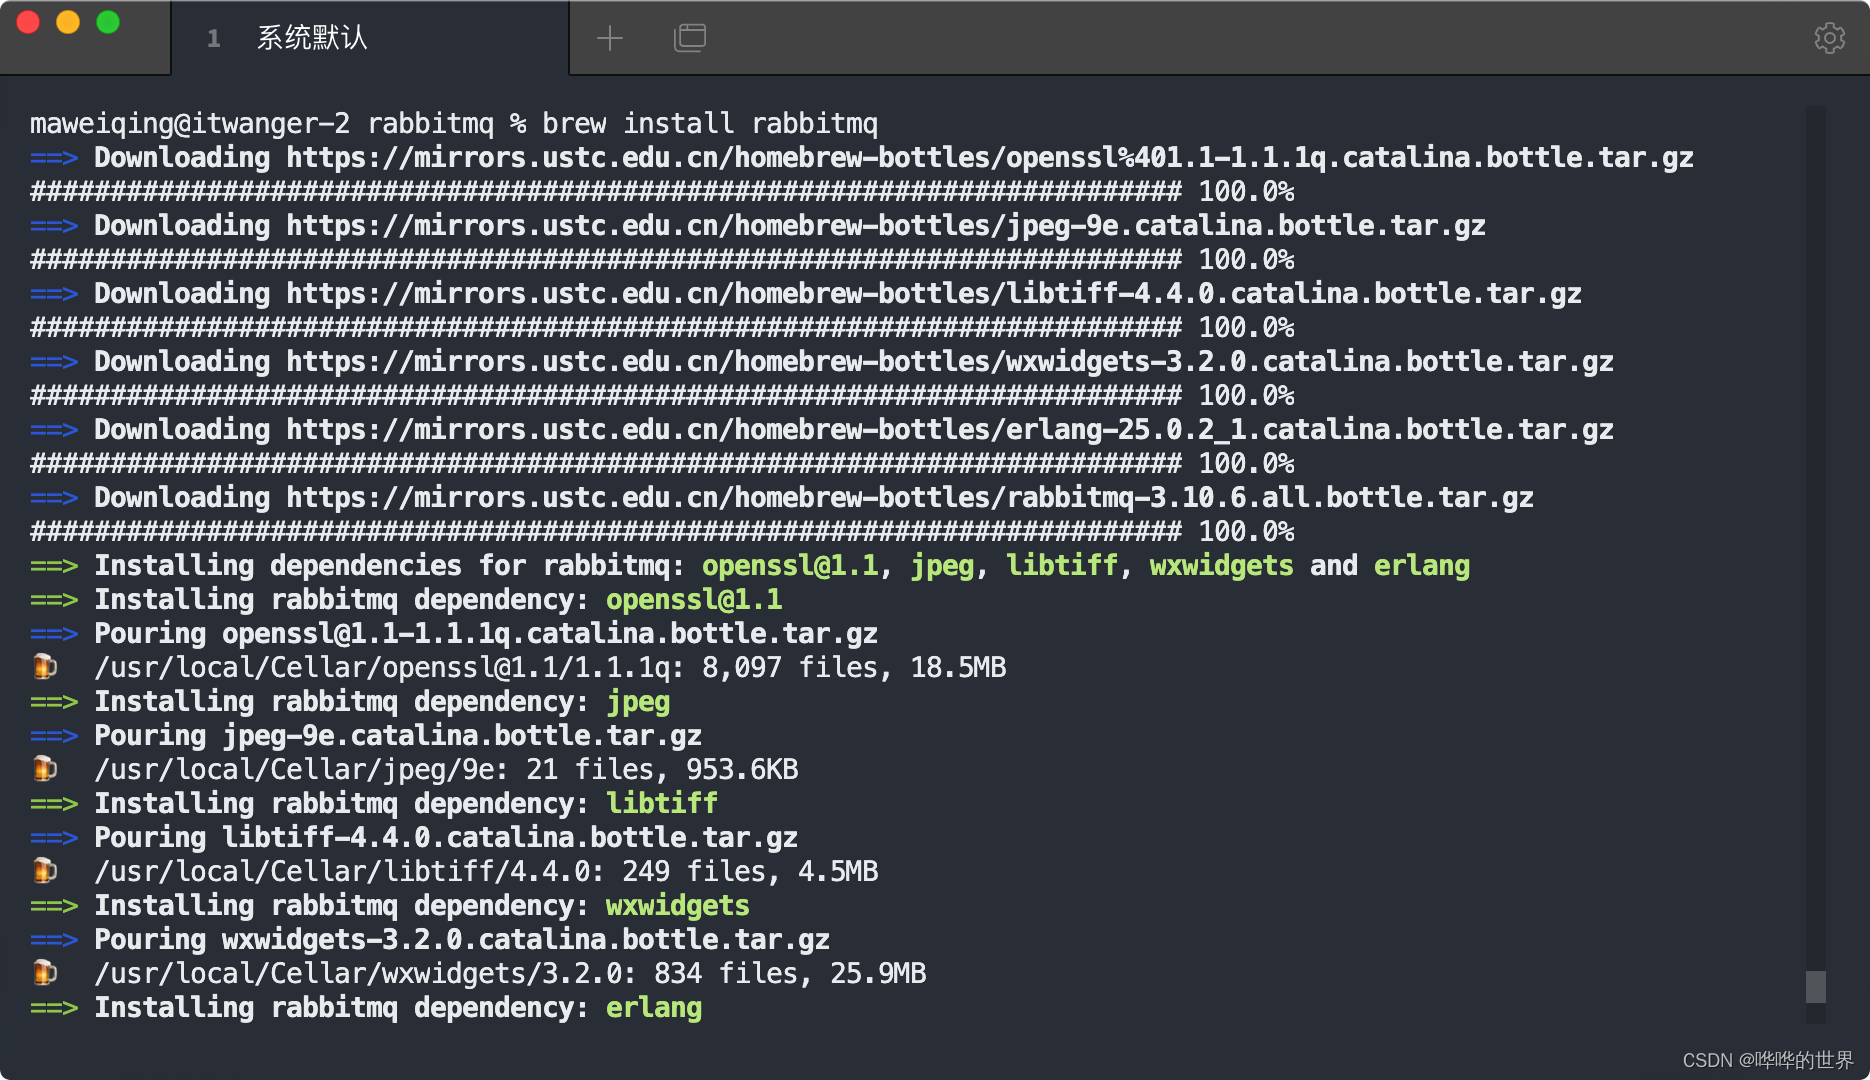
In the tabby terminal, you can directly click http://localhost:15672 to open the RabbitMQ backend management page (the default username and password are guest).
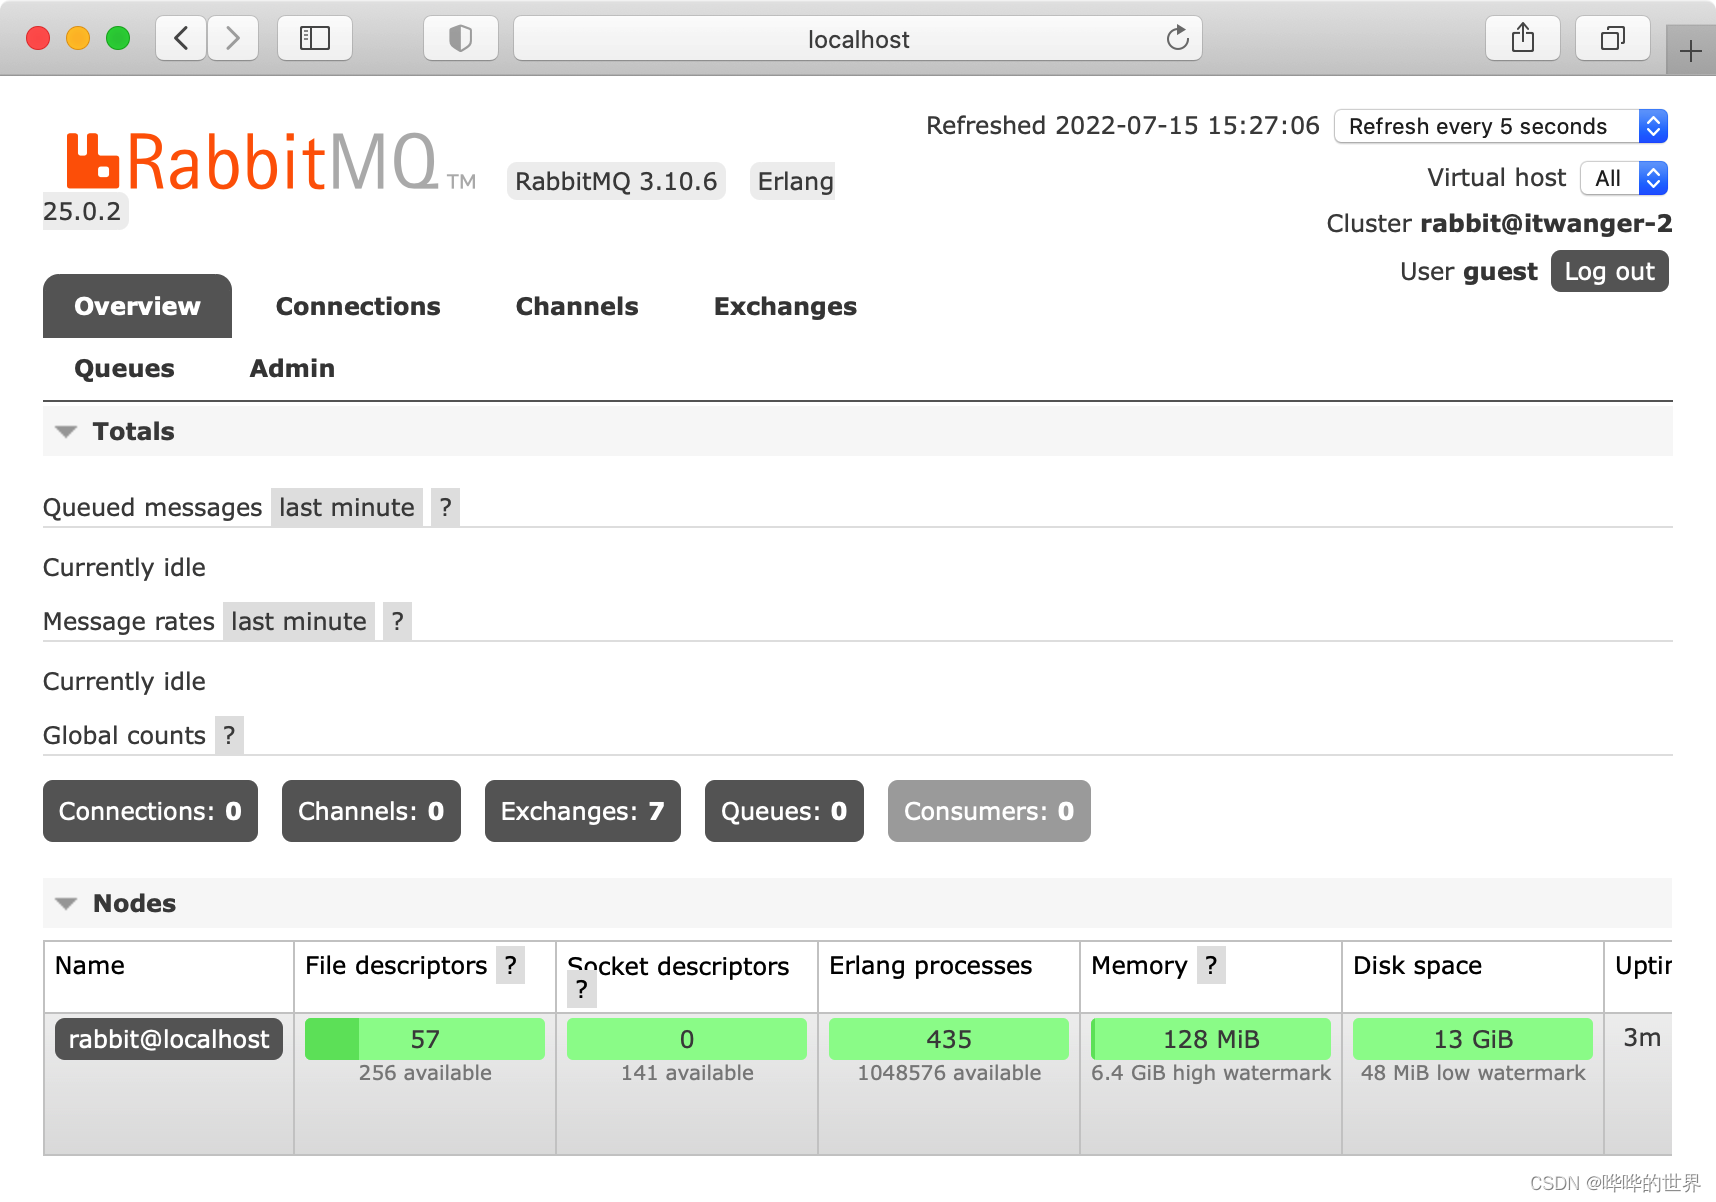
●Server data statistics - message delivery status, as well as the number of connections, channels, switches, queues, consumers
●RabbitMQ node information - erlang process, memory, disk space, etc.
●Port and Web information
●. . .
We click on the admin panel and click on the virtual host to create a new virtual host for codingmore.
And create a new user admin:
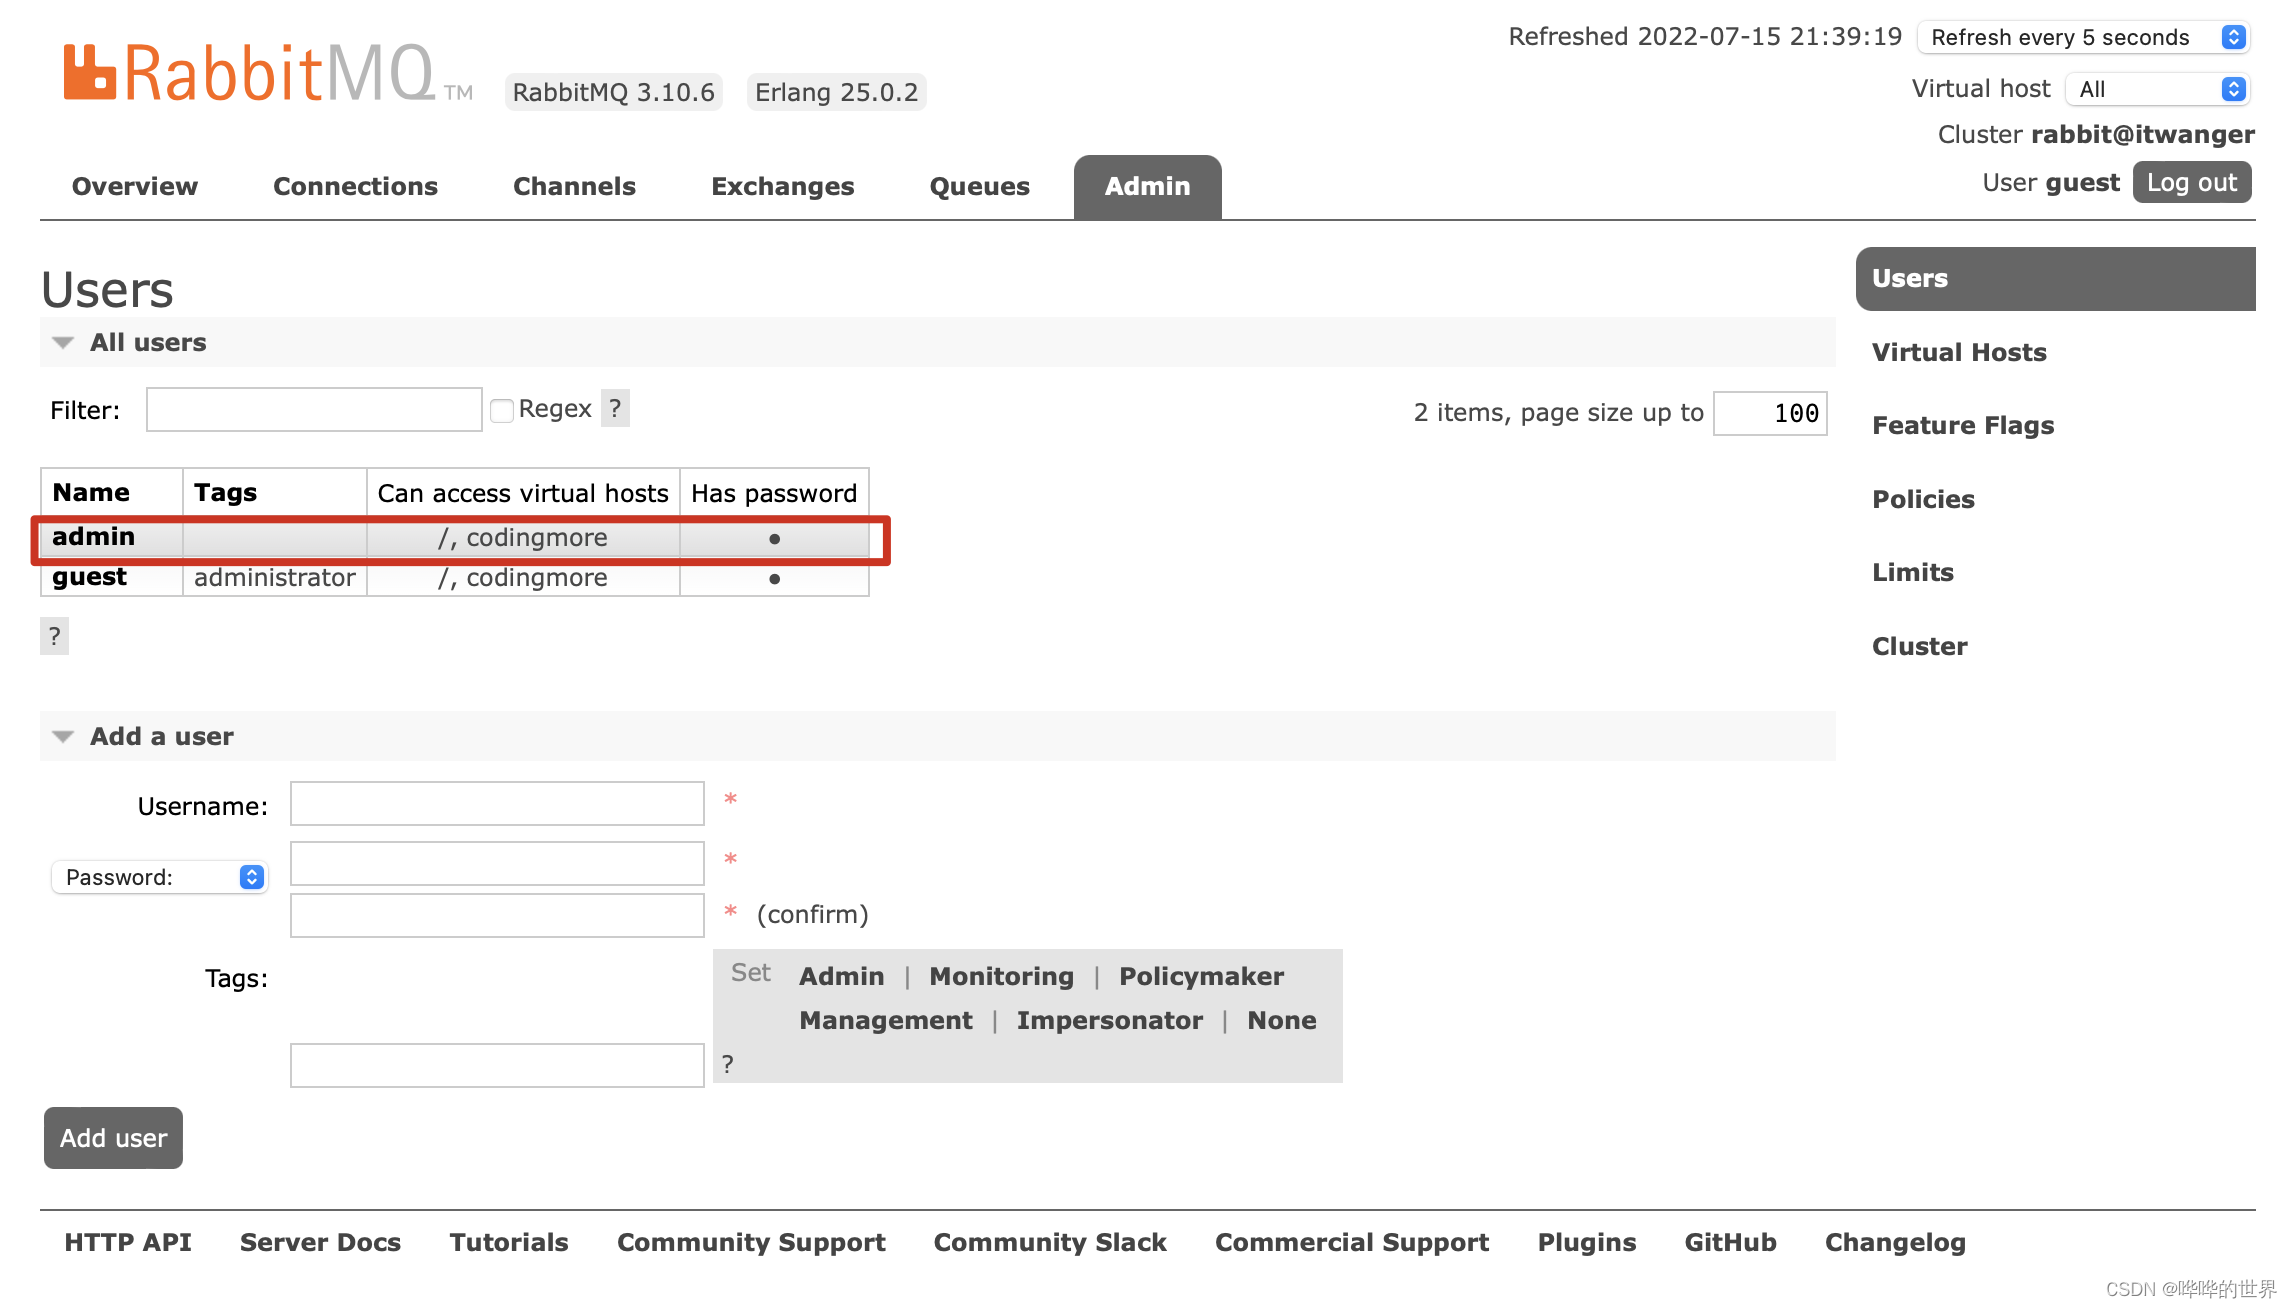
and set its permissions.
The first step to integrate RabbitMQ
is to add the starter dependency of RabbitMQ in the pom.xml file.
      2.     <groupId>org.springframework.boot</groupId>

      3.     <artifactId>spring-boot-starter-amqp</artifactId>

      4. </dependency>
The second step is to add the RabbitMQ configuration in the application.yml file.
      2.   rabbitmq:

      3.     host: 127.0.0.1

      4.     port: 5672

      5.     username: admin

      6.     password: admin

      7.     virtual-host: codingmore
Simple mode
The third step is to create a new RabbitMQController controller class and add the sendSimple producer interface.
      2. @Api(tags = "整合 RabbitMQ")

      3. @RequestMapping("/rabbitmq")

      4. public class RabbitMQController {

      5.     @Autowired

      6.     private RabbitTemplate rabbitTemplate;

      7.

      8.     @PostMapping("/sendSimple")

      9.     @ApiOperation("简单模式")

      10.     public ResultObject sendSimple(String routingKey, String message) {

      11.         rabbitTemplate.convertAndSend(routingKey, message);

      12.         return ResultObject.success("ok");

      13.     }

      14. }
RabbitTemplate is a tool class that Spring Boot encapsulates for us to operate RabbitMQ.
The fourth step is to create a new SimpleConsumer class and add a simple mode consumer.
      2. @Component

      3. @RabbitListener(queuesToDeclare = @Queue("simple"))

      4. public class SimpleConsumer {

      5.     @RabbitHandler

      6.     public void receive(String message) {

      7.         log.info("简单模式:{}", message);

      8.     }

      9. }
Start the service, visit http://localhost:8080/doc.html in the browser address bar and open Swagger.
Enter the parameters and click Send.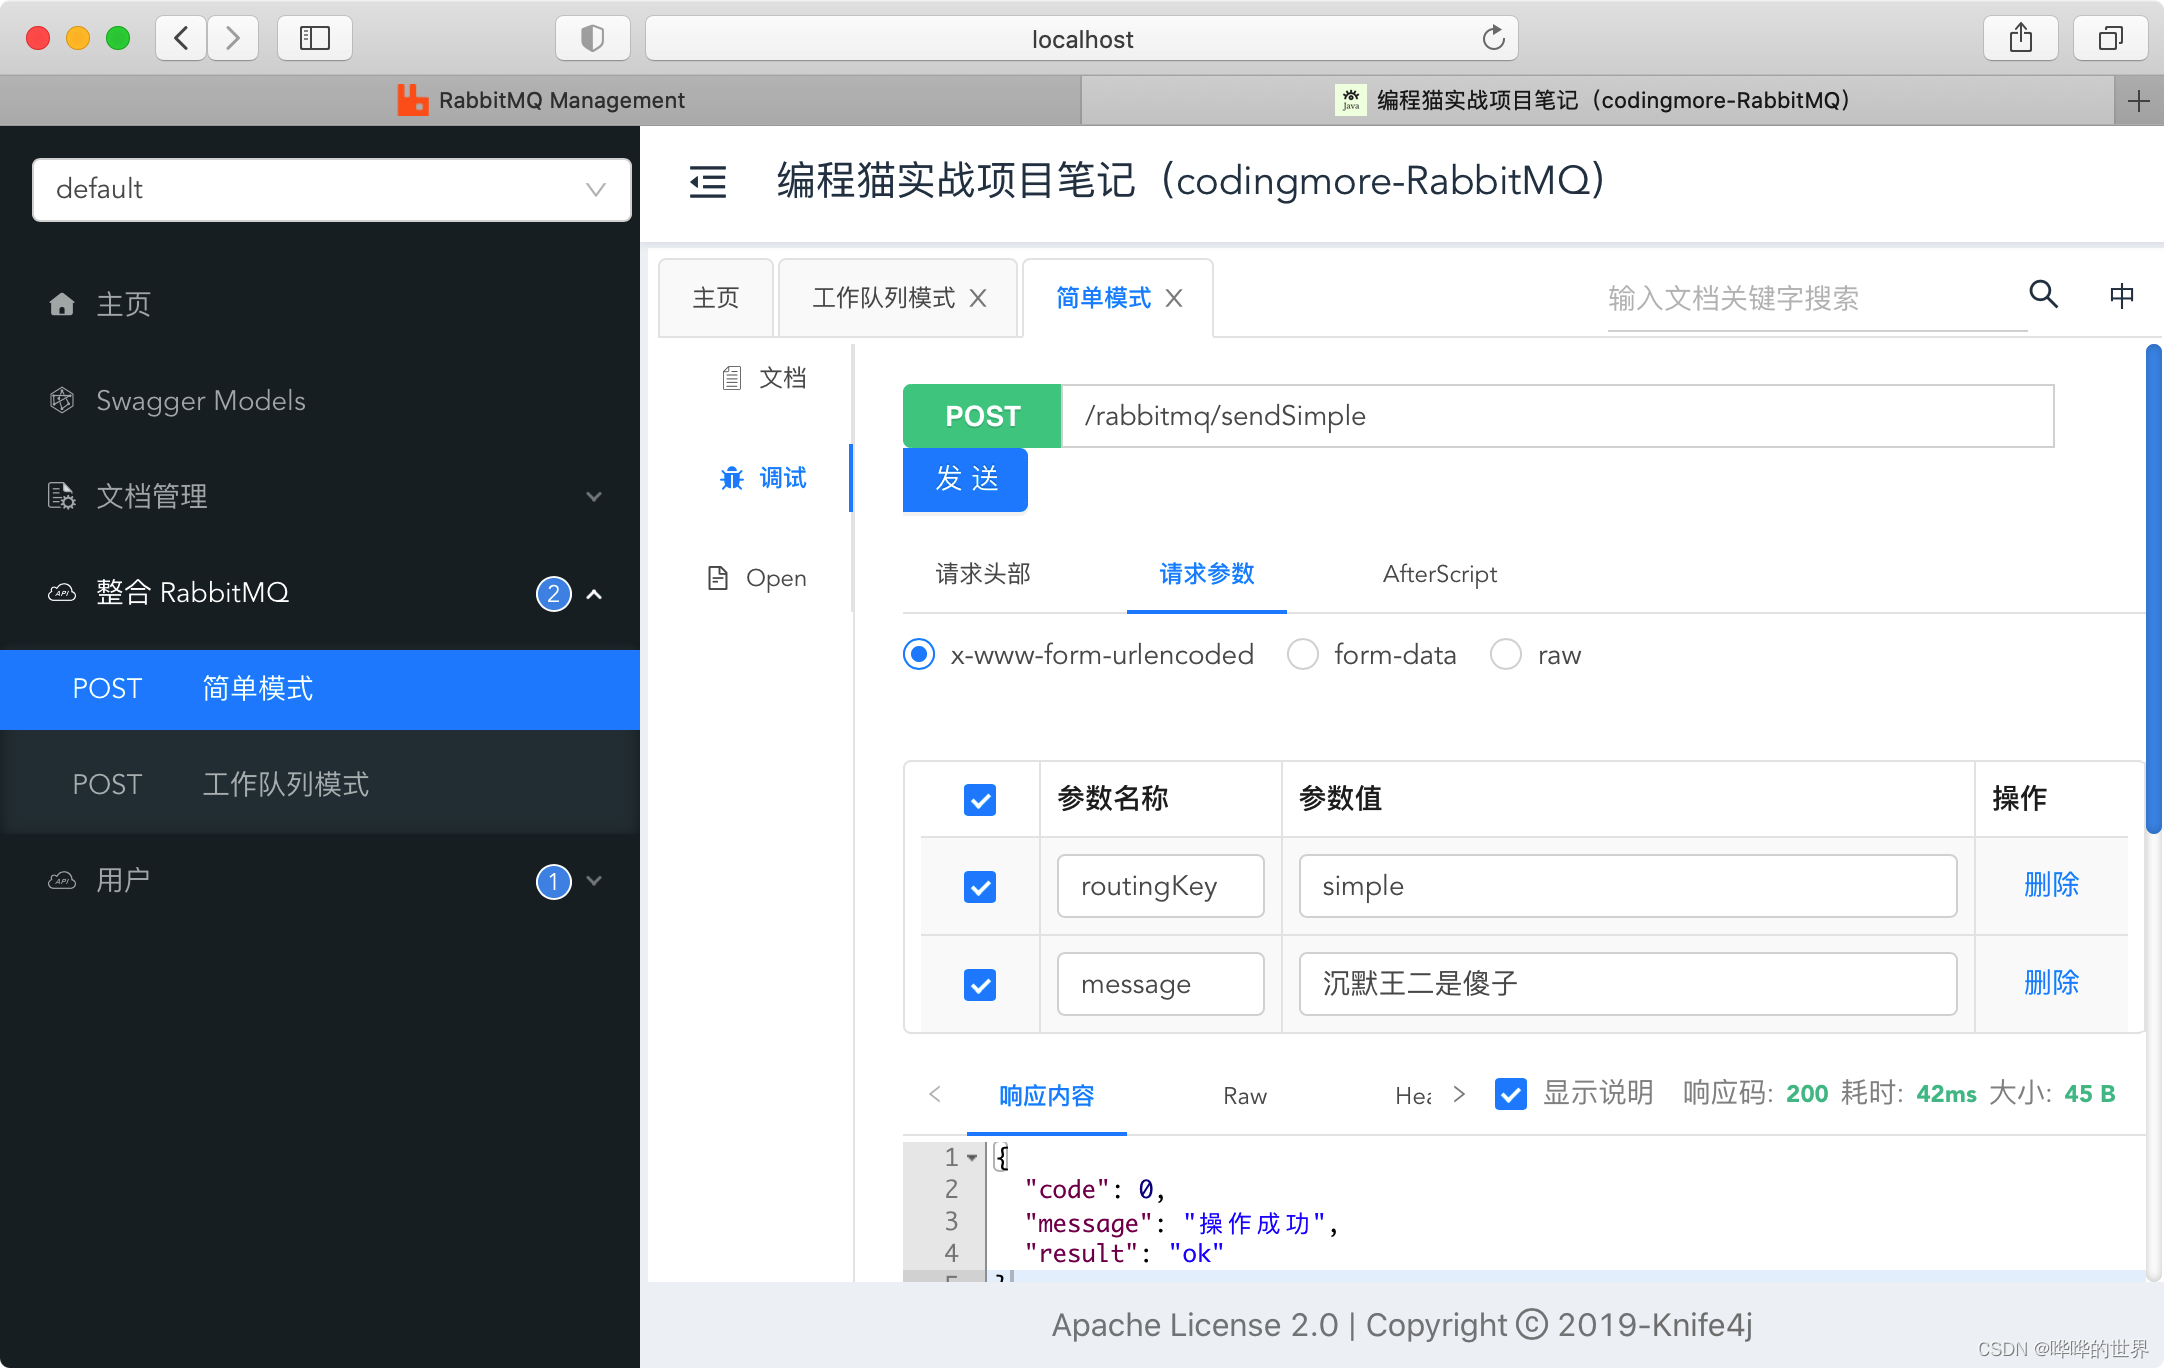
The output information can be seen in Intellij IDEA.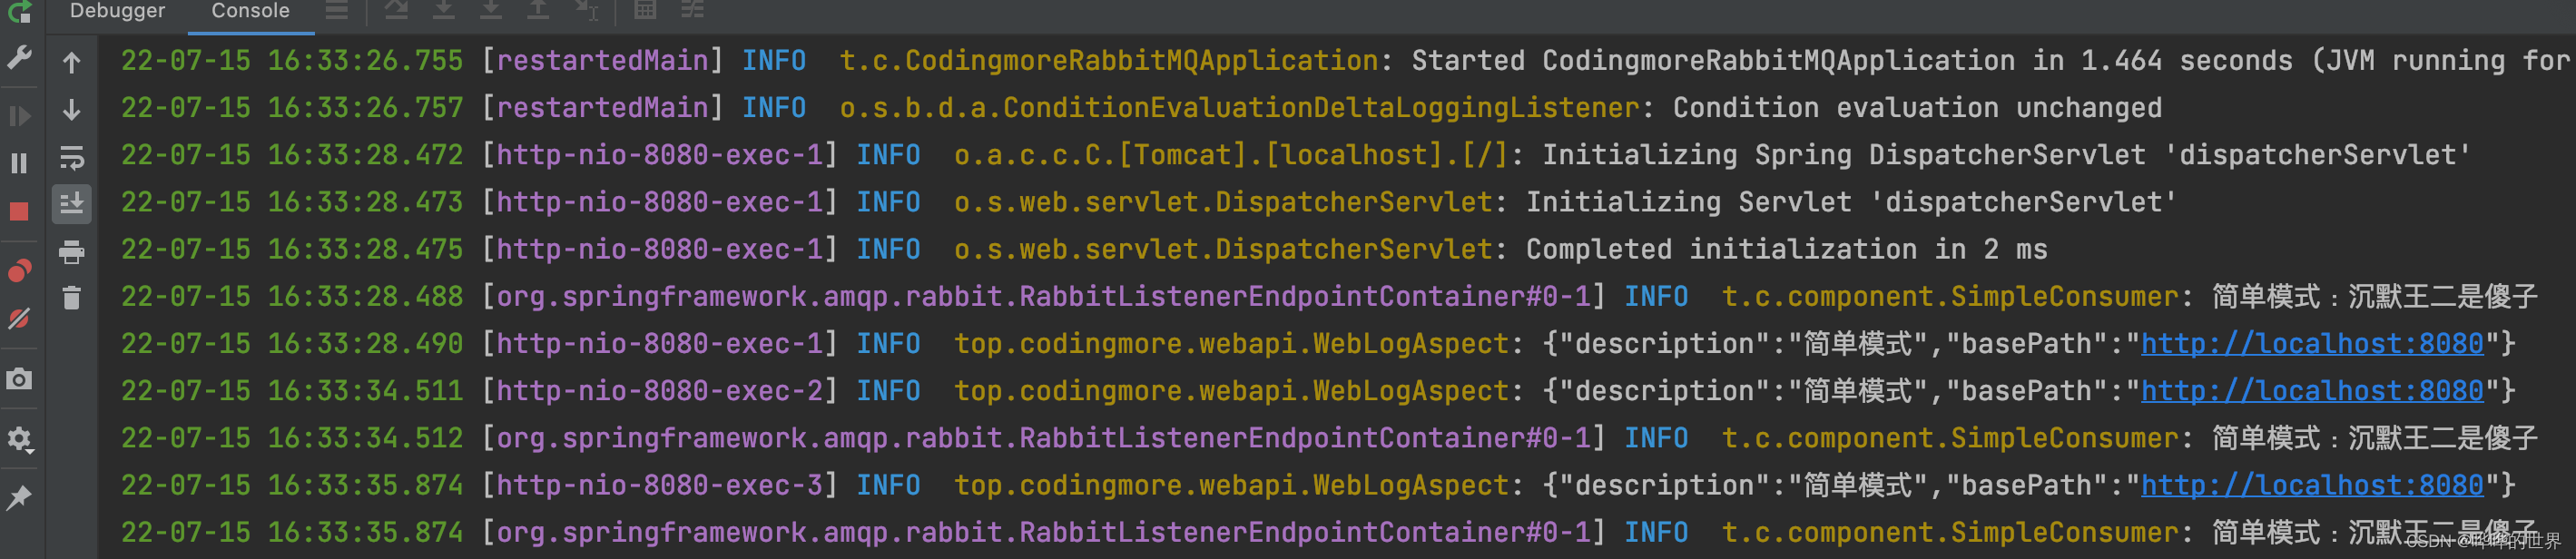
This means that we have completed the simple mode of RabbitMQ.
Work queue mode
Add the sendWork work queue interface in the RabbitMQController controller:
      2. @ApiOperation("工作队列模式")

      3. public ResultObject sendWork(String routingKey, String message) {

      4.     for (int i = 0; i < 10; i++) {

      5.         rabbitTemplate.convertAndSend(routingKey, "第" + i + "消息:" + message);

      6.     }

      7.     return ResultObject.success("ok");

      8. }
Create a new WorkConsumer class and add a consumer in work queue mode.
      2. @Component

      3. public class WorkConsumer {

      4.     @RabbitListener(queuesToDeclare = @Queue("work"))

      5.     public void receiveOne(String message) {

      6.         log.info("工作队列模式 receiveOne:{}", message);

      7.     }

      8.

      9.     @RabbitListener(queuesToDeclare = @Queue("work"))

      10.     public void receiveTwo(String message) {

      11.         log.info("工作队列模式 receiveTwo:{}", message);

      12.     }

      13. }
Build service, open http://localhost:8080/doc.html in the browser address bar and refresh Swagger.
Enter the parameters and click Send.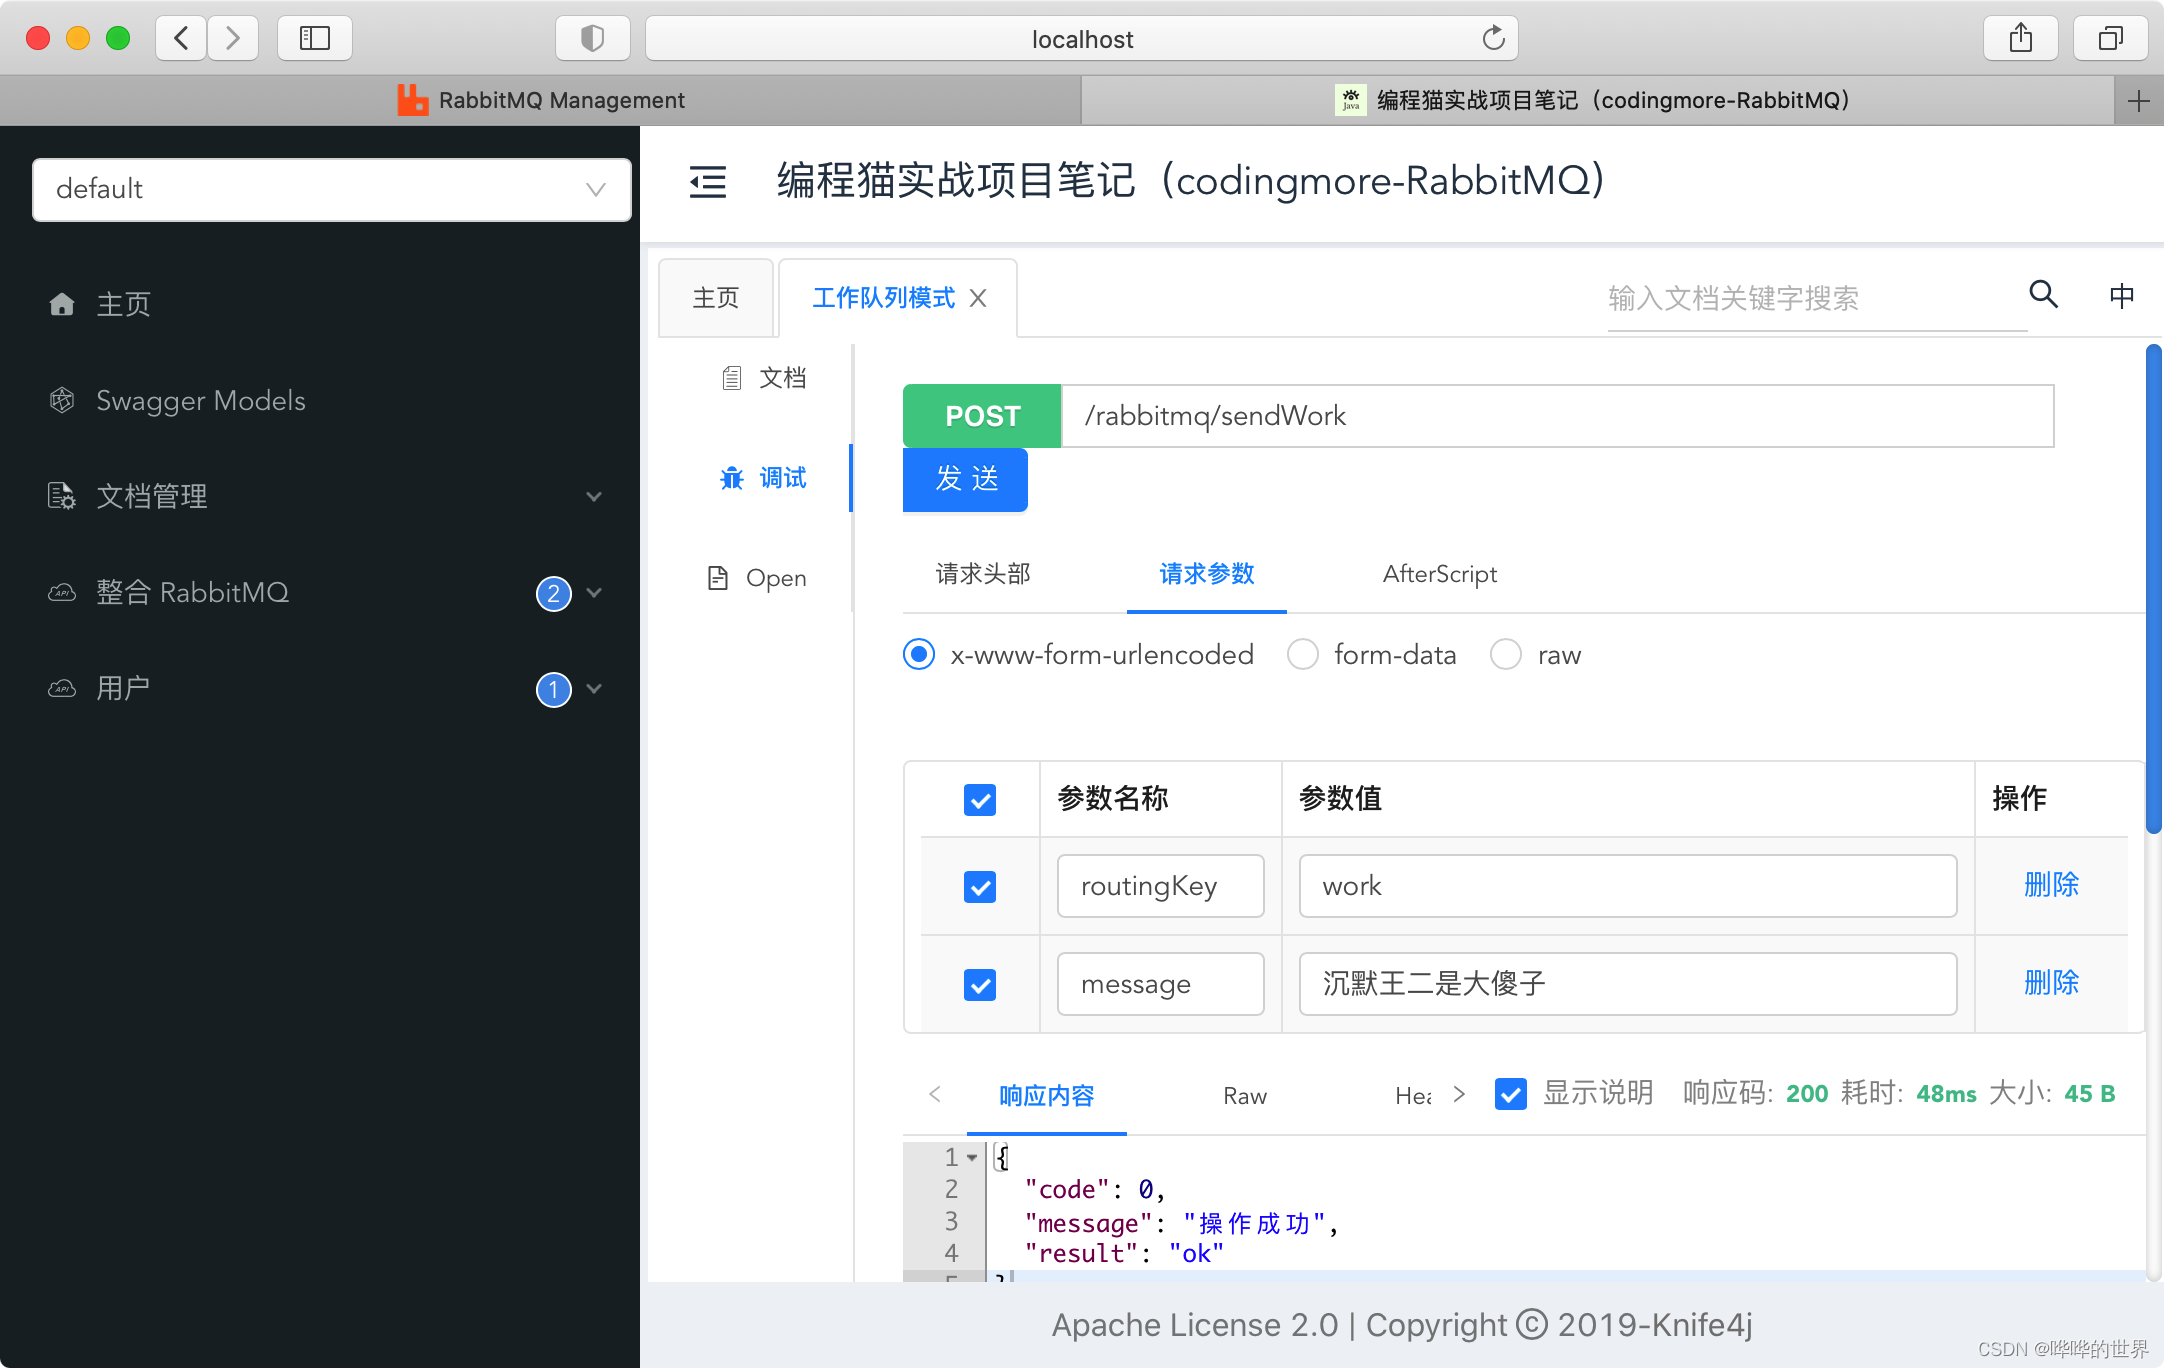
The output information can be seen in Intellij IDEA.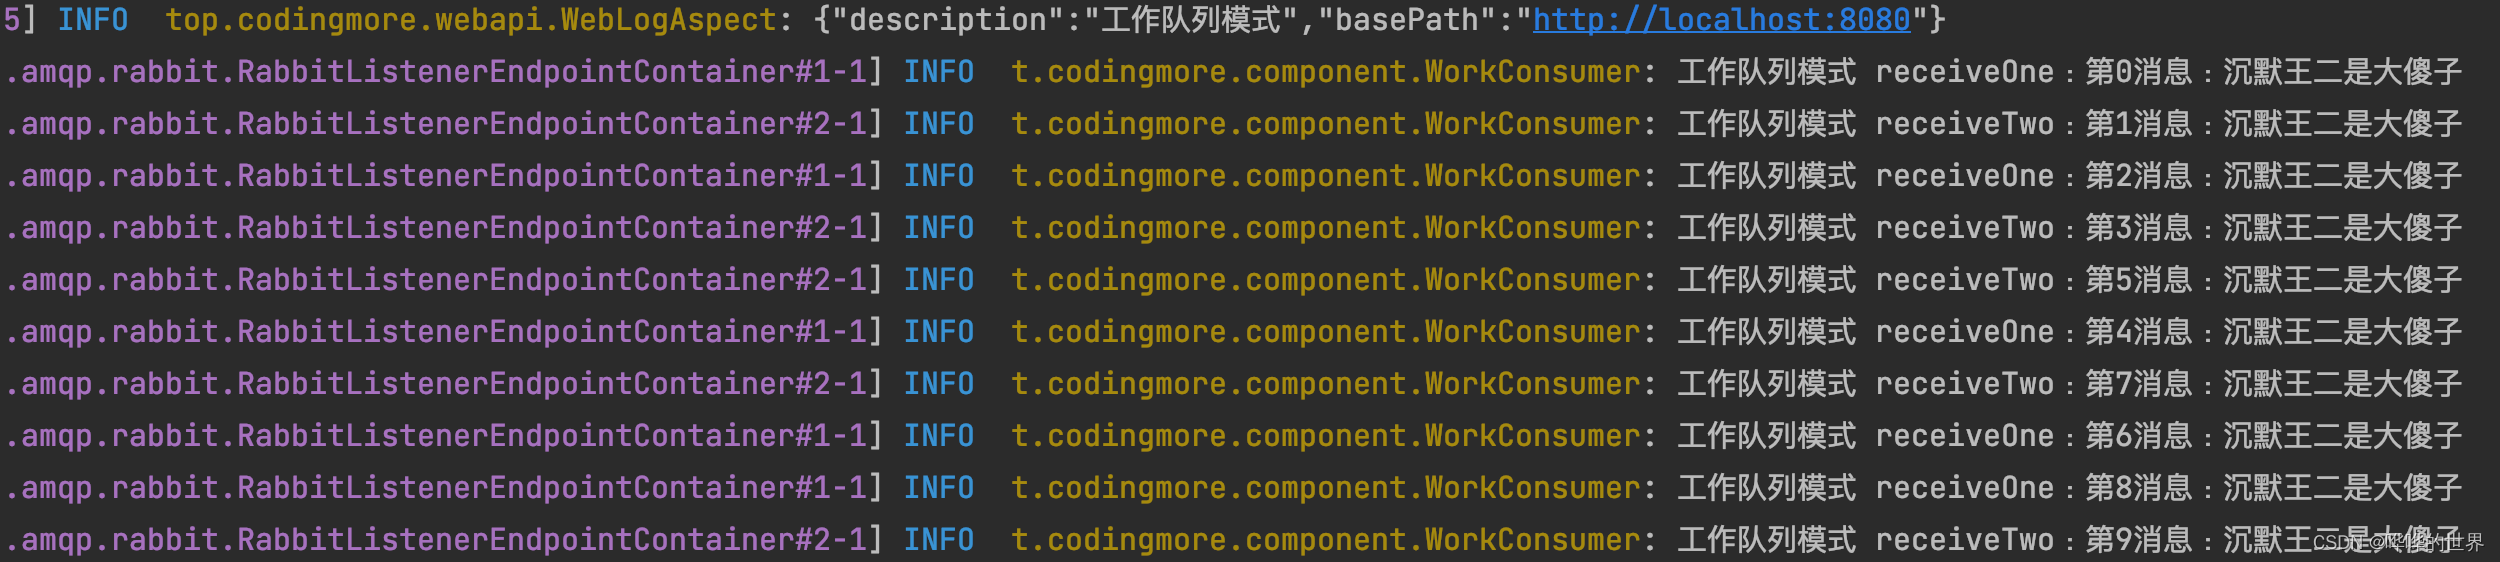
This means that we have completed the work queue mode of RabbitMQ.
Broadcast mode
Add the sendBroadcast broadcast interface in the RabbitMQController controller:
      2. @ApiOperation("广播模式")

      3. public ResultObject sendBroadcast(String exchange, String message) {

      4.     rabbitTemplate.convertAndSend(exchange, "",message);

      5.     return ResultObject.success("ok");

      6. }
Create a new BroadcastConsumer class and add a consumer in broadcast mode. ,
      2. @Component

      3. public class BroadcastConsumer {

      4.     @RabbitListener(bindings = @QueueBinding(value = @Queue,

      5.             exchange = @Exchange(name = "fanout", type = "fanout")))

      6.     public void receiveOne(String message) {

      7.         log.info("广播模式 receiveOne:{}", message);

      8.     }

      9.

      10.     @RabbitListener(bindings = @QueueBinding(value = @Queue,

      11.             exchange = @Exchange(name = "fanout", type = "fanout")))

      12.     public void receiveTwo(String message) {

      13.         log.info("广播模式 receiveTwo:{}", message);

      14.     }

      15. }
Note that the Exchange (exchanger) name here should be fanout, which is the default exchanger of RabbitMQ.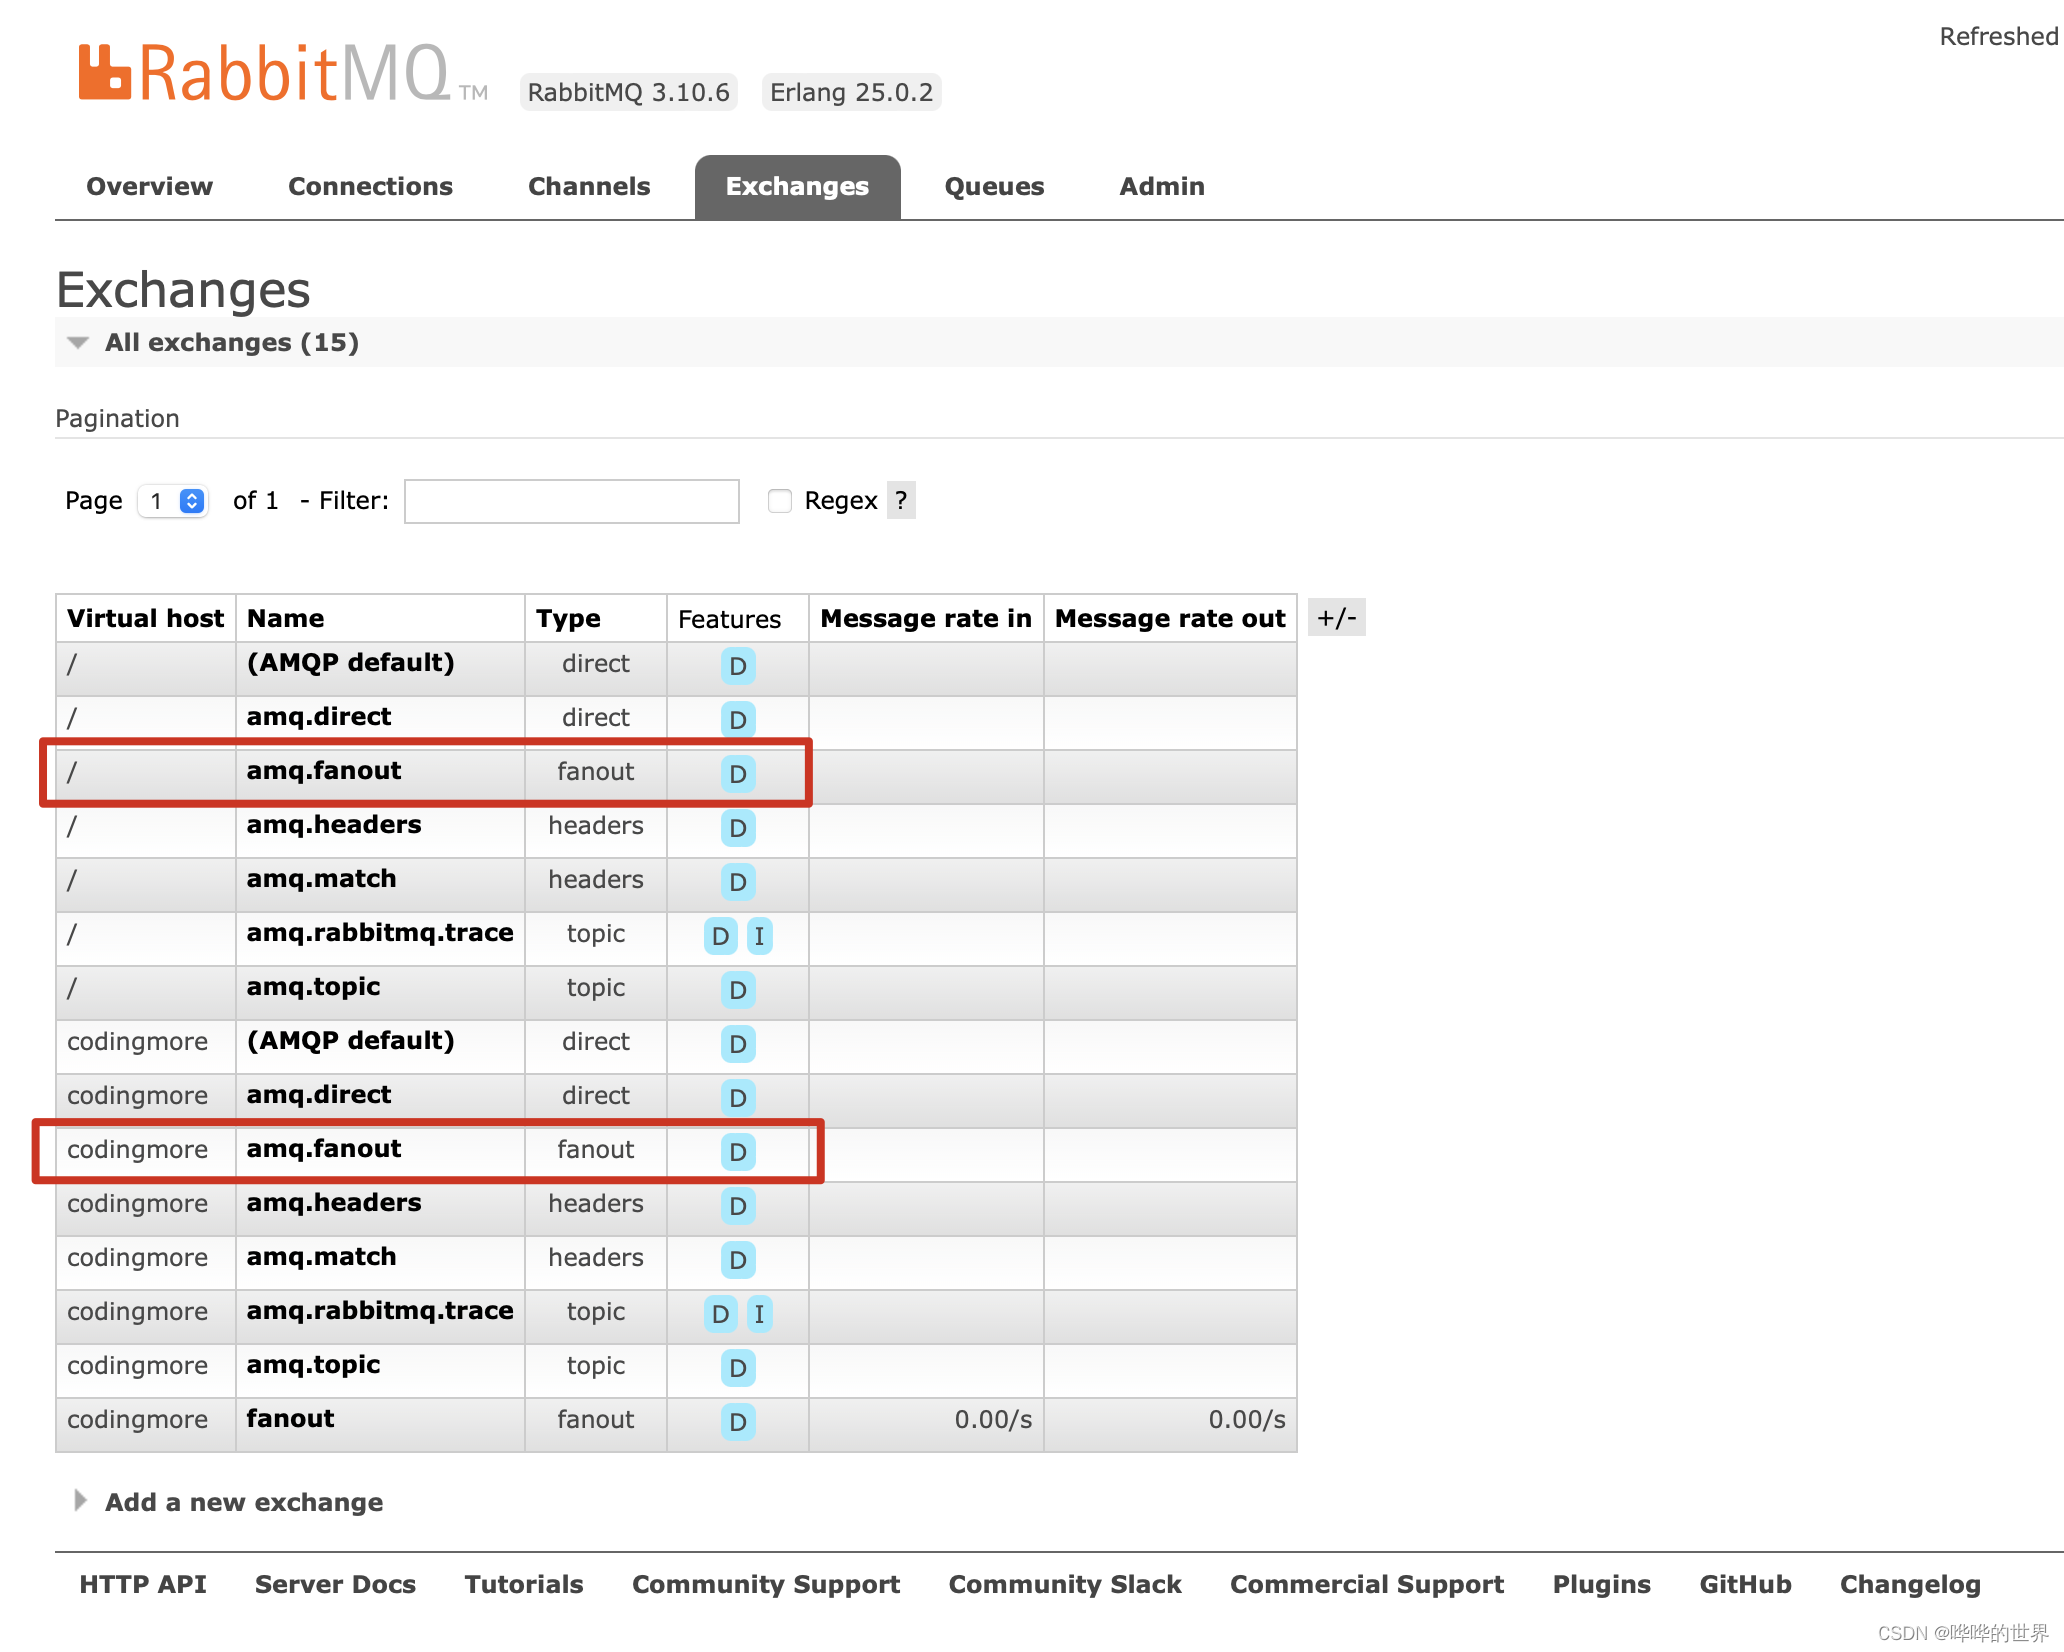
Fanout mode does not need to deal with routing keys (so in the sendBroadcast interface, the routingKey passed in the convertAndSend method is empty). We only need to simply bind the queue to the exchange, and every message sent to the exchange will be forwarded to On all queues bound to the exchange.
Fanout type of Exchange is the fastest to forward messages. In addition, there are Direct Exchange and Topic Exchange, which you can check out.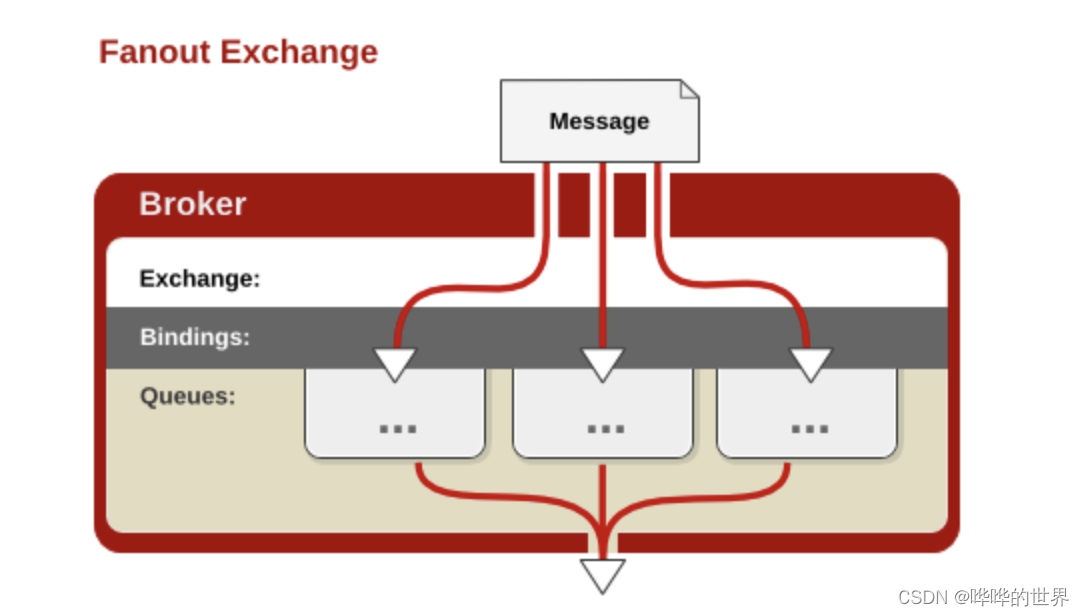
Build service, open http://localhost:8080/doc.html in the browser address bar and refresh Swagger.
Enter the parameters and click Send.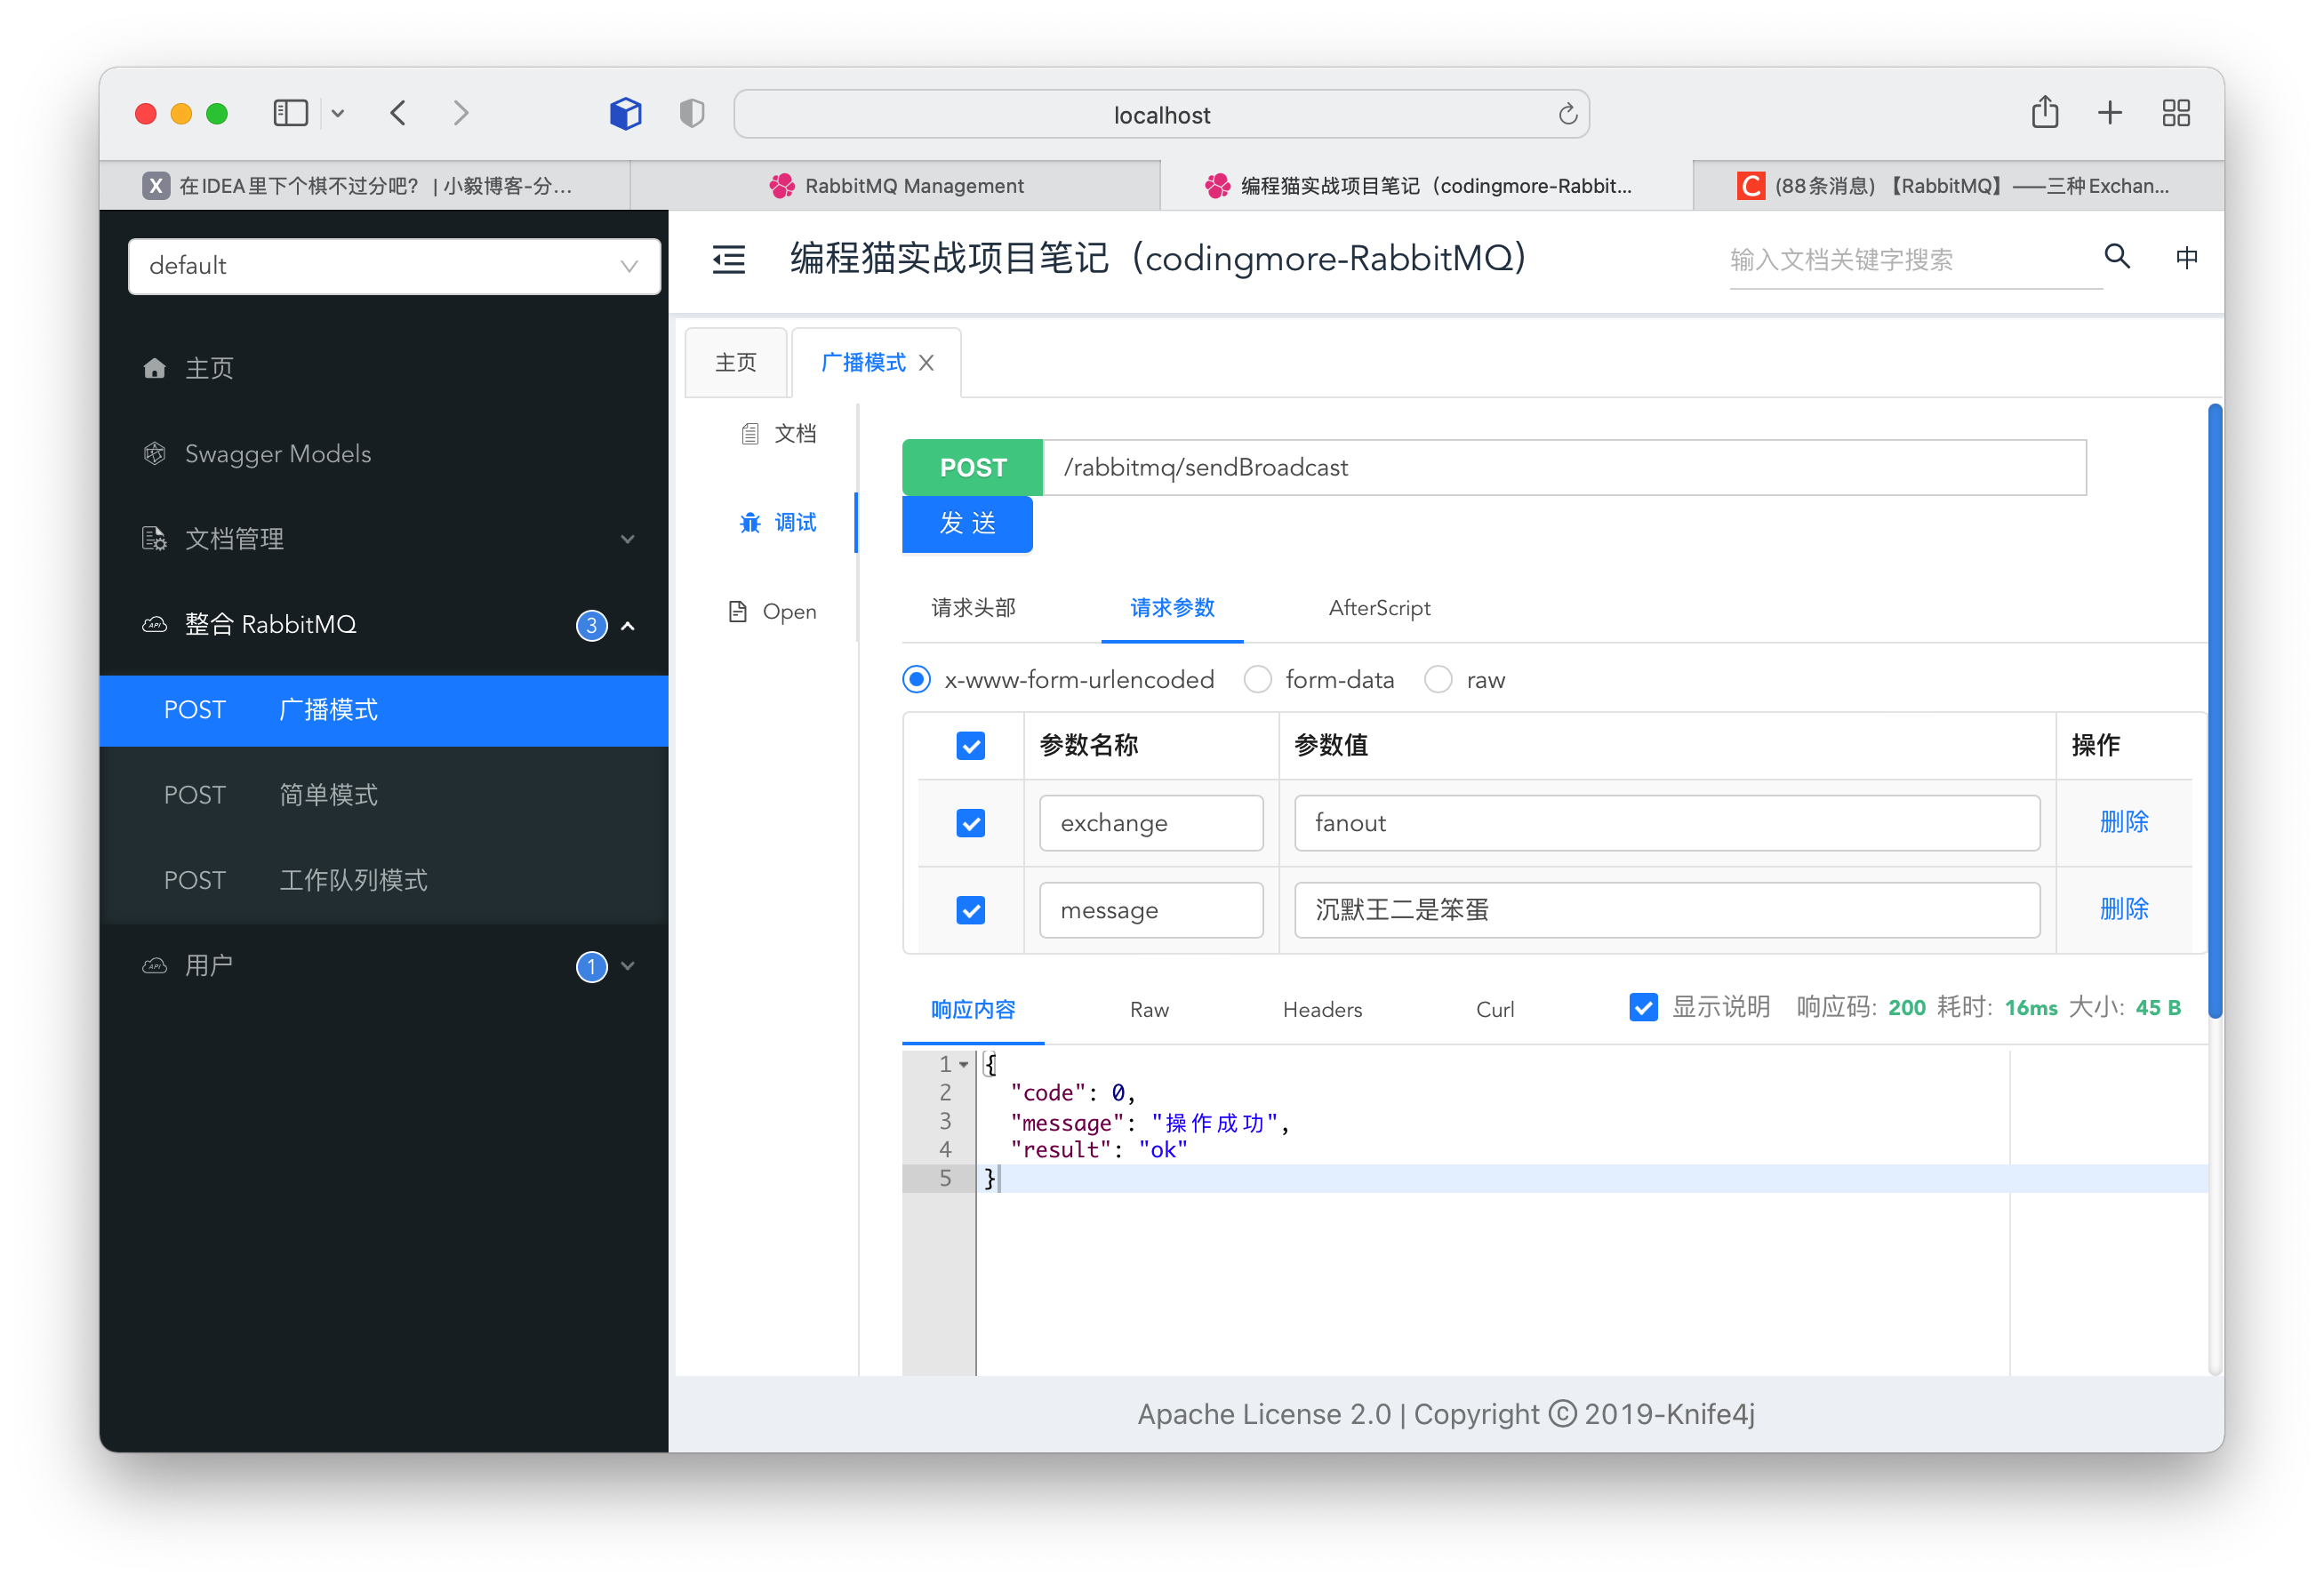
The output information can be seen in Intellij IDEA.
You can see that both consumers have consumed the message, which means that we have completed the broadcast mode of RabbitMQ.